Welcome To My Blog |
|
Welcome To My Blog |
|
|
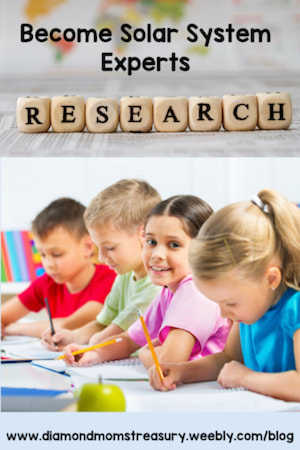
Are you thinking about teaching a solar system unit to your students? Capture the attention and wonder of these young children with a hands on approach that allows them to actually see how different aspects work and why they are so phenomenal. Here are some activities and experiments that will help your students better understand the workings of our amazing solar system. 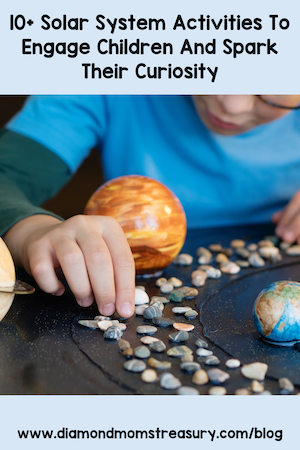 Solar System Activities And ProjectsCreating models, doing research on the planets, making mobiles, making puzzles or games or other activities will all make the solar system more understandable for your students and they will have fun learning as well. Here are a few specific activities that can be done. Solar System ModelsEncourage students to create a three-dimensional model of the solar system using everyday materials such as clay, papier-mâché, or recycled materials. As they design and construct their models, they'll gain a deeper understanding of the relative sizes, distances, and orbits of the planets. They can paint each planet according to its distinctive colors and sizes and then arrange them in order around a central "sun" display. Get students to create space-themed mobiles featuring the planets and other celestial bodies. They can use colored paper, string, and craft materials to construct their mobiles, incorporating facts about each planet into their designs. 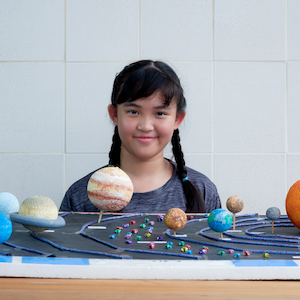 Planets Facts ActivitiesAssign each student or group of students a planet to research and create a fact sheet. They can include information such as the planet's size, distance from the Sun, number of moons, and any interesting facts they discover. Encourage them to use both text and illustrations to present their findings. Have students research individual planets and create informative posters or digital presentations highlighting key facts, such as size, composition, atmosphere, and unique features. They can use their creativity to design eye-catching visuals and share interesting tidbits about their assigned planets. Create puzzles or matching games featuring images of the planets and their names. This activity reinforces students' recognition of the planets and helps them learn their order from the Sun. 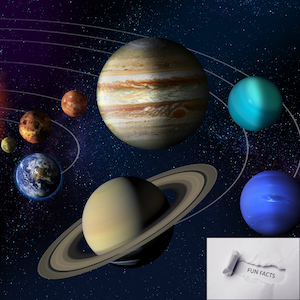 Planet OrbitsSet up a large-scale model of the solar system on the floor or outdoors using hoops, tape, or markers to represent the orbits of the planets. Have students take on the roles of different planets and walk or run along their orbits to understand the concept of planetary motion. Phases Of The MoonUse Oreo cookies to demonstrate the phases of the Moon. Have students carefully scrape away the cream filling to represent each phase, from new moon to full moon, and then arrange the cookies in the correct order. 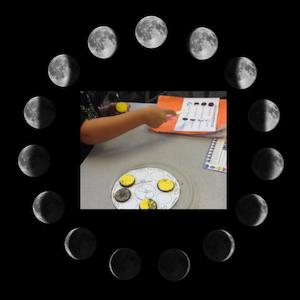 Another Moon ActivityInvite students to explore the surface of the Moon by designing and building their own lunar landscapes. Using a variety of materials such as sand, rocks, and modeling clay, they can recreate the craters, mountains, and valleys found on Earth's natural satellite. Space Themed Story Writing And IllustratingEncourage students to let their imaginations take flight by writing and illustrating their own space-themed stories or comics. They can invent characters, plot exciting adventures, and explore the wonders of the solar system in a creative and imaginative way.  Solar System ExperimentsThese experiments are fairly easy to do as a class and they provide hands-on opportunities for students to explore fundamental concepts related to the solar system while fostering curiosity, critical thinking, and scientific inquiry. Relative Sizes And Distance Of The Planets From The SunThe sizes of the planets will range from a peppercorn to a large balloon and the distances will be so great that you may need to take the experiment outside to relatively see just how far away some planets are from the sun. Note: These suggestions are not totally to scale, but are just to see the differences comparatively in size and distance. This experiment will help students visualize the scale and arrangement of the solar system. Here are some size tips to help. (Note: Pluto was included just for interest as it used to be considered a planet). Sun - large beach ball Mercury - pea Venus - ping pong ball Earth - tennis ball Mars - golf ball Jupiter - soccer ball Saturn - large balloon Uranus - medium size balloon Neptune - medium size balloon (Pluto) - peppercorn Here are some approximate measurements for distance based on 50 yards between the sun and Neptune. (Note: using 50 meters will not significantly change the distances as a meter and a yard are only a few inches different in length). Mercury - 0.65 yards Venus - 1.3 yards Earth - 1.66 yards Mars - 2.52 yards Jupiter - 8.66 yards Saturn - 15.92 yards Uranus - 31.87 yards Neptune - 50 yards (Pluto) - 65.57 yards Orbital Motion ExperimentUse a spinning chair, like a computer chair, to demonstrate orbital motion. Have students sit on the chair while holding a ball (representing a planet) and spin slowly. As they rotate, explain how the combination of forward motion and gravity keeps planets in orbit around the Sun. Gravity ExperimentExplore the concept of gravity by dropping objects of different sizes and weights from the same height. Discuss how gravity affects the motion of objects in space and why planets orbit the Sun in elliptical paths rather than flying off into space. Here is an experiment that shows how gravity works. 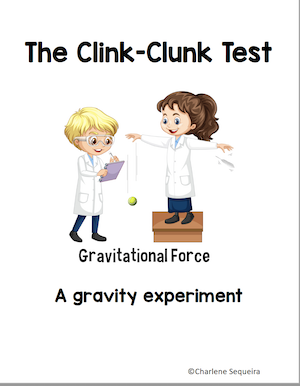 Moon Related ExperimentsUse a flashlight and a ball (representing the Moon) to demonstrate the different phases of the Moon. Have students observe how the position of the light source (Sun) relative to the ball creates shadows, mimicking the waxing and waning phases of the Moon. Create impact craters similar to those found on the Moon's surface. Fill a shallow tray with flour or sand, then drop small objects (marbles, rocks, or balls of varying sizes) onto the surface from different heights. Observe and discuss the shapes and sizes of the craters formed. Use a flashlight and objects of different shapes to explore how shadows are formed. Move the objects closer to or farther from the light source and observe how the size and shape of the shadows change. Discuss how sunlight creates shadows on planets and moons. Exploring Planet Atmospheres ExperimentCreate mini "planets" using balloons filled with different gases (helium, carbon dioxide, air). Observe how the balloons behave in various conditions (e.g., heated or cooled) to understand the role of atmospheres in planetary dynamics. Student ProjectsStudent projects are a great way to involve the family as well as classmates when learning about the solar system. Check out this blog post for some ways that my students have created projects in the past.  By combining teaching about the solar system with a variety of student-led projects, we'll not only deepen our students' understanding of the universe but also encourage creativity, critical thinking, and collaboration. Embarking on this cosmic journey with your students can inspire the next generation of astronomers, engineers, and explorers!  Related Posts
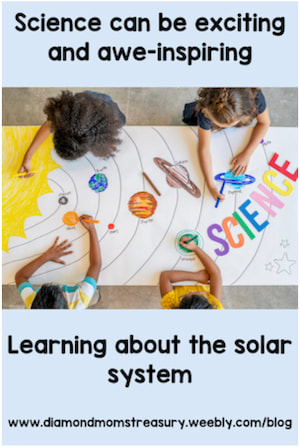
Picture the excitement on your students' faces when they learn that they are going to study the solar system. Watch the awe in their eyes as they learn about the colossal power of the Sun, the magnitude of the galaxy, the rocky planets and the gas giants, and all the other cosmic bodies in the solar system. Teaching about the solar system provides students with the opportunity to satisfy some of their curiosity and learn more about the awesome galaxy they are a part of. As they journey through the solar system, they'll use their imaginations, ask lots of questions, and maybe even build models. They'll learn about the planets' names, sizes, and distances from the Sun. They'll explore why some planets are hot and others are cold, and they'll discover what makes Earth so special and unique. 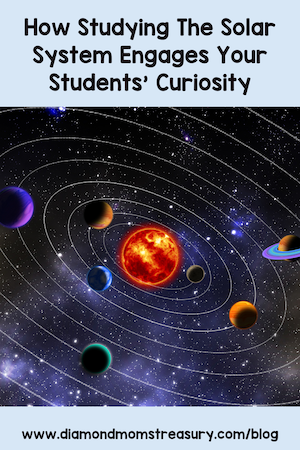 Depending on the age of the children, the study will be different in scope and depth. For young kids, it's important to introduce the solar system in a way that is engaging, understandable, and sparks their curiosity about space. Here are some suggestions for teaching primary children about the solar system. These are broad topics and can be approached in many different ways. Using hands on activities and visuals will help make things more understandable and engaging. What is the solar system?Basic information: The Solar System is a vast galaxy made up of the Sun, eight planets, numerous moons, asteroids, comets, and other celestial objects. Each of these entities possesses unique characteristics and features that offer valuable insights into the workings of the universe. Teaching tip: Introduce the solar system with engaging lessons that include interactive activities and multimedia resources to spark curiosity and lay the groundwork for deeper exploration. 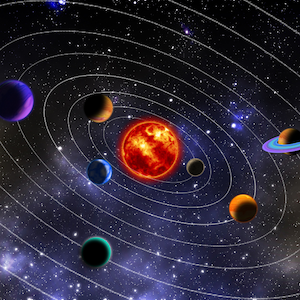 The sunBasic information: The sun is a giant ball of fire, keeping us warm and giving us light. It's a star too, but it's a lot closer to us than all the other stars we see twinkling in the night sky. Teaching tip: Teach children that the Sun is a star, and it's the center of our solar system. Explain that the Sun provides light and heat to all the planets. It provides energy, has solar flares and sunspots and helps sustain life on Earth. All the planets revolve around the sun. Use visuals that show the sunspots and flares, and how the orbits of the planets are ordered. 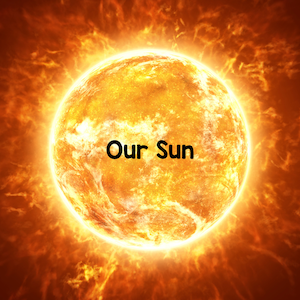 The planetsBasic information: There are eight planets in our solar system. Each one is unique and special. There are two different groups of planets: the rocky planets and the gas planets. The rocky planets are Mercury, Venus, Earth and Mars. These planets are like big balls of rock. They are the inner planets in the solar system and the closest to the sun. The gas planets are often referred to as gas giants because they are so big. They contain various gases in their atmospheres. They are Jupiter, Saturn, Uranus, and Neptune Some of them have colorful rings around them. They are also the outer planets and further away from the sun. Teaching tip: Introduce the eight planets orbiting the Sun, categorizing them into rocky (inner) and gas giants (outer) planets. Explore each planet's unique characteristics, including size, composition, atmosphere, and surface features. Teach students to recognize the planets by their names and order from the Sun. Help them understand the relative sizes of the planets and their distances from the Sun. Use simple comparisons, such as "Earth is bigger than Mars but smaller than Jupiter" and "Mercury is the closest planet to the Sun." 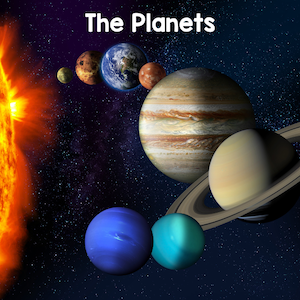 Orbits and moonsBasic information: Orbits are paths that the planets take when revolving around the sun. The gravitational pull of the sun keeps the planets orbiting the Sun in elliptical paths rather than flying off into space. Moons are natural satellites orbiting some planets. They have diverse sizes, shapes, and orbits, Teaching tip: Explain that planets orbit, or revolve around, the Sun in paths called orbits. Teach children that the time it takes for a planet to complete one orbit is called a year. Introduce the concept of moons as natural satellites that orbit planets. Point out that some planets have many moons, like Jupiter, while others have none, like Venus. Look at models of the solar system and the orbits that the various planets take.  How does day and night work?Basic information: It takes 24 hours for Earth to rotate completely. As it rotates, different areas are facing the sun. These areas have light and the other areas have darkness. We call the light "day" and the darkness "night". Teaching tip: Discuss the concept of day and night on Earth and how it's caused by the rotation, or spinning, of the Earth on its axis. Help children understand that it takes about 24 hours for the Earth to make one complete rotation. Using a flashlight and a globe can provide a good visual of how day and night happen. 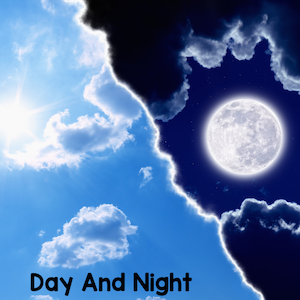 Why do we have seasons on Earth?Basic information: As Earth revolves around the sun, it has different seasons because of the tilt of its axis. When the tilt causes areas of Earth to be facing the sun for longer periods of time it is summer and when it causes the area to be facing away from the sun for longer periods of time, it is winter. Spring and fall happen as the different areas change position from facing to the sun to facing away from the sun and vice versa. Teaching tip: Teach children about the changing seasons on Earth and how they're caused by the tilt of Earth's axis as it orbits the Sun. Use simple visuals, such as diagrams, illustrations, or videos to demonstrate this concept. 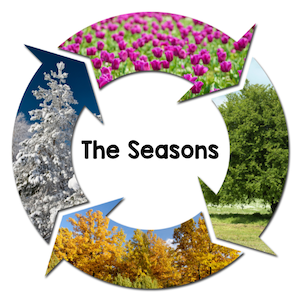 Next time I will give some specific activities to further develop the topics above. These will help engage the children with hands on activities to provide better understanding of the concepts. In the meantime, here is a resource that may help with some basic information about the planets and also provide some fun activities to try. 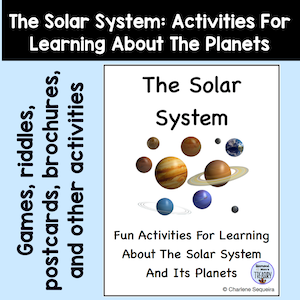 The benefits of studying the solar system extend far beyond the confines of our classrooms. As teachers, we can cultivate essential skills such as critical thinking, problem-solving, and scientific inquiry. We can also foster a deep appreciation for the natural world and inspire future generations of scientists, engineers, and space explorers. 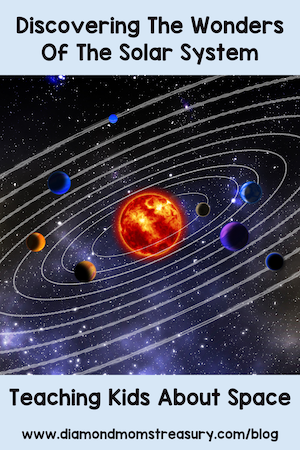 Related Posts
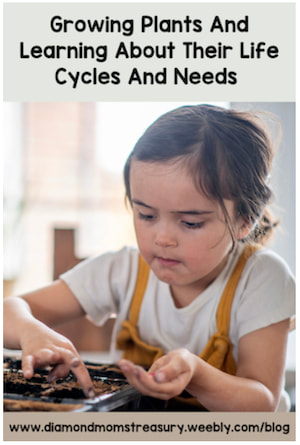
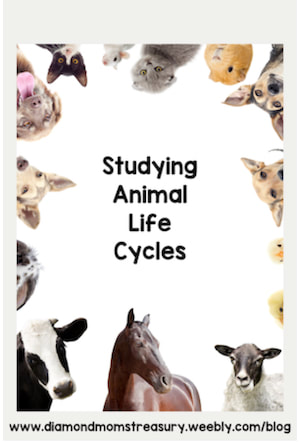
Spring is fast approaching and that means flowers poking up out of the earth, trees blossoming, grass getting green and lush again and kids wanting to get outside to play. This is the perfect time to start thinking about new science units that focus on life cycles, planting things, and watching baby animals as they start their lives and grow. 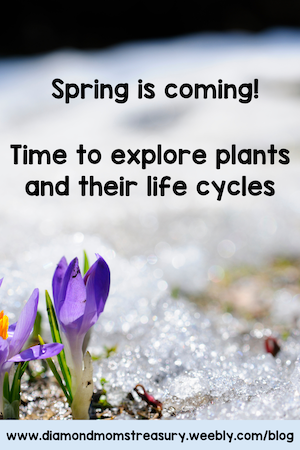 Planting seeds is a great way to help kids understand how we get a variety of fruits, vegetables, and flowers. This is the perfect season to start seedlings in the classroom as well. This has always been a great activity for my students. There are many different ways to plant the seeds and watch them grow. Check out this post to see some examples. 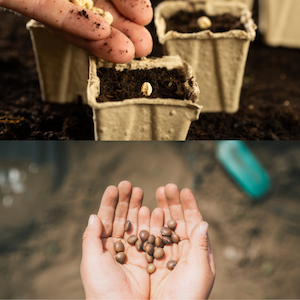 Taking the seedlings and planting them outside in the late spring is an event worth celebrating. If you have garden plots at the school, it is a fun way to keep monitoring and tending to them as they grow. Kids get so excited when the first fruits appear. I still have kids reminding me of the beans and tomatoes they grew when they were in my class. 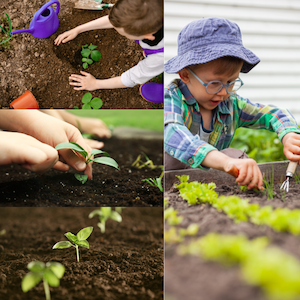 Beans, radishes, lettuce, and other plants tend to grow fairly quickly. Other plants take longer and will require more patience as kids wait to harvest them. This is a great time to talk about how not everything progresses at the same rate. If you are looking at planting other types of fruit or vegetables, check out my plant life cycles bundle. It includes apples, carrots, pumpkins, potatoes, and beans. 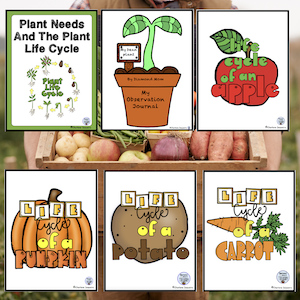 Watching baby chicks hatch, releasing salmon fry, observing the metamorphosis of butterflies from caterpillar to butterfly, or the transformation of a tadpole to a frog are awe inspiring sights for kids and they get so excited during these events. 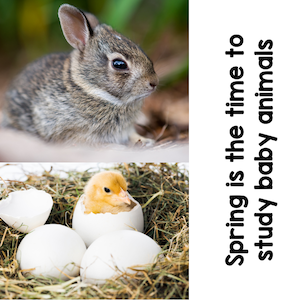 Choosing an animal to observe from it's start through to adulthood is a great hands on unit that helps kids understand how life cycles work. Check out my animal life cycles bundle for resources that may help if you are interested in studying about chickens, frogs, salmon, honey bees, or butterflies. 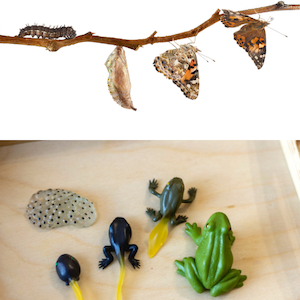 Check out this life cycle template freebie that helps with identifying the different stages of growth for plants or animals. 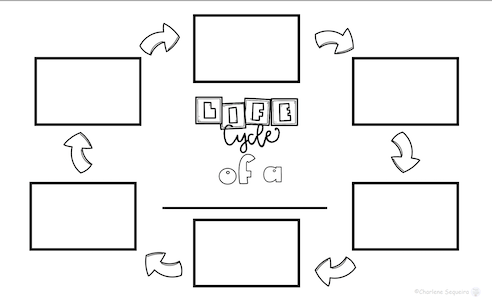 Deciding on what plant life cycles or animal life cycles you will study will depend on the interests of your students and the availability of resources and time. Whatever life cycles you choose to investigate, enjoy the moments and the excitement and wonder as your students learn.  Related Posts
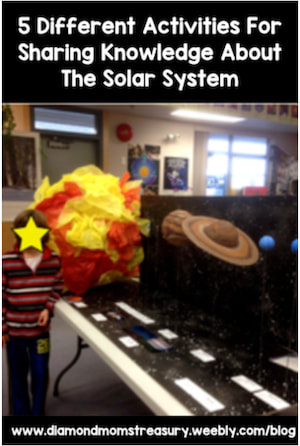
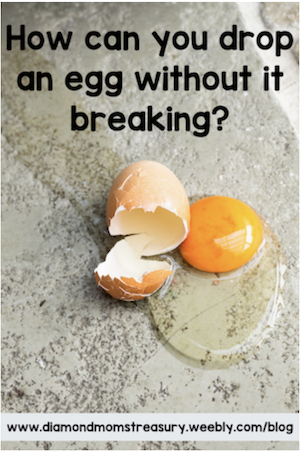
Winter provides a magical and snowy backdrop for engaging and educational activities in the classroom. As primary teachers, incorporating measurement into winter-themed lessons can make learning more fun and engaging for young students. Check out 7 creative measurement activities that will not only capture the imagination of your students but also blend math and science ideas.  Snowman Size ChallengeKids love building snowmen, so why not bring the fun into the classroom. Have your students build the snowmen just outside the classroom so they can see them throughout the day. If you add in some math and science, it will make the activity even more fun. Task: Get your students to measure the circumference of the different parts of their snowmen and then compare the results with their classmates. Math focus: measuring the size of different parts of a snowman helps with understanding shapes and sizes. Science focus: Observing the structure of the snowman introduces basic geometric principles. Fun thought: The snowman's middle could be as wide as a bear hug! 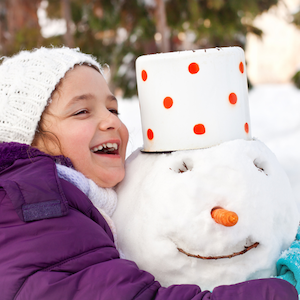 Snow Depth InvestigationsWhen the snow falls, it doesn't fall evenly. it can be varying depths due to wind, landscape and nearby structures or trees. Task: Take advantage of this winter landscape by measuring the depth of snow in various locations. Students can use rulers to measure snow depth on the driveway, grass, under trees, and in snowdrifts. This activity not only teaches measurement skills but also encourages observation and data collection. Math focus: Using rulers to check how deep the snow is in different places, helps teach about numbers and spatial concepts. Science focus: Comparing snow depth in different locations encourages the understanding of weather patterns and how snow accumulates. Fun fact: The snow on the grass is like a fluffy pillow, while the snowdrifts resemble magical mountains. 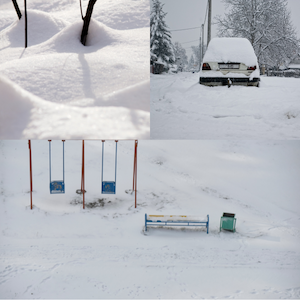 Winter Temperature StudyBraving the cold to measure temperatures on snow days is exciting for kids. As the wind howls and the snowflakes dance, students can collect temperatures and then use the data to make comparisons. Task: Explore the winter weather and record temperatures on snow days and compare them with non-snow days. Include the windchill factor. Math focus: Recording and comparing temperatures involves analyzing and interpreting data. Science focus: Understand the impact of windchill and how it makes the temperature feel colder.  Winter Themed BakingCombine the joy of winter with the excitement of baking by creating winter-themed treats. Task: Practice following recipes and using precise measurements to make some delicious snacks. Math focus: Precise measurements in baking emphasize the importance of accurate calculations. Science focus: The baking process shows the transformation of ingredients, introducing basic chemistry concepts. 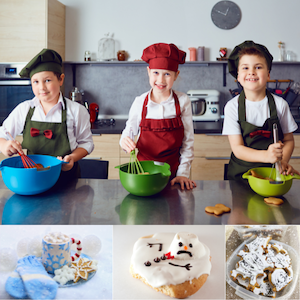 Weight Of Different Snow TypesKids are excited to learn that different types of snow have different weights and why this is so. Task: Compare the weight of flaky, packed, and wet snow. Math focus: Weighing different types of snow involves understanding units of measurement and comparing weights. Science focus: Exploring the weight of snow types connects to the physical properties of water in different states. Fun fact: Packed snow feels like a heavy snowball, while flaky snow is as light as a snowflake gently falling from the sky and weighs very little.  Snow Angel Wing Span MeasurementTake your students outdoors for some winter fun by making snow angels. After creating their snowy masterpieces, have them measure the wing spans of their snow angels. This activity combines creativity with measurement, making it a memorable and enjoyable experience for students. Task: Make snow angels and measure the wing spans. Math focus: Measuring wing spans involves comparing lengths and learning about spatial relationships Science focus: Creating snow angels introduces the physics of body imprints and the impact of pressure on snow. 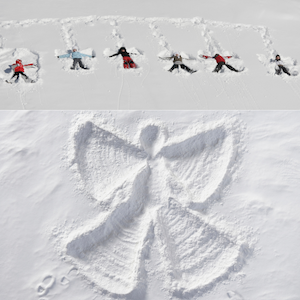 Melting Snow Volume ExperimentThe grand finale of our winter measurement activities is a melting snow experiment. Task: Explore the concept of volume by measuring the amount of snow in a bucket before and after it melts. Math focus: Measuring volume requires understanding of units and how they relate to three-dimensional space. Science focus: This experiment allows students to witness the transformation of a solid (snow) into a liquid (water) while practicing measurement and observation skills. 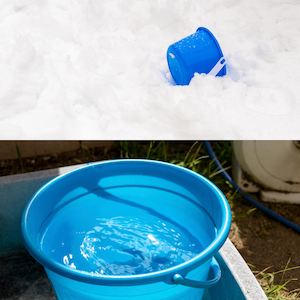 Winter provides a unique opportunity to make measurement activities in the classroom exciting and relevant for primary students. By delving into these winter measurement activities, students not only strengthen their math skills but also develop a deeper appreciation for the science that surrounds them in the winter wonderland. The joy of discovery is not just in the snowflakes but in the math and science concepts that come to life during these hands-on adventures. 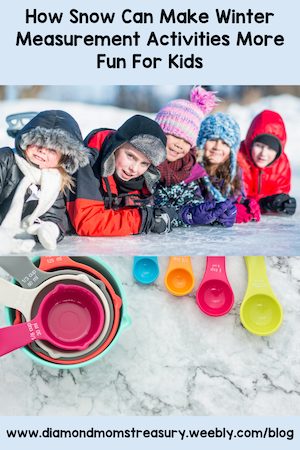 Winter measurement activities aren't just about numbers and rulers; they're about creating lasting memories and instilling a love for learning. As primary teachers, let's embrace the enchantment of the season and turn our classrooms into snowy laboratories where every measurement tells a tale of winter wonder. The joy in their eyes and the laughter in the air will be the true measures of success in your winter measurement adventures. Related Posts Solar system projects are fun to do and they allow for student choice when selecting how they wish to share their knowledge. This has always be a great way to showcase my students to their parents, other students, and the school community. 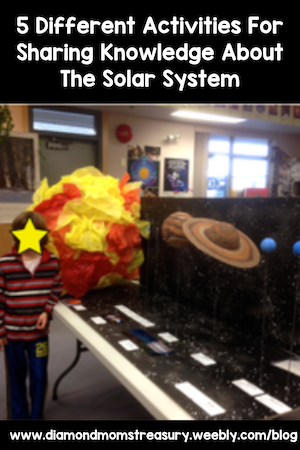 It's amazing how much young children can learn and how excited they can get about a subject when it is approached in this manner. Here is the project and options that I used. It's important to emphasize that no matter what form of project is selected, there is a presentation component that is included. This helps to demonstrate what has been learned and also allows for questions to be asked about the project. 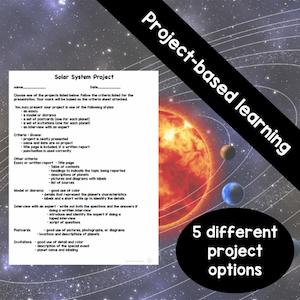 Written Report Or EssayThe traditional way to share research is through a written report or essay. Although this is a great way to share information, for some students it is difficult to do, especially when they are younger and emerging writers. If kids enjoy writing and sharing knowledge this way, the option should be provided for them. Here is my grandson with his report. He chose this option and was very proud of his presentation to the class and to the parents. 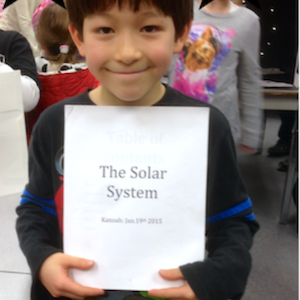 Model Or DioramaModels or dioramas are often popular because they are so visual. The key is to make sure that there are enough details or characteristics shown to help with identifying the planets. The descriptions and labels are also very important. 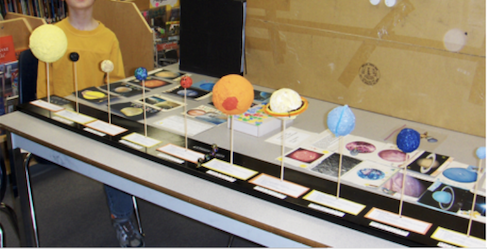 PostcardsCreating planet postcards is fun to do because it allows for some humor and captions. The idea is to take some key characteristics of the planet and use them in an imaginative way to capture the attention of others. Brochures Or InvitationsBrochures or invitations are another imaginative way to represent a planet. It is also a great way to demonstrate how to promote events or objects. 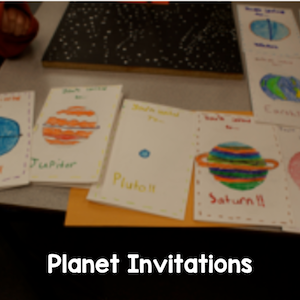 InterviewAlthough interviews are an option, this choice is rarely taken because there are not always experts nearby or accessible, however, if a child does have someone that they can connect with, it is a great way to learn more about the solar system from an expert. 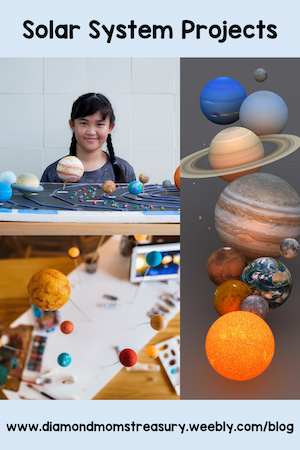 Solar System ResourcesHere are a couple of resources that make using projects work. Our Solar System Project is an outline of what is required, a letter to parents, a criteria outline with a simple marking sheet, a solar system test, and some sample photos of completed projects. The Solar System - Fun Activities For Learning About The Solar System And It's Planets is a new resource that has ready made templates that can accompany the projects or be used by themselves. Teaching young children about space and the solar system can be an exciting and awe-inspiring experience. Here are some creative ideas to make learning about space engaging for young learners. 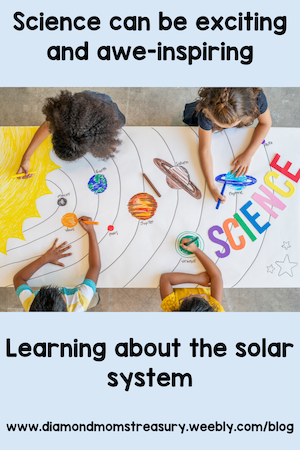 Sweet Moon PhasesLearning about the phases of the moon can be fun if you add in a little bit of sweetness. Try using cream filled cookies to show the different phases of the moon. The amount of cream on the cookie represents the fullness of the moon. It's a tasty and visual way to understand the moon's changing appearance. 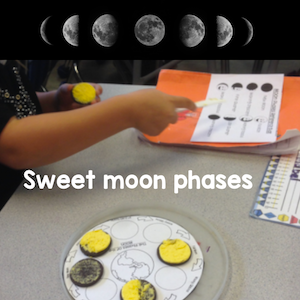 Solar System MobileHow many times have you seen a child's room decorated in a space theme? Kids love to imagine they are surrounded by the planets and the stars. What better way to create excitement and fun than to have each child make their own solar system mobile. Provide them with paper plates, paint, markers, and string. They can paint or draw the planets, cut them out, and hang them in order from the Sun to create a miniature representation of the solar system. 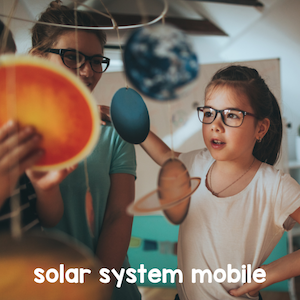 Alien SpaceshipsKids often imagine there are aliens on the different planets and they wonder if we will have visits from them someday. Creating alien spaceships is a fun way to let their imaginations live on. Here are some that my class made one year using the lids of slushy drinks and paper plates. 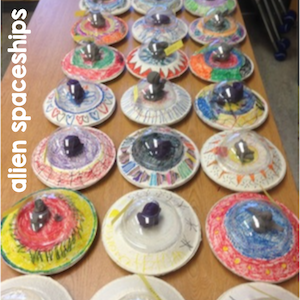 Space StoriesAs kids learn more about the different planets and the solar system, they can create space stories using some of the information they have learned. Make sure that they include some factual information in the stories but allow them to use their imaginations to create events that happen there based on the facts. 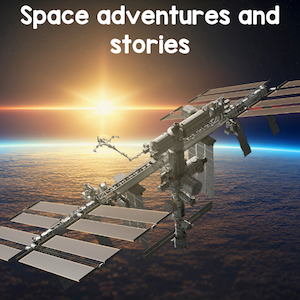 Moon Visits And Other Space AdventuresThe astronaut visits to the moon took place many years ago, so many children may not know much about them. They would probably enjoy watching video clips from the first steps on the moon and subsequent visits. They might also like to learn more about space trips to the space stations and what goes on there. Maybe they could even learn about the possibility of future space trips to other planets. 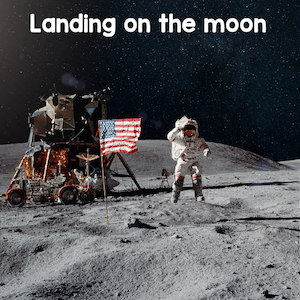 Research ExpertsThere are many books available that provide information about the inner and outer planets and what we know about them. It would take a long time to go through all of them and learn enough information about each if one person had to do it themselves, but if a group of people each took one or two planets, they could become the experts and share what they learn with the others. 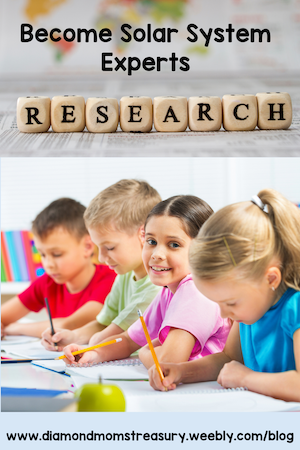 Mixing fun imaginative activities with research will engage and entertain your students as you venture into the worlds beyond. After exploring and broadening the wonders of space, try doing a project that demonstrates what has been learned. Doing a project about the solar system with multiple ways of sharing what was learned is a great way to culminate your space unit. This was one of my favorite projects and each time my class did it, the results were incredible. Check out my next blog post for more.details. Have fun with your explorations of space! Related Posts Hands-on science activities engage our children and encourage their curiosity. Here are some simple and fun science experiments that require minimal materials but address many questions that kids have pondered. Let's embark on a journey of discovery and learning! 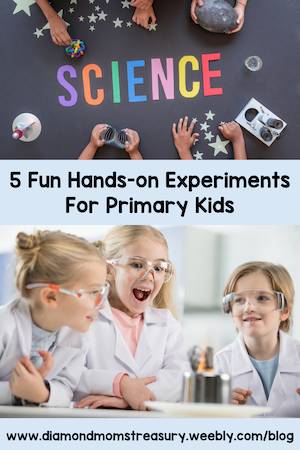 Balloon Rockets (Force Experiment)Question: How does the size of the balloon affect the distance the rocket travels? Hypothesis: The larger balloon (will/will not) make the rocket travel farther. Materials: balloons, string, straw, tape, measuring tape Procedure: 1. Tie one end of the string to a chair, door knob or something that can support it. 2. Slip the straw onto the string at the other end. 3. Tie the other end to another support so that the string is taut. 4. Inflate balloons of different sizes (pinch them closed, don't tie them), attach them to the straw with tape, release them and measure the distance each one travels. Observations: Measure distances each balloon rocket travels and record the results.. Conclusion: Analyze the data and determine if the hypothesis was correct or not. Discoveries: As the air rushes out of the balloon it creates a force motion called "thrust" that propels the balloon forward. The size of the balloon will determine the amount of thrust provided and how far the balloon will travel. 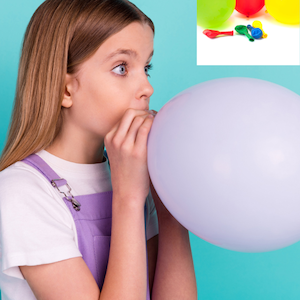 Egg Drop Challenge (Gravity Experiment)Question: Can an egg be dropped from a rooftop without breaking? Hypothesis: With the right materials and design, the egg can be protected from breaking when dropped. Materials: Eggs, various materials for padding (e.g., cotton balls, bubble wrap, foam, tissue paper) tape, string, plastic bags, small boxes, other household materials for building a protective structure, ladder or access to a roof Procedure: 1. Create a protective structure to hold the egg 2. Attach the egg 3. Drop the structure from the roof Observations: Record the type of material and structure created to protect the egg. Record whether to the egg remained intact or broke. If this was done with several different structures, record each one and the results. Conclusion: Identify the materials and design strategies that were most successful in protecting the egg from breaking during the drop. Review the hypothesis and answer the question. Discoveries: By attempting to drop eggs from a height, students experience firsthand the force of gravity and the need to counteract it to protect fragile objects. The conclusion can highlight how different materials and design elements can effectively absorb and distribute the force of impact. 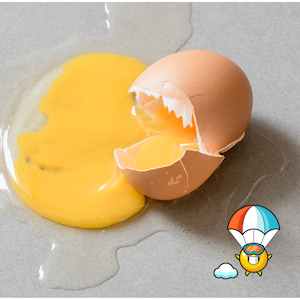 Sink Or Float (Buoyancy Experiment)Question: Which objects float and which objects sink? Hypothesis: I think _____ will float and _____ will sink. Materials: Various objects of different materials (plastic, wood, metal, cork, etc.), large container of water Procedure: Place one object at a time in the container of water Observations: Observe and record whether the object floats or sinks. Categorize the objects as floaters or sinkers based on the observations. Conclusion: Determine which objects float or sink and compare the results with the hypothesis. Discoveries: The children will learn that shat, size and material of an object can determine whether it floats or sinks. Objects with lower density than water float (such as cork or plastic), while objects with higher density (such as metal, or stone),sink. Note: The results can change if the density of the water changes (salt water is denser than fresh water). 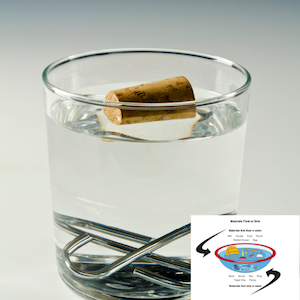 Layered Liquids (Density Experiment)Question: How do different liquids of varying densities interact when layered? Hypothesis: Predict the order in which liquids will layer based on their densities Materials: various liquids (water, cooking oil, honey, dish soap, food coloring), tall transparent container Procedure: 1. Fill the container 1/3 full with water. 2. Pour different liquids , one by one, into the container. Add a few drops of food coloring to each layer. Observations: Record the order that the liquids are added and how they settle. Examine the layered liquids and their densities noting any patterns or differences. Conclusion: Determine the order of the liquids and compare them with the hypothesis. Discoveries: The children will observe that different liquids do not mix easily and form distinct layers. They will also see how light interacts with the layers to create a rainbow-like effect. Liquids that are heavier (denser) sink to the bottom, while liquids that are lighter (less dense) stay on top. 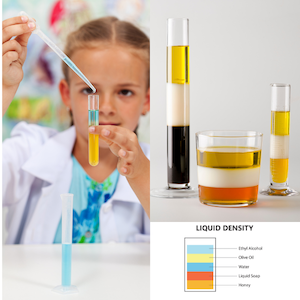 Volcanic Eruption (Chemical Experiment) Question: What happens when you combine baking soda and vinegar? Hypothesis: I think they will react together. Materials: baking soda, vinegar, red food coloring, playdough or something that can be shaped to look like a volcano, container to place under the volcano shape, spoon Procedure: 1. Create a volcano shape using playdough or a model and place it in a container. 2. Measure and add baking soda inside the volcano structure. 3. Add some red food coloring to the baking soda. 4. Pour vinegar on top of the baking soda and observe the reaction. Observations: Record what happens when the vinegar mixes with the baking soda. Collect data of what you see. Examples: Upon pouring vinegar onto the baking soda, there was an immediate reaction. Bubbles and fizz were produced, resembling a mini volcanic eruption Conclusion: Mixing the vinegar with the baking soda created a chemical reaction that caused bubbles of gas to form. Discoveries: When an acid (vinegar) is combined with a base (baking soda) it creates a chemical reaction that produces carbon dioxide gas. The gas is released as bubbles causing a forming reaction.This gas expands and causes the foam to flow from the volcano. 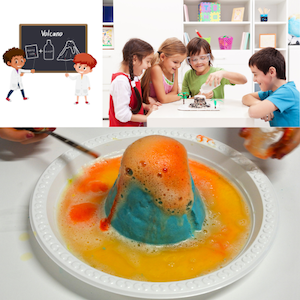 These simple and enjoyable experiments provide a hands-on approach to teaching fundamental scientific principles. By engaging in these activities, children not only gain a deeper understanding of concepts like force, gravity, density, and chemical reactions, but they also develop essential skills such as observation, classification, and critical thinking. We can foster a love for science early on, using hands-on activities and create a lifetime of curiosity and exploration. 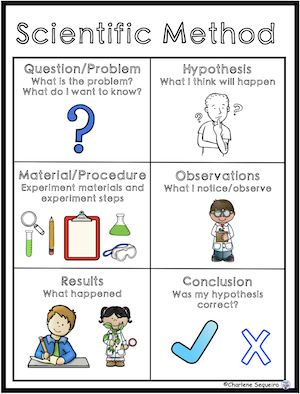 Check out this blog post for other experiments that might be fun to try. Here are a couple of resources that might be helpful as well. String Telephone Experiment Using The Scientific Method Scientific Method Happy experimenting! 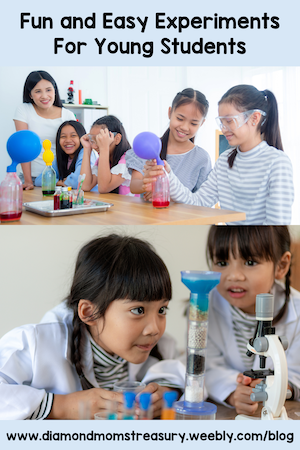 Related Posts
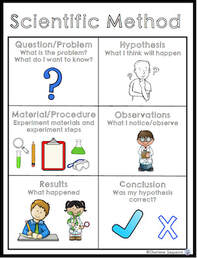
Kids are full of questions. Why is the sky blue? What are you doing? How does that work? It can be exhausting sometimes to keep answering them, but it is exciting to see the wonder and awe when they see new things. 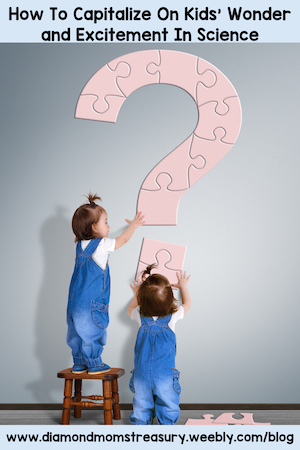 Science activities are a great way to capture that wonder and seek answers. Doing experiments is fun and can answer many of those questions. Creating experiments using the scientific method helps students to think through the necessary steps for controlling the parts of an experiment so that they can repeat when necessary to test out different hypotheses. It is important to have a question to answer before starting an experiment. Once you get your question, you can then make an educated guess or hypothesis about the outcome. This will help you to decide on the procedure and the materials needed to try to test out what you think might happen.  Here are some fun questions to ponder and maybe create experiments for. • Is there a way to drop an egg from the roof without breaking it? • How does a string telephone work? • How do large boats keep from sinking? • How can you make an egg bouncy? • How do airplanes stay in the sky? • How is electricity made? • How do magnets work?  Let's take a look at an experiment or activity that can be done to learn more about magnets. The objective of this experiment is to introduce primary children to the concept of magnets and their ability to attract certain materials. This hands-on activity combines learning with a fun scavenger hunt to engage and excite young learners. 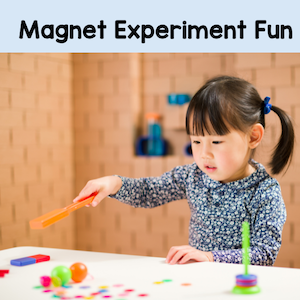 Question and HypothesesQuestion: Why do magnets pick up or stick to some materials, but not others? Ask students this question and get them to give you their hypotheses (These are their best guesses.) Materials NeededMaterials needed: - Small magnets (bar magnets or magnetic wands - Various objects made of different materials (paperclips, plastic toys, coins, aluminum foil, wooden blocks, corks, toy cars, etc. - Small containers or bags - Labels or cards with pictures of objects to find - Object checklist - Recording sheet - Pencil for recording  Material PreparationPrepare small containers or bags with labels or cards featuring pictures of the objects to find. Attach the object checklist to the containers. Scatter a variety of objects made of different materials around the room or outdoor areas. Hide some of the objects if possible. ProcedureGive each child a recording sheet, a magnet and a container or bag with labels or pictures of the objects. Attach a list to each container. Explain that their mission is to use the magnet to find objects around the room and record whether or not they are attracted to the magnet.  ObservationsEncourage the children to use their magnets to explore and observe which objects are attracted to the magnets. Have them record their observations on the recording sheet and check off the objects they find on their list. Results And DiscussionGather the children together to discuss their findings. Ask questions such as: - What objects did you find? - Were there any objects that the magnet didn't attract? - Were some objects easier to find than others? Check out the recording sheet and how the children classified the objects they found into the two categories: attracted to the magnet and not attracted to the magnet.  ConclusionConclude the experiment by reinforcing the idea that magnets have special powers and can attract certain materials. Introduce the concept that magnets attract objects made of certain materials, such as iron and steel. Check the hypotheses and see if they were correct or not and discuss why or why not based on what they discovered. Extension Or Follow Up ExperimentExplain that magnets have special powers to attract certain materials and that they have a north pole and a south pole. Create an experiment and opportunity for children to test out magnets and their poles to see how they can attract or repel based on which poles are facing each other.  This is just one example of how to capture wonder and excitement using the scientific method and experiments. There are so many different experiments to try. Enjoy exploring the world around with your students as they discover new and amazing things. Related Posts
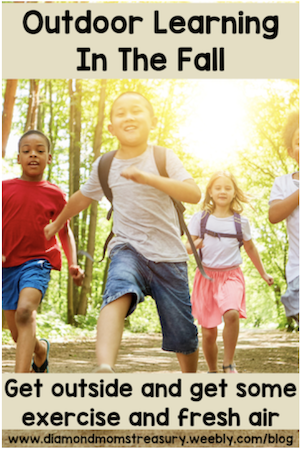
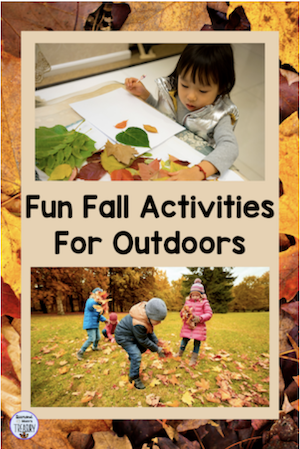
Teaching science to primary kids is a magical journey of discovery, curiosity, and boundless enthusiasm. By tapping into the innate sense of wonder that children possess, teachers can transform science education into a fun and exciting adventure. Let's explore creative ways to make science come alive for young minds, focusing on the wonders of nature and the marvels of scientific exploration. 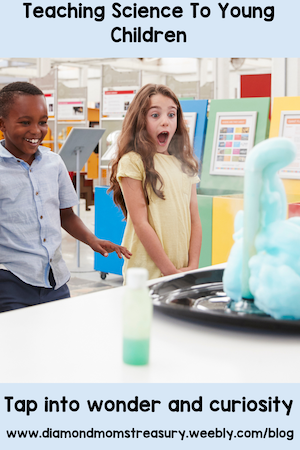 Embrace Hands On Learning And ExperiencesYoung children are natural explorers who learn best through hands-on experiences. Incorporating experiments and interactive activities not only makes science real but also creates a sense of excitement and discovery. Whether it's observing the growth of plants, creating simple chemical reactions, or exploring the properties of magnets, hands-on learning engages students and leaves a lasting impact. 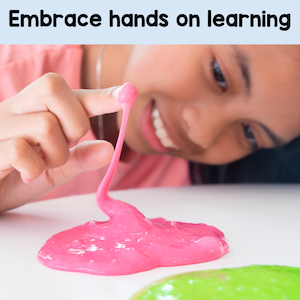 Explore NatureNature is the ultimate classroom for budding scientists. Take your students outside to explore the wonders of the natural world. From observing insects and birds to examining different types of rocks, the outdoors provide a rich learning environment that stimulates curiosity and develops a love for science. Nature walks, scavenger hunts, and outdoor experiments can turn a science lesson into an unforgettable adventure. 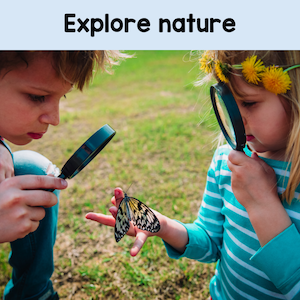 Create A Curiosity Driven ClassroomEncourage questions and nurture the natural curiosity of your students. A curiosity-driven classroom is one where students feel empowered to ask "why" and "how." This not only enhances their critical thinking skills but also opens the door to exciting scientific discoveries. Create a safe and supportive environment where curiosity is celebrated, and students feel comfortable exploring the unknown. 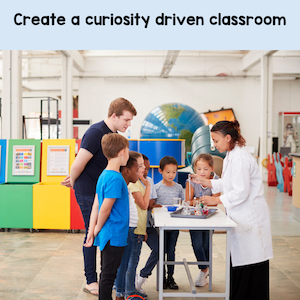 Include StorytellingWeave captivating stories into your science lessons to make abstract concepts more relatable. Whether it's the life cycle of a butterfly or the water cycle, storytelling adds a narrative element that captures the imagination of children. Consider incorporating picture books, interactive storytelling sessions, or even creating class stories that connect science concepts to real-world scenarios. 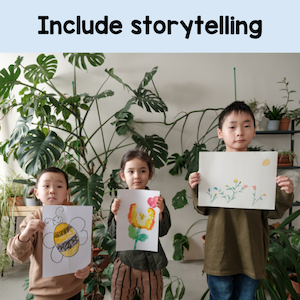 Use Everyday Objects In TeachingScience is all around us, and everyday objects can serve as fantastic teaching tools. Turn household items into science experiments or use them to demonstrate scientific principles. For example, a simple baking soda and vinegar volcano can illustrate the power of chemical reactions, while a magnifying glass can turn an ordinary leaf into a fascinating study of plant structures. 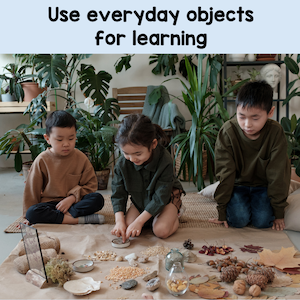 Celebrate Curiosity And Learning From MistakesIn the world of science, curiosity often leads to unexpected discoveries. Encourage students to embrace their curiosities and not fear making mistakes. Create an atmosphere where "failed" experiments are seen as opportunities to learn and refine hypotheses. Celebrate the journey of exploration, and help kids develop resilience and a positive attitude towards challenges. 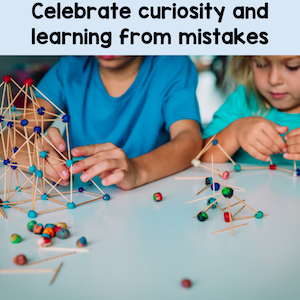 Teaching science to young children can be a joyful and rewarding experience when approached with creativity and a sense of wonder. By integrating hands-on activities, exploring the outdoors, fostering curiosity, using storytelling, and celebrating everyday objects, teachers can create an environment where science becomes a thrilling adventure.  Have fun with these tips and help instill a lifelong love for learning and discovery in the hearts of our youngest scientists. Related Posts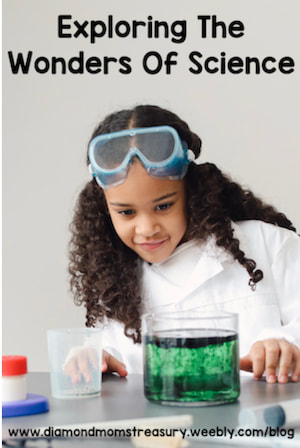 Changing weather, cooler temperatures, and color changes are all signs of the arrival of fall. There's something magical about the colors, sounds, and smells of fall. Students often find themselves more engaged in learning when they are surrounded by the beauty of nature. Whether it's studying the changing colors of leaves, identifying different animals, or learning about the life cycle of a pumpkin, outdoor lessons are inherently captivating. 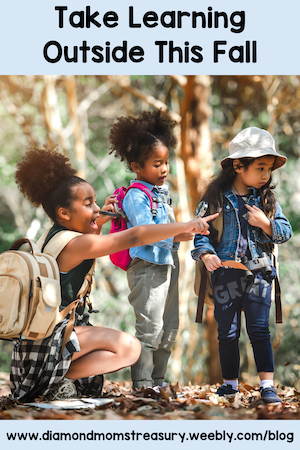 Fresh air and natural surroundings can help improve students' focus and stimulate their creativity. Studies have shown that spending time outdoors can boost cognitive function and problem-solving skills, making outdoor classrooms an ideal setting for critical thinking activities. Spending time outdoors has been linked to improved mental health and reduced stress levels. Fall's cool, crisp air and the calming influence of nature can help students feel more relaxed and connected to the world around them. The hands on experiences and fresh air also invigorate students and engage them in their learning. 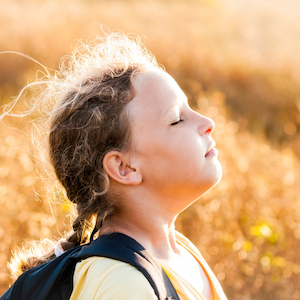 Fall is the perfect time to encourage physical activity among students. Hiking, nature walks, and outdoor games not only promote exercise but also foster teamwork and social interaction. Getting students moving in a natural setting can help overcome the hours of sitting in classrooms and keep them engaged. 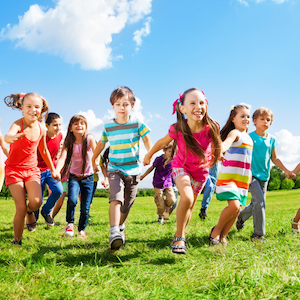 There are many different subjects that can be taught outdoors. Each of these add a real world element to the students' learning and experience. Integrating social studies and science activities into your fall outdoor learning adventures can provide a well-rounded educational experience. To further enrich your fall outdoor learning adventures, try incorporating some math and language activities into the mix. Here are some suggestions for social studies, science, math, and language arts that might be of interest. Social Studies• visiting local historical landmarks * learning about fall harvest and traditions • using maps and doing a geography scavenger hunt Science• leaf identification activities • studying the pumpkin life cycle • weather monitoring • learning about weathering and erosion * keeping a nature journal • stream study • learning about seed dispersements Math• nature math scavenger hunt • using measurement skills outdoors • fall data collection Language Arts• outdoor poetry writing • nature journaling with descriptive writing • vocabulary scavenger hunt (looking for examples in nature) • reading fall themed books  Preparation tipsHere are some preparation tips that will help make your outdoor sessions successful. Select an outdoor location that suits your curriculum and learning objectives. Local parks, forested areas, the seashore, or even your school's own outdoor spaces can be transformed into effective learning environments. Make sure students are dressed appropriately for the fall weather. Layers, hats, and gloves are essential to keep everyone comfortable during outdoor lessons. Tailor your lessons to incorporate the unique features of fall. Explore topics like the changing colors of leaves, the science behind falling leaves, the life cycle of pumpkins, or even Halloween-themed literature. Bring technology outdoors by using tablets or smartphones for nature observation apps or taking pictures to document findings. This can enhance the learning experience and provide opportunities for digital storytelling.  Make sure that your plans are flexible and adaptable as the weather can be unpredictable and you may need to make changes quickly. With preparation ahead of time and some back up ideas in case of change, getting outside to learn is worth the effort and will benefit your students.  Embracing the great outdoors during the fall season is a fantastic way to enhance your students' learning experience. The benefits of outdoor education are numerous, from improved engagement and focus to enhanced physical and mental well-being. By incorporating nature into your curriculum, you can create unforgettable learning moments and inspire a lifelong love for the natural world in your students. So, this fall, take your class outside and let the wonders of the season become your classroom. 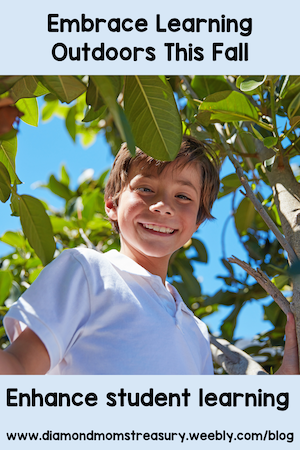 Happy outdoor learning! Related Posts
|
About Me Charlene Sequeira
I am a wife, mother of 4, grandmother of 9, and a retired primary and music teacher. I love working with kids and continue to volunteer at school and teach ukulele. 
Categories
All
|


 RSS Feed