Welcome To My Blog |
|
Welcome To My Blog |
|
|
Recently we have been focusing on kids and how to keep them learning during the summer while still having fun. Now it's time to help teachers begin planning for a new school year while not getting too stressed out. Here are some back to school tips that hopefully will help you to start the new year refreshed and ready to go but still allow you to enjoy the remaining days or weeks of summer break.  1. Keep the good parts and change the other partsTake what you've learned in previous years and include the good parts in your teaching and change up the parts that didn't work well. Reflecting on past successes can be incredibly rewarding. Perhaps you introduced a new interactive activity that captured your students' imaginations and helped them grasp a difficult concept. Or maybe you developed a unique technique that motivated them to engage deeply with the material. These successes are the building blocks of your teaching philosophy, and it’s essential to carry them forward. By identifying and replicating these effective strategies, you can create a more engaging and effective learning environment year after year. However, reflection also involves an honest assessment of what hasn’t worked. Every teacher has encountered lesson plans that fell flat, activities that failed to engage, or assessment methods that didn’t quite measure up. These experiences, while challenging, are invaluable. They provide critical insights into what needs to change. Perhaps the pacing was off, the material was too complex, or the method didn’t align with your students' learning styles. Whatever the case, acknowledging these less successful aspects is the first step toward improvement. Adapting your teaching methods doesn’t mean starting from scratch. It involves thoughtful tweaks and adjustments based on past experiences. For example, if a particular instructional strategy didn’t resonate with your students, consider modifying it rather than discarding it entirely. Small changes, such as incorporating more visual aids, breaking down complex information into more manageable chunks, or integrating technology in new ways, can make a significant difference.  2. Change up your classroomConsider rearranging your classroom at the beginning of the year. A fresh layout can revitalize both you and your students, making the space feel new and inviting. Decorate with pops of color, inspirational messages, and designated special centers for various activities. This not only makes the classroom more visually appealing but also creates a sense of excitement and curiosity among students.  Here are some calendar headers that might be helpful for you. Click on the image that works best for you.
3. Do some basic planning for the first weeksIn many districts, at least here in Canada, classes can be reconfigured after the school year begins based on enrollment numbers and budgets. This can cause some uncertainty about what grade you may end up with. Over planning and preparing for one group and then having it completely change in grade level or configuration can be very stressful, so I suggest that you do some basic planning for the first few weeks and hold off on the deeper concepts until the classes are settled. While waiting, plan basic lessons that work for both returning and new students. These foundational lessons can help ease everyone into the new school year smoothly.  4. Decide on your must-have rulesClassroom management is necessary in order to have a respectful and caring classroom environment. There are many different aspects to this and many are determined by your teaching style and your classroom dynamics. Decide on your must-have rules and classroom management strategies. Establishing clear expectations from the outset helps create a structured and respectful learning environment. Some of your rules may be non-negotiable, but many can also be determined as a class community.  5. Take brain breaks and movement breaksIncorporating brain breaks and movement breaks while planning and setting up your classroom is crucial. Just as kids need to have breaks during to day, so do you. These breaks will improve your productivity. Continue to add in brain breaks as you do things throughout the year as well. These breaks are important for your well-being and they model the importance of this for your students as well.  6. Consider your curriculum goals for the yearAs you set up your classroom, also consider your curriculum goals for the year. Start brainstorming ideas for how to implement them, ensuring that they are both ambitious and achievable. Plan a basic schedule that includes a mix of academic and social-emotional learning (SEL) activities. This balance is essential for creating well-rounded development in your students. Remember, this schedule can and should be adjusted as needed to respond to the changing needs of your classroom.  7. Take time for self careMentally preparing yourself is just as important as physical preparations. Take time to relax, practice mindfulness, and engage in activities that reduce stress. This mental preparation helps in maintaining a positive outlook and resilience throughout the school year. It's essential to take care of yourself during this busy time. A well-rested and healthy teacher is more effective and more capable of handling the demands of the school year.  As you prepare for a new academic year, embrace the lessons of the past with an open mind and a willingness to change. Consider some of the tips I've suggested and remember to take care of yourself. By doing so, you can create an engaging and productive learning environment that not only meets the needs of your students but also inspires them to reach their full potential.  Related Posts
It's hard to believe that I retired 9 years ago. It seems like it was yesterday. I guess that is partly because I haven't totally left school. I still volunteer with small groups a couple of times a week. I was looking back recently and I stumbled on a post I wrote when I first retired. It's interesting to see that my thoughts haven't changed much since I wrote this post. Here is an updated version.  Back To School: Reflect And Refresh There were four different things to reflect on: communication, organization, content, and big summer projects. Here are my thoughts from back then and any updates that I feel are important to add. CommunicationThen: This is very important at all times, but at the beginning of the year it is important to create relationships and help new students and their families feel comfortable about sharing with you. Even though I won't have my own class this year, it is still important. It will also be necessary for me to maintain communication with the staff so that I can stay on top of what is happening around the school. Now: As I continue to work with students needing extra support, it will be important to make a relationship with them and let them know that they are in a safe place where they can ask questions and get extra practice. Connecting with the teachers and making sure that we are clear on what they would like me to help the children with is key. Giving them updates and sharing successes and concerns with them is also going to be key to supporting the learning.  OrganizationThen: This summer my organization took a different emphasis. I had to pack up and empty out my classroom. I had so much stuff that it took me a couple of weeks to do so. I gave lots of my material to other teachers that are just starting out, recycled and threw away material that was too old or outdated, and brought home the rest. Then I had to sort through the material that I brought home so that I can access things easily when I need them later. Now: I still have many resources that I created and that are relevant for use today when volunteering. I have organized these by subject and I have a bookshelf at school where many of them are stored. I also have some of my hands on activities filed away here at home. I have always been a collector of kids books, so I have a large collection of book sets of different levels at school for when I do reading groups. I do use some of the school's materials, but not often. I have created guided reading book studies for many of the books, so I use those. When I need specific resources for different activities, I make copies from the resources that I have created.  ContentThen: I am looking forward to creating materials for my colleagues. I will still be able to work with kids while trying them out in real situations. The content will be determined by the curriculum being taught by my colleagues and by their requests for materials. Now: Resources I use are based on the needs of the students I work with. I try to coordinate what I am doing with themes that the class is working on so that they support each other. If I make resources to use with the students, I often give a copy to the teacher as well.  My Big Summer ProjectThen: I am hoping to develop more materials for my TPT store so that I can help to impact student learning even while retired. I am learning so much about how to improve the appearance of my products and my storefronts. It will be a big job, but I am excited to continue learning and improving. Now: This is still my hope, but with new changes to the TPT site, I am making more changes to the appearance and information about my resources. I plan to continue updating more resources and improving them.  Well, there you have a then and now recap of my reflections and refreshments. I plan to continue to add more value to what I am creating and I will share this with you in future posts. For now, I hope that you are enjoying your summer and that you are taking some time to do some reflecting and refreshing as well.  Here's a task card template that you may enjoy using for creating an activity while you are slowly transitioning from vacationing to planning mode in the next few weeks. Stay tuned for some back to school tips and ideas for planning the first weeks of school. 
As summer approaches, children everywhere look forward to a well-deserved break from the school routine. While summer is a time for relaxation and fun, it's also important to provide opportunities for kids to stay engaged to prevent the "summer slide" – the tendency for students to lose some of the academic gains they made during the school year. Making sure that the activities are fun and don't feel like work will help to keep them motivated and interested in participating. There are many ways to do this. Games are one way to do so, but there are other ways too. Here are some ideas.  Use Educational GamesBoard games and online games can cover a wide range of subjects and they are fun to play. Some can be played with others, and some are meant to be played alone. Games like Scrabble and Monopoly incorporate literacy and math skills. For younger children, word games, Snakes and Ladders or Bingo are some other games that can work. Online games are interactive and can cover a range of subjects, from math and science to reading and art.  Read RegularlyReading is one of the best ways to keep skills sharp over the summer. Encouraging kids to pick books that interest them, whether it’s an adventure story, a fantasy novel, or a non-fiction book about animals can help them develop reading habits. Many local libraries also offer summer reading programs that reward kids for reading.  Write OftenWriting journals can help kids to keep track of their daily adventures, activities, dreams, and other memories. Creating stories and poems or writing letters are other ways to practice writing skills. Creating a memory box to store these items in could be a great way to encourage them to look back at their writing in future years.  Real Math ActivitiesMath doesn’t have to be just worksheets and flashcards. Involving kids in cooking helps them practice measuring ingredients. Playing games that require counting and strategy helps develop number skills and critical thinking. Shopping trips can turn into math lessons that tally prices and calculate discounts. Real math activities help kids see its importance in everyday life.  Do Hands On Science ActivitiesScience is all around us, and summer is the perfect time for hands-on experiments and exploration. Simple experiments like making a baking soda and vinegar volcano, growing crystals, or even cooking can teach kids about chemistry and physics. Nature walks and trips to the local zoo or science museum can spark curiosity and provide real-world learning experiences.  Family Activity TimesSummer is a great time for family outings and activities that combine fun with learning. Visit museums, historical sites, or botanical gardens. Many places offer interactive exhibits that are both educational and engaging. Even a family hike can become a biology lesson as you identify plants and animals along the trail.  The goal of doing these types of activities is to help kids maintain the academic skills they worked so hard on during the school year. They can avoid the summer slide and return to school in the fall ready to succeed. Remember, the goal is to make learning enjoyable and natural, seamlessly blending education with the joys of summer.  Here is a sports themed game board that might be fun to use for creating some different games or activities.  Related Posts
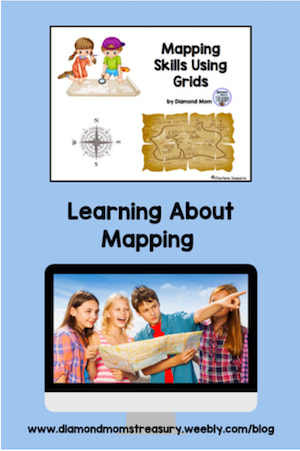
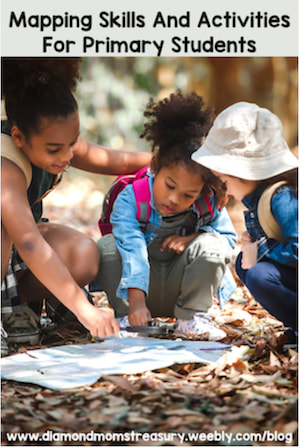
If you mention to your students that you are going on a treasure hunt, you can be sure there will be cheering and excitement along with lots of questions. Learning to read maps and use them are valuable skills for kids, and one way of capturing their attention is to link them to stories of treasures and adventure. 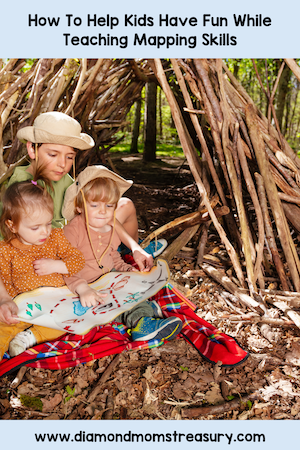 Ways To Use MapsMapping skills can be exciting for kids if they are introduced in an interesting, hands on way. These skills help develop spatial awareness and teach kids how to navigate in their world. Here are some different ways to get started. 1. Look at a variety of different types of maps and try to find some similarities on them. Look for symbols, shapes, words, or other elements that may be important. Treasure maps, school maps, neighborhood maps, and even country or world maps are great examples. 2. Try following a neighborhood or school map and identifying the various areas or symbols that are on the map. 3. Walk around the neighborhood and make note of different things that are there. Draw a map that shows the different key elements and create a legend that can be followed by others. 4. Create a treasure map and a story to go along with it. Maybe even try to find a hidden treasure in the nearby area following a map. 5. Check out mapping programs like Google Earth and see the bigger world by exploring the neighborhood and beyond. 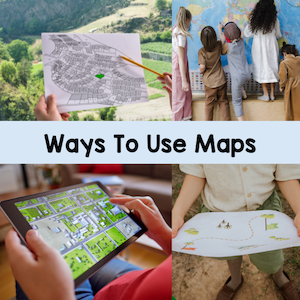 Important Mapping Skills And TermsLooking at a variety of different maps and exploring the world around them is great, but in order to really understand how to read and use maps requires teaching about the different concepts and details. Young children need to be taught some of the vocabulary and also how to use the different symbols and components of maps effectively if they are going to be able to transfer these skills to various different types of maps. 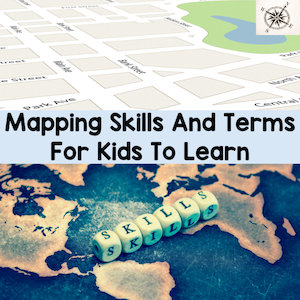 Here are some of the terms and aspects of maps that children need to understand and practice using to fully understand how to read maps. Map - A paper drawing or an electronic image that show where different places are located. There are many different kinds of maps. World maps, neighborhood maps, road maps, and treasure maps are just a few types. Legend/Key - This is a guide for the symbols used and tell us what they represent. Symbols - These are pictures or shapes that are used to represent real objects or places. Compass Rose - This is a symbol that is used to show the directions north, south, east, and west, as well as areas in between. It helps to make sure that we are going in the correction direction when following instructions for how to get somewhere. Grid - This is used to help locate areas on the map. The spaces where the letters and numbers interesect show where the object or place is located. Coordinates - These are the numbers and letters on the map that are used for locating the correct spaces on the grid. Scale - This shows the distance between places or objects. It can also be used for 3D maps to make sure that objects are appropriate sizes. Here are some booklets that help to explain and practice using these terms. Map Skills Mapping Skills Using Grids 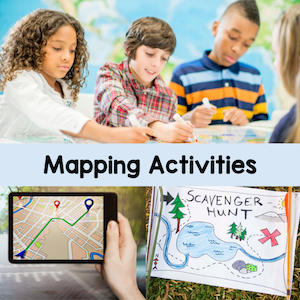 Once they understand what the various components are, they can begin to create their own maps. Here is a free booklet I created that can help them get started on creating a neighborhood map. 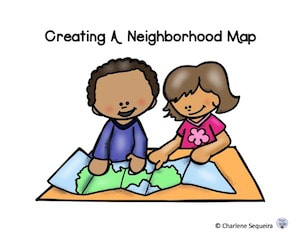 More Mapping ActivitiesLooking for some more ideas and hands on activities? Check these out. 1. Create a treasure hunt: Provide children with blank paper and crayons/markers. Encourage them to draw their own treasure maps, including landmarks like trees, houses, and lakes. They can then hide "treasure" (e.g., small toys or stickers) and exchange maps with classmates for a fun treasure hunt. 2. Collaborative Classroom Map: Create a map of the classroom. Use a large piece of paper or a whiteboard and let students contribute by drawing key features such as desks, chairs, door, windows, and other important items. Discuss the purpose of each item and its location within the classroom. 3. Following Directions Game: Play a game where children practice following directional instructions in the school yard. Give verbal instructions like "walk two steps north" or "turn to the left and walk three steps west." This helps reinforce cardinal directions in a fun way. 4. Outdoor Scaventer Hunt: Take children on an outdoor scavenger hunt around the schoolyard or nearby park. Provide each child with a simple map indicating areas they need to explore and items they need to find (e.g., a tree, a bench, a flower). Encourage them to mark off each item as they find it and label the map where the item was found. 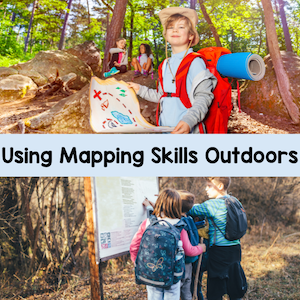 As you can see, there are many components to learning how to use maps and understand them. Once kids get the hang of it. they can navigate to different places and create adventures that are fun and educational as well. Enjoy sharing these spatial adventures with your students and helping provide them with tools for future adventures. 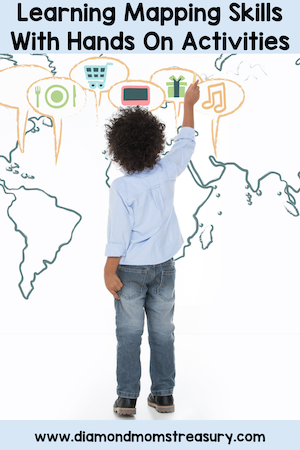 Next time I will share more ideas about mapping and how to create a 3D community. Related Posts
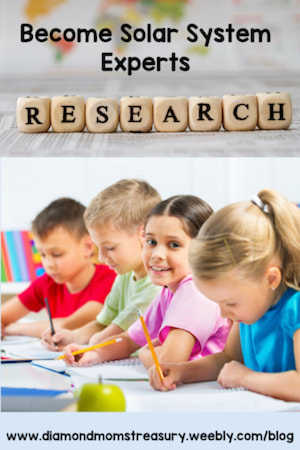
Are you thinking about teaching a solar system unit to your students? Capture the attention and wonder of these young children with a hands on approach that allows them to actually see how different aspects work and why they are so phenomenal. Here are some activities and experiments that will help your students better understand the workings of our amazing solar system. 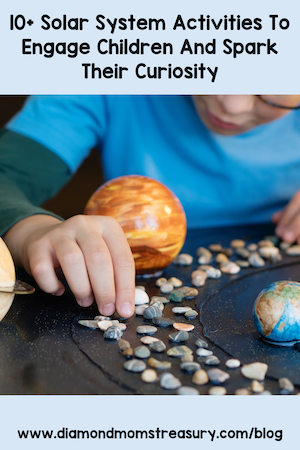 Solar System Activities And ProjectsCreating models, doing research on the planets, making mobiles, making puzzles or games or other activities will all make the solar system more understandable for your students and they will have fun learning as well. Here are a few specific activities that can be done. Solar System ModelsEncourage students to create a three-dimensional model of the solar system using everyday materials such as clay, papier-mâché, or recycled materials. As they design and construct their models, they'll gain a deeper understanding of the relative sizes, distances, and orbits of the planets. They can paint each planet according to its distinctive colors and sizes and then arrange them in order around a central "sun" display. Get students to create space-themed mobiles featuring the planets and other celestial bodies. They can use colored paper, string, and craft materials to construct their mobiles, incorporating facts about each planet into their designs. 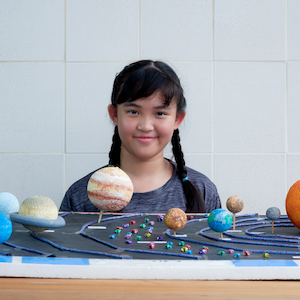 Planets Facts ActivitiesAssign each student or group of students a planet to research and create a fact sheet. They can include information such as the planet's size, distance from the Sun, number of moons, and any interesting facts they discover. Encourage them to use both text and illustrations to present their findings. Have students research individual planets and create informative posters or digital presentations highlighting key facts, such as size, composition, atmosphere, and unique features. They can use their creativity to design eye-catching visuals and share interesting tidbits about their assigned planets. Create puzzles or matching games featuring images of the planets and their names. This activity reinforces students' recognition of the planets and helps them learn their order from the Sun.  Planet OrbitsSet up a large-scale model of the solar system on the floor or outdoors using hoops, tape, or markers to represent the orbits of the planets. Have students take on the roles of different planets and walk or run along their orbits to understand the concept of planetary motion. Phases Of The MoonUse Oreo cookies to demonstrate the phases of the Moon. Have students carefully scrape away the cream filling to represent each phase, from new moon to full moon, and then arrange the cookies in the correct order. 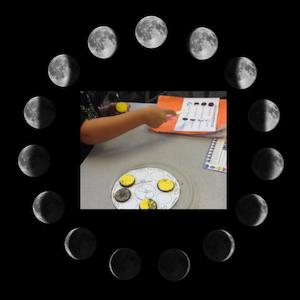 Another Moon ActivityInvite students to explore the surface of the Moon by designing and building their own lunar landscapes. Using a variety of materials such as sand, rocks, and modeling clay, they can recreate the craters, mountains, and valleys found on Earth's natural satellite. Space Themed Story Writing And IllustratingEncourage students to let their imaginations take flight by writing and illustrating their own space-themed stories or comics. They can invent characters, plot exciting adventures, and explore the wonders of the solar system in a creative and imaginative way.  Solar System ExperimentsThese experiments are fairly easy to do as a class and they provide hands-on opportunities for students to explore fundamental concepts related to the solar system while fostering curiosity, critical thinking, and scientific inquiry. Relative Sizes And Distance Of The Planets From The SunThe sizes of the planets will range from a peppercorn to a large balloon and the distances will be so great that you may need to take the experiment outside to relatively see just how far away some planets are from the sun. Note: These suggestions are not totally to scale, but are just to see the differences comparatively in size and distance. This experiment will help students visualize the scale and arrangement of the solar system. Here are some size tips to help. (Note: Pluto was included just for interest as it used to be considered a planet). Sun - large beach ball Mercury - pea Venus - ping pong ball Earth - tennis ball Mars - golf ball Jupiter - soccer ball Saturn - large balloon Uranus - medium size balloon Neptune - medium size balloon (Pluto) - peppercorn Here are some approximate measurements for distance based on 50 yards between the sun and Neptune. (Note: using 50 meters will not significantly change the distances as a meter and a yard are only a few inches different in length). Mercury - 0.65 yards Venus - 1.3 yards Earth - 1.66 yards Mars - 2.52 yards Jupiter - 8.66 yards Saturn - 15.92 yards Uranus - 31.87 yards Neptune - 50 yards (Pluto) - 65.57 yards Orbital Motion ExperimentUse a spinning chair, like a computer chair, to demonstrate orbital motion. Have students sit on the chair while holding a ball (representing a planet) and spin slowly. As they rotate, explain how the combination of forward motion and gravity keeps planets in orbit around the Sun. Gravity ExperimentExplore the concept of gravity by dropping objects of different sizes and weights from the same height. Discuss how gravity affects the motion of objects in space and why planets orbit the Sun in elliptical paths rather than flying off into space. Here is an experiment that shows how gravity works. 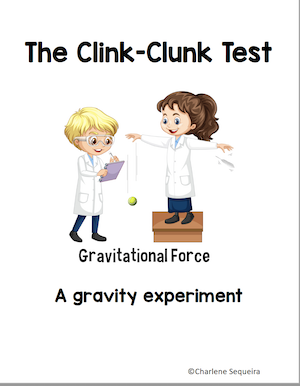 Moon Related ExperimentsUse a flashlight and a ball (representing the Moon) to demonstrate the different phases of the Moon. Have students observe how the position of the light source (Sun) relative to the ball creates shadows, mimicking the waxing and waning phases of the Moon. Create impact craters similar to those found on the Moon's surface. Fill a shallow tray with flour or sand, then drop small objects (marbles, rocks, or balls of varying sizes) onto the surface from different heights. Observe and discuss the shapes and sizes of the craters formed. Use a flashlight and objects of different shapes to explore how shadows are formed. Move the objects closer to or farther from the light source and observe how the size and shape of the shadows change. Discuss how sunlight creates shadows on planets and moons. Exploring Planet Atmospheres ExperimentCreate mini "planets" using balloons filled with different gases (helium, carbon dioxide, air). Observe how the balloons behave in various conditions (e.g., heated or cooled) to understand the role of atmospheres in planetary dynamics. Student ProjectsStudent projects are a great way to involve the family as well as classmates when learning about the solar system. Check out this blog post for some ways that my students have created projects in the past.  By combining teaching about the solar system with a variety of student-led projects, we'll not only deepen our students' understanding of the universe but also encourage creativity, critical thinking, and collaboration. Embarking on this cosmic journey with your students can inspire the next generation of astronomers, engineers, and explorers! Related Posts
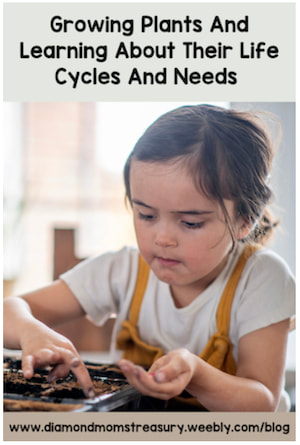
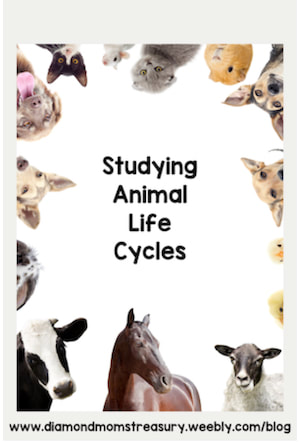
Spring is fast approaching and that means flowers poking up out of the earth, trees blossoming, grass getting green and lush again and kids wanting to get outside to play. This is the perfect time to start thinking about new science units that focus on life cycles, planting things, and watching baby animals as they start their lives and grow. 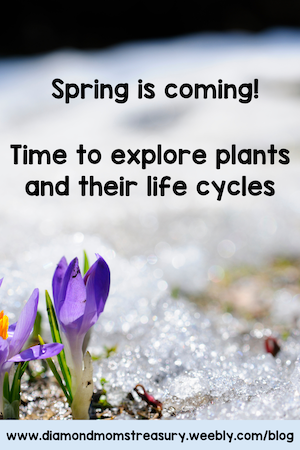 Planting seeds is a great way to help kids understand how we get a variety of fruits, vegetables, and flowers. This is the perfect season to start seedlings in the classroom as well. This has always been a great activity for my students. There are many different ways to plant the seeds and watch them grow. Check out this post to see some examples. 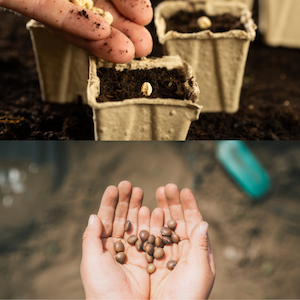 Taking the seedlings and planting them outside in the late spring is an event worth celebrating. If you have garden plots at the school, it is a fun way to keep monitoring and tending to them as they grow. Kids get so excited when the first fruits appear. I still have kids reminding me of the beans and tomatoes they grew when they were in my class. 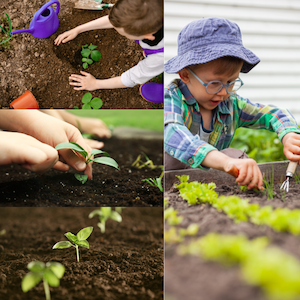 Beans, radishes, lettuce, and other plants tend to grow fairly quickly. Other plants take longer and will require more patience as kids wait to harvest them. This is a great time to talk about how not everything progresses at the same rate. If you are looking at planting other types of fruit or vegetables, check out my plant life cycles bundle. It includes apples, carrots, pumpkins, potatoes, and beans. 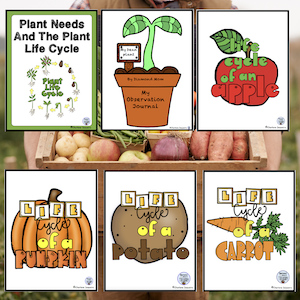 Watching baby chicks hatch, releasing salmon fry, observing the metamorphosis of butterflies from caterpillar to butterfly, or the transformation of a tadpole to a frog are awe inspiring sights for kids and they get so excited during these events. 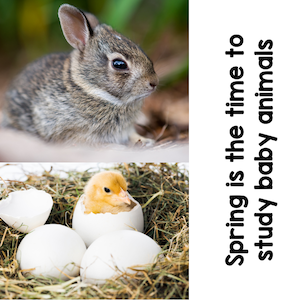 Choosing an animal to observe from it's start through to adulthood is a great hands on unit that helps kids understand how life cycles work. Check out my animal life cycles bundle for resources that may help if you are interested in studying about chickens, frogs, salmon, honey bees, or butterflies. 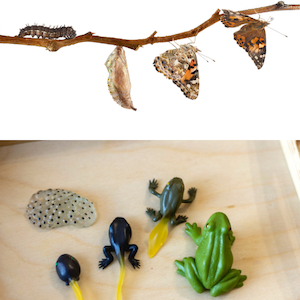 Check out this life cycle template freebie that helps with identifying the different stages of growth for plants or animals. 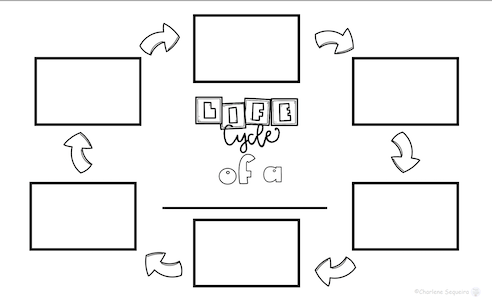 Deciding on what plant life cycles or animal life cycles you will study will depend on the interests of your students and the availability of resources and time. Whatever life cycles you choose to investigate, enjoy the moments and the excitement and wonder as your students learn.  Related Posts
When it comes to nurturing successful readers, we often focus on the importance of word work activities, phonics instruction, and comprehension strategies. And while these elements undoubtedly play a crucial role in developing literacy skills, let's not overlook another essential aspect: the types of reading material we provide to our students. Just like the ingredients in a recipe, the selection of reading material can significantly impact a child's reading journey and overall literacy development. Think about it: would you serve the same meal for every occasion? Of course not! Just as we vary our menus to cater to different tastes and dietary needs, we must offer a diverse array of reading material to meet the varied interests, abilities, and learning styles of our students. Whether it's decodable books, leveled readers, fiction, non-fiction texts, or close reading, each type of reading material brings its own unique flavor to the table, enriching the reading experience in distinct ways. 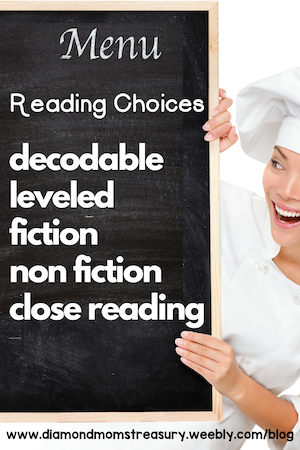 Decodable BooksFirst up, let's talk about decodable books. Think of them as the training wheels of reading. These specialized texts are like the building blocks of reading, providing early readers with the phonetic patterns and word structures they need to decode unfamiliar words with confidence. With decodables, our students can gain confidence as they tackle words one sound at a time. Plus, they're often filled with fun stories and characters that keep kids engaged and excited about reading. Here are some ways you can use decodable books in your classroom. - Reinforce phonics skills by focusing on specific letter-sound relationships or phonetic patterns - Incorporate decodable books into guided reading sessions, where you can provide targeted support and instruction based on students' individual needs. - Set up word work centers where students can practice decoding words from decodable texts through activities like word building, word sorts, and phonics games. 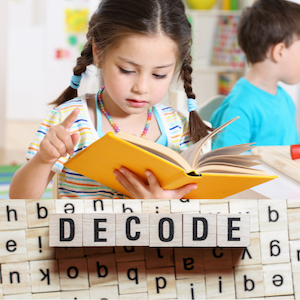 Leveled BooksMoving on to leveled books, we discover books in all shapes and sizes, tailored to suit different reading levels. Whether a child is just beginning their reading journey or ready to tackle more complex texts, leveled readers offer the perfect balance of challenge and support. They help ensure that each child is reading at just the right level for them, which is key for building those all-important comprehension skills. Here are some ways you can use leveled books in your classroom. - Organize leveled books into guided reading groups based on students' reading levels. Use these groups to provide differentiated instruction and targeted support. - Allow students to choose leveled books to read independently during silent reading time or as part of a reading workshop model. - Facilitate discussions about leveled books through book talks, where students can share their thoughts, make predictions, and ask questions about the text. 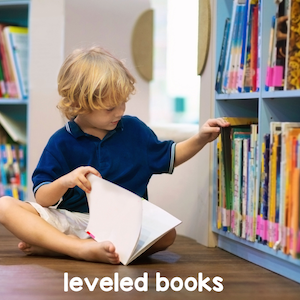 Fictional BooksFictional stories captivate readers' imaginations, transporting them to far-off lands, introducing them to unforgettable characters, and sparking their creativity in ways that only the power of storytelling can. Through fiction, students not only develop essential literacy skills such as comprehension and vocabulary but also cultivate empathy, critical thinking, and a lifelong love of reading. Here are some ways you can use fiction books in your classroom. - Encourage students to predict what will happen next, read to confirm their predictions, and reflect on the story afterward. This helps develop comprehension and critical thinking skills. - Have students analyze characters' traits, motivations, and actions throughout the story. This promotes empathy and understanding of character development. - Explore story elements such as plot, setting, and theme through discussions, graphic organizers, and creative activities like story mapping and retelling. 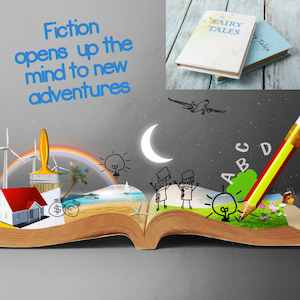 Non-Fiction BooksAnd then there's non-fiction, with its wealth of information and endless opportunities for exploration. From fascinating facts about the natural world to in-depth studies of historical events and science, non-fiction texts increase knowledge, encourage curiosity and develop a thirst for learning in young minds. By integrating non-fiction into our reading curriculum, we empower students to become informed citizens, critical thinkers, and lifelong learners. Here are some ways you can use non-fiction books in your classroom. - Teach students how to navigate non-fiction texts by exploring text features such as headings, captions, diagrams, and glossaries. Help them understand how these features enhance comprehension. - Guide students in identifying the main idea and supporting details of non-fiction texts. Use graphic organizers like main idea webs or summarizing templates to aid comprehension. - Integrate non-fiction texts with other subjects like science, social studies, and mathematics to provide context and deepen understanding of content-area concepts. 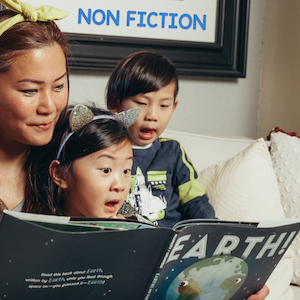 Close Reading For ComprehensionReading for comprehension is an important piece in learning to read. It isn't enough to be able to decode words and read them fluently. If there isn't some deeper understanding of what is going on and what the author is trying to tell us, then there isn't much of a purpose to the reading. Close reading is a strategy that helps readers uncover a deeper meaning while reading passages. This technique is all about diving deep into a text and really getting to grips with what it's all about. Instead of just skimming the surface, close reading encourages students to ask questions, make connections, and think critically about what they're reading. It's a fantastic way to develop those higher-order thinking skills and get kids actively engaged in their reading. Teach close reading strategies alongside the use of fiction and non-fiction texts. Encourage students to engage deeply with the text, asking questions, making connections, and analyzing the author's purpose and point of view. Close reading can be applied to both fiction and non-fiction texts, allowing students to develop critical thinking skills across genres. 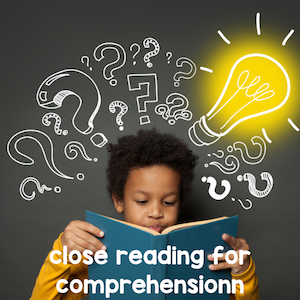 If you would like your students to dig deeper for more comprehension, check out this free sampler of Find The Evidence. You can check out the full resource here. 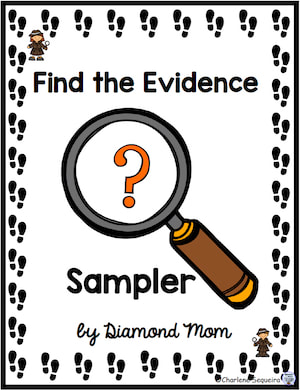 Balancing FormatsBalancing these resources effectively is key to making reading successful for kids. Here are some ways to do this. Start by assessing each student's reading level and comprehension skills. Use tools like running records, comprehension assessments, and observations to gather data. Once you understand where each student is at, you can provide appropriately leveled materials. Leveled books and decodables are fantastic for this, ensuring that students are reading at a level that challenges them without overwhelming them. Incorporate a variety of reading materials into your curriculum. Use decodable books for targeted phonics instruction and practice. Leveled books can be used for guided reading sessions where you work with small groups of students at their instructional level. Introduce fiction and non-fiction texts for independent reading and to explore different genres and topics. Provide opportunities for student choice and follow their interests. Offer a selection of books at various levels and genres, allowing students to choose what they want to read. When kids are interested in what they're reading, they're more likely to be engaged and motivated to improve their skills. Integrate reading activities with other areas of the curriculum. Use non-fiction texts to support science and social studies lessons, and incorporate fiction texts into language arts and creative writing activities. This helps students see the relevance of their reading skills across different subjects. Continuously monitor student progress through ongoing assessment and provide timely feedback. This can include informal assessments during reading conferences, comprehension checks, and written responses to texts. Use this feedback to adjust instruction and provide additional support or challenges as needed. By balancing these resources and strategies effectively, you can create a rich and supportive reading environment that meets the needs of all students and fosters a love of reading that will last a lifetime. 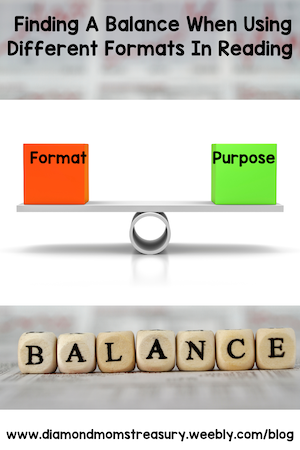 The types of reading material we use are indeed as important as the word work activities we employ when helping kids become successful readers. With the help of decodable books, leveled texts, close reading, fiction, and non-fiction, we've got everything we need to help our young readers become confident, enthusiastic, and skilled readers. Adding variety and flavor is the key to helping our students learn to enjoy reading and keeps them learning and thriving as they continue on their literary adventures! Related Posts
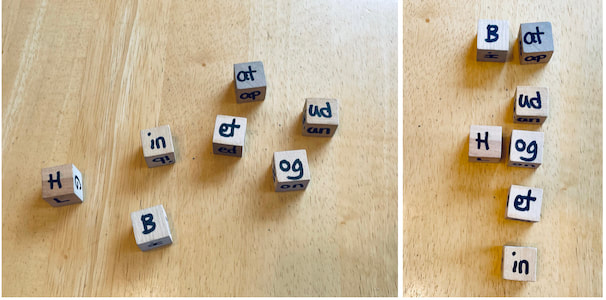
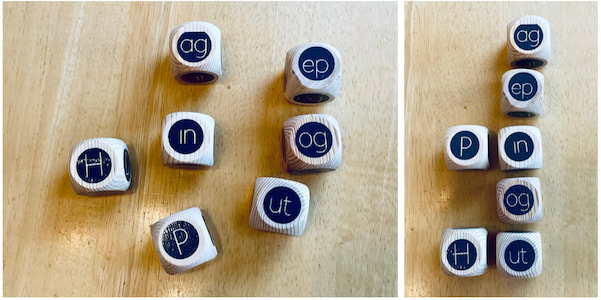
Word work activities are key to developing strong language skills and fluent readers. Working with word families is an effective way to solidify connecting groups of letters with meaning and it is fun for kids to do. Here are some more word work activities that you might want to try. 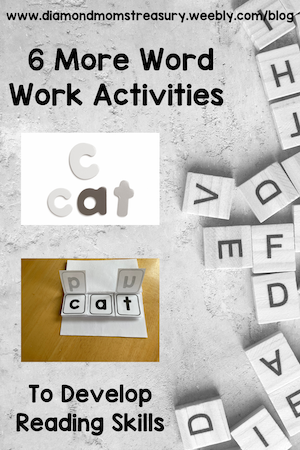 6 Word Work Activities1. Word Family SortProvide students with a set of word cards representing various word families (e.g., -at, -an, -it). Have them sort the words into the corresponding word family categories. Differentiation: For struggling students use visual aids like pictures alongside words to reinforce word family connections. For advanced students introduce less common word families or challenge them to generate new words within a given word family.  2. Word Family Flip BooksCreate flip books with word family endings (e.g., -at, -an) and a variety of beginning letters. Students can flip the pages to create new words within the same word family. Differentiation: For struggling students provide word starters with visual cues and scaffold the activity by focusing on one word family at a time. For advanced students include more complex word families and encourage them to create sentences using the words they generate 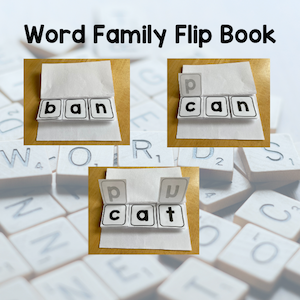 3. Word Family Word HuntsGive students a list of word families to focus on. Have them search through books or texts to find words that belong to each word family and write them down. Differentiation: For struggling students provide a list of words to search for within the text and offer support with decoding if needed. For advanced students encourage them to identify additional words that belong to each word family beyond those provided on the list. 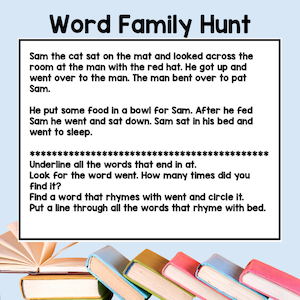 4. Word ListsUsing digraphs, blends, or other letter combinations, change the vowel and add a consonant at the beginning to make a list of words that fit the ending. For example: _and, _end, _ind, _ond, _und Differentiation: For struggling students provide some letter tiles to create the words so they can sound them out. For advanced students encourage them to add more letters to the beginning and notice suffixes such as with the word handful. 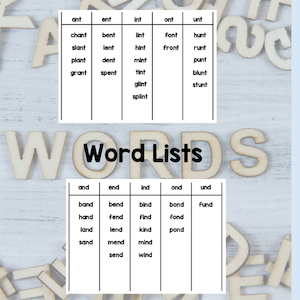 5. Real vs Nonsense Words ActivitiesProvide letter tiles and word endings and create words with them. Decide if the words are real or nonsense words. This could be combined with the word list activity above. Note: If the students can't explain what the word is, they may need to put it in the nonsense category. As they develop a bigger vocabulary, some of the words may be identified as real words. Differentiation: For struggling students try to get them to tell you why the word is real. Use pictures if needed. For advanced students have them check out words in a dictionary if they are unsure. 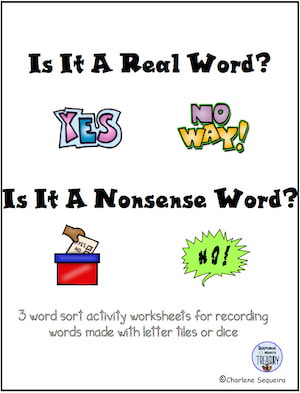 6. Real Words vs Nonsense Words Using DiceUse a set of dice with short vowel word family endings and some dice with single consonants and create word lists. Record the words as real words or nonsense words. Check the images below to see how you can create your own dice.
Differentiation: For struggling students ask them to tell you what they words are and how they know they are real words, if possible. For advanced students, add in some blends or digraphs instead of single consonants. Add in some other more complex word endings as well. 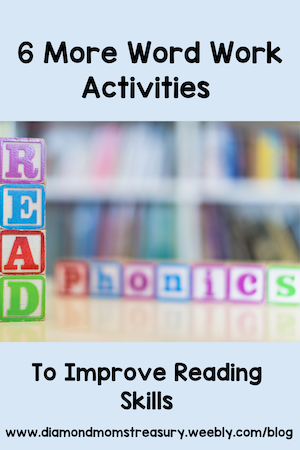 These word work activities provide engaging ways for students to practice word families and distinguish between real and nonsense words, supporting their phonemic awareness and phonics skills development. By using the differentiation ideas, adjustments can be made to suit the needs of individual learners, ensuring that all students receive appropriate support and challenge. Related Posts
Learning to read can be tricky as children learn in many different ways. Adding in a variety of skills and activities will help to engage them as they learn. Phonemic awareness and phonics are both important components of reading. Finding the combination of both that works for your students will make a difference to their successfulness in reading and writing. Here are 5 phonemic awareness activities and 5 phonics activities to consider as you plan for your lessons. I have also included some differentiations for those that need extra support and those who are more advanced. 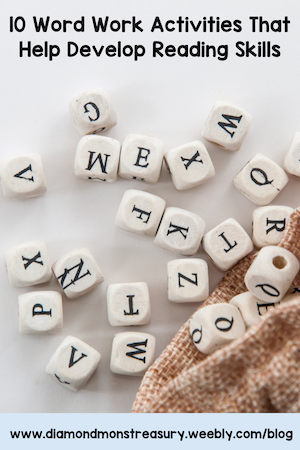 Phonemic Awareness Activities1. Picture/Sound SortUsing a variety of pictures or objects, have students sort them by beginning, middle, or end sounds. (Choose only one of these skills at a time.) This activity will help them listen for specific sounds in the words. Differentiation: For struggling students provide fewer words or objects. For advanced students provide more challenging sounds or blends. Maybe even have them sort for more categories. 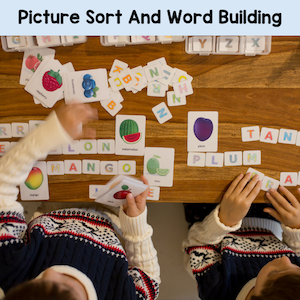 2. Rhyming Words RecognitionPresent students with pairs of words and ask them to identify if they rhyme or not. For example, "cat" and "bat" rhyme, while "cat" and "dog" do not. Differentiation: For struggling students use word pairs with clear rhyming patterns and provide visual cues like pictures to support understanding. For advanced students include words with less common rhyming patterns or words with multiple syllables. 3. Sound SegmentingSay a word aloud and have students identify the individual sounds within the word. For example, say "sun" and ask students to identify the /s/, /u/, and /n/ sounds. Differentiation: For struggling students use words with only 2 or 3 phonemes and have them tap out the sounds. I like to use the arm so they can visualize the different sounds. For advanced students use longer words or words with consonant blends. 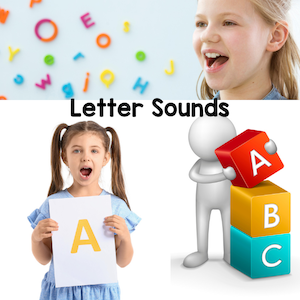 4. Odd One OutGive students 3 words and have them identify which one doesn't rhyme with the others. Differentiation: For struggling students choose word sets with clear rhyming patterns and provide visual support if needed with pictures. For advanced students use words with subtle differences. 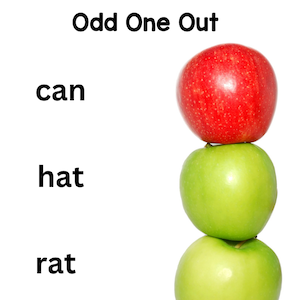 5. Sound SubstitutionSay a word and ask students to substitute one sound to make a new word. Example: cat/ change c to h/ hat. Diferentiation: For struggling students begin with simple CVC (consonant-vowel-consonant) words and provide visual aids like letter cards. For advanced students introduce words with consonant blends or digraphs and encourage them to generate multiple new words by substituting different phonemes. Phonics Activities1. Word BuildingHave a selection of letter tiles available as well as a word bank of words that focus on specific phonetic patterns or word families. Choose words from the word bank and use the letters to build the words. Differentiation: For struggling students provide a smaller set of letters and offer word banks with simpler words. For advanced students increase the complexity by introducing longer words or words with more challenging phonetic patterns. 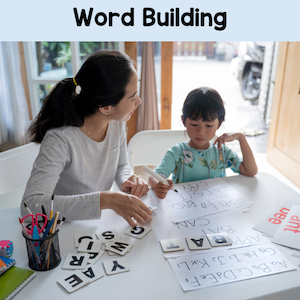 2. Word SortsGive students a collection of words and have them sort the words into categories based on specific phonetic patterns (e.g., short vowels vs. long vowels, words with different digraphs). Differentiation: For struggling students use word sets with clear differences in phonetic patterns and provide visual cues like color-coding for sorting. For advanced students include words with irregular spelling patterns or words with multiple syllables.  3. Decodable TextProvide students with decodable texts that contain words they have learned phonetic patterns for. Have them practice reading the text aloud, focusing on decoding unfamiliar words using phonics skills. Differentiation: For struggling students choose texts with simpler vocabulary and provide additional support during reading, such as using finger tracking or a glossary for unfamiliar words. For advance students select texts with more complex sentences and vocabulary, and encourage them to identify phonetic patterns in words independently. 4. Word Building RelayBuild a Word Relay is an activity where students take turns adding a letter or changing a letter in a word to create new words. For example, start with "cat" and add a letter to make "coat," then change the letter c to g to make goat and so on. Differentiation: For struggling students begin with shorter words and provide visual support with letter cards. For advanced students increase the word length and challenge them to build words with specific phonetic patterns. 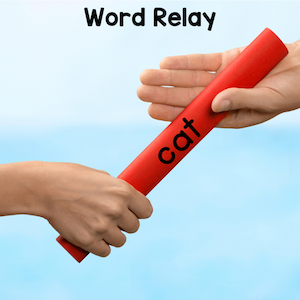 5. Phonics Board GamesCreate board games where students move pieces along a path by correctly reading words containing specific phonetic patterns. You could also include challenge cards that require students to apply phonics rules in different contexts. Differentiation: For struggling students simplify the game board and provide more frequent opportunities for reinforcement of phonetic patterns. For advanced students introduce additional challenges such as reading words with irregular spelling patterns or applying phonics rules to multisyllabic words. 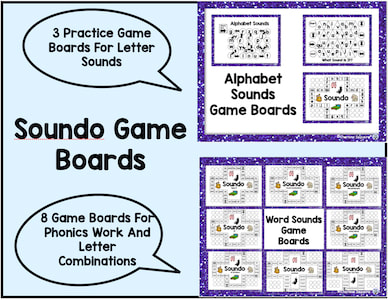 These phonics board games work great for practicing alphabet sounds and different phonetic patterns. Check them out here. If you want to try out some letter sounds, grab this free sampler below. 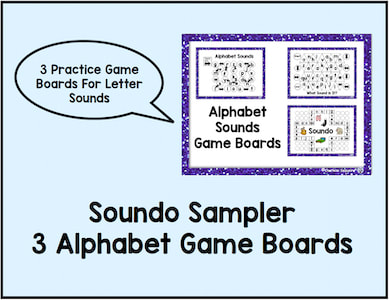 These activities provide a range of opportunities for students to practice both phonemic awareness and phonics skills, with differentiation strategies to support learners at different levels of proficiency. 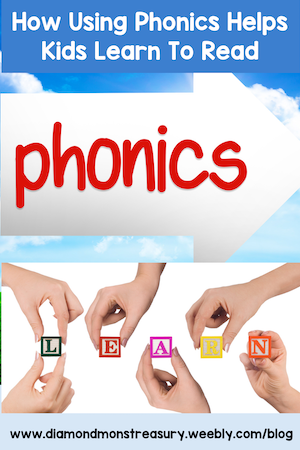 Related Posts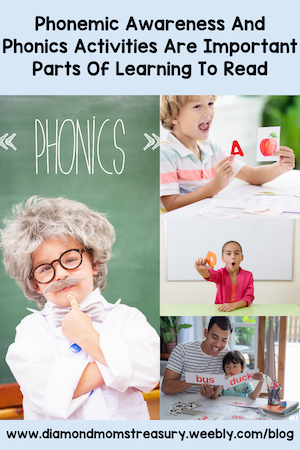 In primary classrooms, helping kids figure out reading and writing early on is super important. That's where phonemic awareness and phonics come in. Phonemic awareness is all about understanding and playing around with the sounds of language, while phonics is about connecting those sounds to letters. When we mix fun activities that cover both, we create a lively learning space that suits all kinds of learners. Learning to read is a process. Some kids get it quickly, and others need lots of extra practice to make sense of the letters and words in front of them. In a single primary classroom, it is possible to find some kids who don't know their letter sounds and others who are reading at an upper intermediate level.  How do you differentiate and help make sure that all of these children get what they need in order to be successful and engaged? That is the big challenge for most primary teachers. In today's classrooms, it is also important to make sure that the mental well being of the students is considered as well. This is an enormous task and requires a lot of preparation, creativity, and successful execution of lessons and ideas. 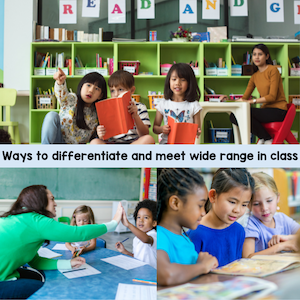 Here are some ideas and possible stepping stones or activities that might help. Making sure that everyone has a handle on their letter sounds and how letters are combined is important and it can be made into a fun activity that can be done as a class. Those that are more advanced can work with a center activity that has more advanced letter combinations while those who are still working with phonemic awareness can do some activities with the teacher as a warmup for the day. For example: The advanced kids could be working with digraphs or blends, prefixes and suffixes, or even with vocabulary development or a dictionary activity. The kids needing more help could be working with word families, segmenting words and isolating sounds, doing cvc word activities, or maybe even letter sounds, if necessary. 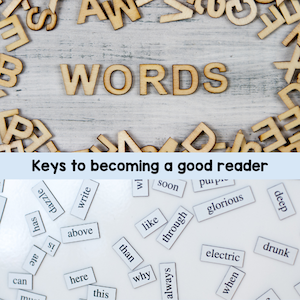 Guided reading activities and centers help to manage several different activities at the same time and they also help to keep everyone engaged. Check out my post on how to set up and run guided reading groups if this is new to you. 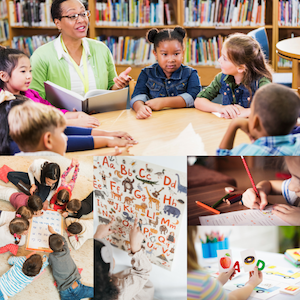 Of course, you will need a good selection of materials and activities on hand in order to provide variety and appropriate materials for each of the different groups. Choosing activities for specific themes can also be a good motivator. For instance, during the winter, kids are excited to see the snow and they love to do activities that are related to it. Here are a couple of bundles that I just created of some my winter literacy materials that have that in mind. Click on the images to check them out. You can also get a free sample from my short and long vowels activities here.
If you are looking for a variety of winter reading material for different levels, here are a few that I have used successfully in the past. I created some study guides to go along with them. Owl At Home Emma's Magic Winter The Kids In Ms Coleman's Class Snow War Stone Fox 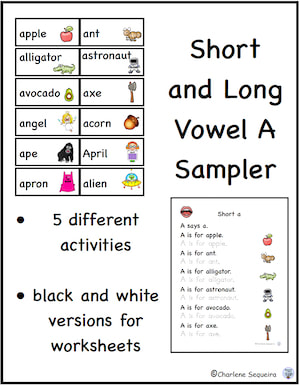 Reading is also necessary in other subject areas. Kids need to be able to understand directions for math and science, and read informational text for research projects and social studies. These are just a few of the areas where they may need to read. Again, adding some creativity and themed activities will help them to engage even when the language may be a bit difficult. If you want some fun activities to do with math and science, you can check out my recent blog posts for winter geometry and winter measurement. 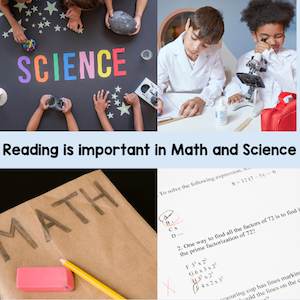 By blending phonemic awareness and phonics activities and tailoring them to different needs, we're making sure every student gets the support they need to become confident readers and writers. It's all about fostering that love of learning from the get-go! 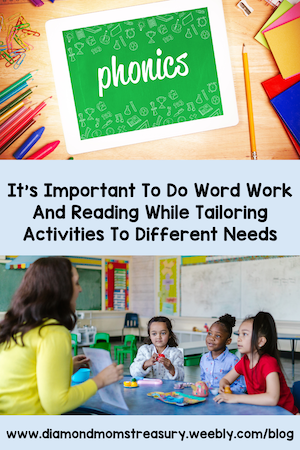 Next time I will share some specific activities that will help with differentiating and engaging kids as you incorporate phonemic awareness and phonics activities in the classroom. Related Posts
|
About Me Charlene Sequeira
I am a wife, mother of 4, grandmother of 9, and a retired primary and music teacher. I love working with kids and continue to volunteer at school and teach ukulele. 
Categories
All
|


 RSS Feed