Welcome To My Blog |
|
Welcome To My Blog |
|
|
Recently we have been focusing on kids and how to keep them learning during the summer while still having fun. Now it's time to help teachers begin planning for a new school year while not getting too stressed out. Here are some back to school tips that hopefully will help you to start the new year refreshed and ready to go but still allow you to enjoy the remaining days or weeks of summer break.  1. Keep the good parts and change the other partsTake what you've learned in previous years and include the good parts in your teaching and change up the parts that didn't work well. Reflecting on past successes can be incredibly rewarding. Perhaps you introduced a new interactive activity that captured your students' imaginations and helped them grasp a difficult concept. Or maybe you developed a unique technique that motivated them to engage deeply with the material. These successes are the building blocks of your teaching philosophy, and it’s essential to carry them forward. By identifying and replicating these effective strategies, you can create a more engaging and effective learning environment year after year. However, reflection also involves an honest assessment of what hasn’t worked. Every teacher has encountered lesson plans that fell flat, activities that failed to engage, or assessment methods that didn’t quite measure up. These experiences, while challenging, are invaluable. They provide critical insights into what needs to change. Perhaps the pacing was off, the material was too complex, or the method didn’t align with your students' learning styles. Whatever the case, acknowledging these less successful aspects is the first step toward improvement. Adapting your teaching methods doesn’t mean starting from scratch. It involves thoughtful tweaks and adjustments based on past experiences. For example, if a particular instructional strategy didn’t resonate with your students, consider modifying it rather than discarding it entirely. Small changes, such as incorporating more visual aids, breaking down complex information into more manageable chunks, or integrating technology in new ways, can make a significant difference.  2. Change up your classroomConsider rearranging your classroom at the beginning of the year. A fresh layout can revitalize both you and your students, making the space feel new and inviting. Decorate with pops of color, inspirational messages, and designated special centers for various activities. This not only makes the classroom more visually appealing but also creates a sense of excitement and curiosity among students.  Here are some calendar headers that might be helpful for you. Click on the image that works best for you.
3. Do some basic planning for the first weeksIn many districts, at least here in Canada, classes can be reconfigured after the school year begins based on enrollment numbers and budgets. This can cause some uncertainty about what grade you may end up with. Over planning and preparing for one group and then having it completely change in grade level or configuration can be very stressful, so I suggest that you do some basic planning for the first few weeks and hold off on the deeper concepts until the classes are settled. While waiting, plan basic lessons that work for both returning and new students. These foundational lessons can help ease everyone into the new school year smoothly.  4. Decide on your must-have rulesClassroom management is necessary in order to have a respectful and caring classroom environment. There are many different aspects to this and many are determined by your teaching style and your classroom dynamics. Decide on your must-have rules and classroom management strategies. Establishing clear expectations from the outset helps create a structured and respectful learning environment. Some of your rules may be non-negotiable, but many can also be determined as a class community.  5. Take brain breaks and movement breaksIncorporating brain breaks and movement breaks while planning and setting up your classroom is crucial. Just as kids need to have breaks during to day, so do you. These breaks will improve your productivity. Continue to add in brain breaks as you do things throughout the year as well. These breaks are important for your well-being and they model the importance of this for your students as well.  6. Consider your curriculum goals for the yearAs you set up your classroom, also consider your curriculum goals for the year. Start brainstorming ideas for how to implement them, ensuring that they are both ambitious and achievable. Plan a basic schedule that includes a mix of academic and social-emotional learning (SEL) activities. This balance is essential for creating well-rounded development in your students. Remember, this schedule can and should be adjusted as needed to respond to the changing needs of your classroom.  7. Take time for self careMentally preparing yourself is just as important as physical preparations. Take time to relax, practice mindfulness, and engage in activities that reduce stress. This mental preparation helps in maintaining a positive outlook and resilience throughout the school year. It's essential to take care of yourself during this busy time. A well-rested and healthy teacher is more effective and more capable of handling the demands of the school year.  As you prepare for a new academic year, embrace the lessons of the past with an open mind and a willingness to change. Consider some of the tips I've suggested and remember to take care of yourself. By doing so, you can create an engaging and productive learning environment that not only meets the needs of your students but also inspires them to reach their full potential.  Related Posts
It's hard to believe that I retired 9 years ago. It seems like it was yesterday. I guess that is partly because I haven't totally left school. I still volunteer with small groups a couple of times a week. I was looking back recently and I stumbled on a post I wrote when I first retired. It's interesting to see that my thoughts haven't changed much since I wrote this post. Here is an updated version.  Back To School: Reflect And Refresh There were four different things to reflect on: communication, organization, content, and big summer projects. Here are my thoughts from back then and any updates that I feel are important to add. CommunicationThen: This is very important at all times, but at the beginning of the year it is important to create relationships and help new students and their families feel comfortable about sharing with you. Even though I won't have my own class this year, it is still important. It will also be necessary for me to maintain communication with the staff so that I can stay on top of what is happening around the school. Now: As I continue to work with students needing extra support, it will be important to make a relationship with them and let them know that they are in a safe place where they can ask questions and get extra practice. Connecting with the teachers and making sure that we are clear on what they would like me to help the children with is key. Giving them updates and sharing successes and concerns with them is also going to be key to supporting the learning.  OrganizationThen: This summer my organization took a different emphasis. I had to pack up and empty out my classroom. I had so much stuff that it took me a couple of weeks to do so. I gave lots of my material to other teachers that are just starting out, recycled and threw away material that was too old or outdated, and brought home the rest. Then I had to sort through the material that I brought home so that I can access things easily when I need them later. Now: I still have many resources that I created and that are relevant for use today when volunteering. I have organized these by subject and I have a bookshelf at school where many of them are stored. I also have some of my hands on activities filed away here at home. I have always been a collector of kids books, so I have a large collection of book sets of different levels at school for when I do reading groups. I do use some of the school's materials, but not often. I have created guided reading book studies for many of the books, so I use those. When I need specific resources for different activities, I make copies from the resources that I have created.  ContentThen: I am looking forward to creating materials for my colleagues. I will still be able to work with kids while trying them out in real situations. The content will be determined by the curriculum being taught by my colleagues and by their requests for materials. Now: Resources I use are based on the needs of the students I work with. I try to coordinate what I am doing with themes that the class is working on so that they support each other. If I make resources to use with the students, I often give a copy to the teacher as well.  My Big Summer ProjectThen: I am hoping to develop more materials for my TPT store so that I can help to impact student learning even while retired. I am learning so much about how to improve the appearance of my products and my storefronts. It will be a big job, but I am excited to continue learning and improving. Now: This is still my hope, but with new changes to the TPT site, I am making more changes to the appearance and information about my resources. I plan to continue updating more resources and improving them.  Well, there you have a then and now recap of my reflections and refreshments. I plan to continue to add more value to what I am creating and I will share this with you in future posts. For now, I hope that you are enjoying your summer and that you are taking some time to do some reflecting and refreshing as well.  Here's a task card template that you may enjoy using for creating an activity while you are slowly transitioning from vacationing to planning mode in the next few weeks. Stay tuned for some back to school tips and ideas for planning the first weeks of school. 
Some of my colleagues and other teachers here in Canada are just starting their summer breaks, so they may want to put this information aside for awhile and revisit it in a few weeks. For other teachers who are halfway through their summer break, if you are anything like me, your brain is starting to think about the next school year.  At first, it's just a few ideas and possible lesson thoughts, but gradually the thoughts increase and start to invade your dreams and nighttime moments. This isn't necessarily bad, but if it starts to take over your thoughts and cause stress, something needs to be done to reduce the stress.  Years ago I learned the hard way that it doesn't always pay to have everything planned in detail too far in advance. In our district and many others across Canada, class sizes and grades can be subject to change after the beginning of the school year based on school enrollment and budgets. I remember taking a trip during the early part of the summer and then planning a whole unit for school startup based on some of the ideas and material I gathered during that trip. I had the bulletin boards done and the materials all prepared, when I was told that my grade was going to change. All the work I had done was for naught as it was too difficult for the new grade. I was so disappointed that I had to give up on the idea and come up with a different plan.  Fast forward to today, and my advice for teachers is to choose some ideas and broad concepts that can be taught to the grade above and below what you are expecting to teach and build on them for the beginning of the year. Not only will the material be more appropriate for whatever grade you are given, but it also will provide some differentiation for those who need more support and those who need enrichment. After my above mentioned episode, this was the strategy I began to use and it worked well for me for the remaining years of my teaching.  Coming up with creative ideas that will capture the attention of your students can be difficult at times, but it's worth it. Take some time during your summer break to think of what kinds of activities capture your attention and see if there's a way of incorporating that feeling into lessons you plan for the beginning weeks of school. You may be amazed at some of the ideas that you will come up with.  Because summer time is different for everyone, many children will not do as much work on practicing skills learned during the year, so you will need to be prepared to do review of many of these skills with them when school resumes. Finding activities that help with review and are engaging for those who need less review can be a challenge. Try using some activities that involve real world situations so that you can motivate your students to participate more readily. Hands on activities and concrete examples work best with younger children as they are not always ready for abstract work. Even those who do have that mastered enjoy the hands on activities. Take advantage of this and the engagement will help them to review and reinforce skills so they are ready to continue learning more advanced concepts.  The weather is usually still great for getting outdoors, so take advantage of it and plan some lessons for outside. If you add in an element of play or physical activity to the lessons you will involve more of the whole child instead of just the intellectual part. Here's an example that I used when I was teaching music. We would play a version of California Kickball. I was the pitcher and before I threw the ball, the person who was up had to correctly tell me what rhythm I was clapping or answer another musical question. This could be adapted to answering a math question or a science fact or whatever topic you choose, but it combined some form of academics with the game. Maybe you could do something similar with foursquare or a skipping game.  These are just a few tips to consider as you are spending time relaxing during the summer. Try to remember to enjoy your time off and not get too caught up in the planning for the next school year yet. There will be time for deeper planning as the break gets nearer to the end.  Related Post
For some, summer break is just beginning, and for others, it is halfway through. This is a time for having fun, enjoying family time and friends, and taking time away from school studies. However, learning and practicing skills doesn't have to end. It just needs to be approached in a different way. Just think of all the different things that can be done during the summer that can be turned into learning experiences. All we need to do is stop and take a closer look and we can see math and science all around us. We can learn about social studies and practice our skills during our outdoor adventures.  Camping ActivitiesCamping is a great way to explore nature and learn more about the environment. It's a family time that can lead to many adventures and discoveries. There are many different types of activities that can be done that can enrich the learning experience. Go on hikes and explore the trails and the different scenery. This provides opportunities to make comparisons between different areas and what can be found there. It's also a great way to get exercise. Going on nature walks is a great way to get to learn more about the different plants and animals that are local to the area.  Scavenger Hunt And Nature ArtOrganize a scavenger hunt where family members search for specific plants, insects, rocks, and other natural items. Create a scavenger hunt list that includes different types of leaves, birds, insects, and rocks. As you find each item, discuss interesting facts about them. For example, talk about the lifecycle of a butterfly or the different types of rocks and how they form. This activity promotes observation skills and teaches about local plants and animals. Use natural materials collected during the scavenger hunt to create art projects. Make leaf rubbings, paint rocks, or create a nature collage. This promotes creativity and appreciation for nature.  Beach AdventuresSpending time at the beach and summer vacations go hand in hand, so use this time to have fun and learn at the same time. Depending on where the beach is and what kind of water body it is can provide different experiences. Rivers and lakes will be different from the sea or ocean and they will provide a different landscape to discover. Depending on where you are, you can collect shells, build sandcastles, and explore tide pools. This could be a great time to discuss the purposes and similarities or differences of the different water bodies as well how they behave in different manners.  Vacation TravelsIf you go on trips or outings, have children keep a travel journal. They can write about the places they visit, draw pictures, and note interesting facts. This activity enhances writing skills and geographical knowledge. Before leaving, check out different special activities, landmarks, and events that may be happening and plan to incorporate some of these in your itinerary. You could explore local museums that focus on art, history, science or culture. You could also attend local festivals to experience traditional music, dance, food and crafts. These are all good ways to learn about the culture and history behind the celebrations. If you are going to areas that are more isolated or away from city centers, you could do activities that explore the area and create memories of the experiences.  Day Trip ActivitiesIf you wish to stay close to home or take day trips, there are many types of activities that can be done to enrich learning experiences. Here are a few ideas. Spend a day at a science center or planetarium. Participate in hands-on experiments and watch educational shows about space and science. Visit aquariums and zoos to learn about marine life and animals. Attend feeding sessions and educational talks. Visit a local farm to learn about agriculture and animal care. Participate in activities like picking fruits, feeding animals, and milking cows. Go geocaching, and search for hidden caches while learning about the locations you visit.  It's important for kids to have fun this summer and enjoy being with family and friends. But I would also like to encourage you to help them take some time to learn more about the world around them and keep building on the skills they learned throughout the school year. This will set them up for success in the new school year.  Related Posts
Summer time is supposed to be fun, but we don't want kids to stop learning for a couple of months so here are some ideas to keep the learning happening while enjoying the summer break. Many of these ideas can be used throughout the year as well. Math happens all around us, but we often overlook it. There are so many different real world activities that can be done that involve math. Here are a few ideas to try.  Measurement activitiesCooking and baking are great ways to practice using measurement and then enjoying the food afterwards. When measuring ingredients, kids get practice with fractions, addition, multiplication, and division. They also get to learn about temperatures. For more measurement practice, use rulers, tape measures, or measuring cups to measure objects around the house. Compare lengths, weights, and volumes to practice measurement skills.  Outdoors activitiesKids love to be outdoors during the summer, so take advantage of that time to incorporate some math activities. Sports is a great way to do math. Kids can keep score, calculate averages, and measure times and distances. For example, how far they can throw a ball or how long they can run. Get out into nature with math. Kids can collect natural items like leaves, rocks, or flowers and use them for counting, sorting, and pattern-making activities. They can explore concepts like symmetry and classification. They could also do a math scavenger hunt where they look for different shapes, patterns, and objects.  Working With MoneyThere are a few different ways that money lessons and practice can be done. Here are some ideas to consider. 1. Create a store and practice counting money, making change, and budgeting. 2. Go shopping. Give the kids a budget and let them help with making a shopping list, comparing prices, and calculating totals. 3. Do a yard sale and let the kids have an area or table where they can sell some of their things. Let them take responsibility for handling the money for their sales. They could also have a lemonade stand or sell cookies as part of this activity.  Physical activitiesAdding movement or physical activity to math can help reinforce concepts in a fun way. Here are some ideas to consider. 1. Use jumping rope, clapping games, or songs to practice skip counting and multiplication tables. 2. Solve math problems while playing hopscotch. 3. Do some timed running activities and practice graphing the results afterwards.  Critical thinking/Spatial reasoning activitiesBeing able to think critically and reason spatially are skills that require practice. Jigsaw puzzles and games of logic work well here. Many board game activities can also work. Building things also helps. Here are a few ideas to try. 1. Use building toys like LEGO or blocks to explore geometry and spatial reasoning. Challenge children to build specific shapes or structures and discuss their properties. 2. Solve number puzzles and riddles together. You can find these in puzzle books or online, and they help with logical thinking and problem-solving skills. 3. Work on jigsaw puzzles, Sudoku, or other logic puzzles that require spatial reasoning and critical thinking.  This is only a small sampling of things that can be done to incorporate math activities into real world situations while having fun. They will enjoy doing these kinds of activities and reinforce or maintain their skills without them even realizing it. After all, summer is supposed to be a break from school so doing lots of worksheets and math lessons is not really the way to get the kids engaged when they just want to get outdoors and enjoy their break.  Related Posts
As summer approaches, children everywhere look forward to a well-deserved break from the school routine. While summer is a time for relaxation and fun, it's also important to provide opportunities for kids to stay engaged to prevent the "summer slide" – the tendency for students to lose some of the academic gains they made during the school year. Making sure that the activities are fun and don't feel like work will help to keep them motivated and interested in participating. There are many ways to do this. Games are one way to do so, but there are other ways too. Here are some ideas.  Use Educational GamesBoard games and online games can cover a wide range of subjects and they are fun to play. Some can be played with others, and some are meant to be played alone. Games like Scrabble and Monopoly incorporate literacy and math skills. For younger children, word games, Snakes and Ladders or Bingo are some other games that can work. Online games are interactive and can cover a range of subjects, from math and science to reading and art.  Read RegularlyReading is one of the best ways to keep skills sharp over the summer. Encouraging kids to pick books that interest them, whether it’s an adventure story, a fantasy novel, or a non-fiction book about animals can help them develop reading habits. Many local libraries also offer summer reading programs that reward kids for reading.  Write OftenWriting journals can help kids to keep track of their daily adventures, activities, dreams, and other memories. Creating stories and poems or writing letters are other ways to practice writing skills. Creating a memory box to store these items in could be a great way to encourage them to look back at their writing in future years.  Real Math ActivitiesMath doesn’t have to be just worksheets and flashcards. Involving kids in cooking helps them practice measuring ingredients. Playing games that require counting and strategy helps develop number skills and critical thinking. Shopping trips can turn into math lessons that tally prices and calculate discounts. Real math activities help kids see its importance in everyday life.  Do Hands On Science ActivitiesScience is all around us, and summer is the perfect time for hands-on experiments and exploration. Simple experiments like making a baking soda and vinegar volcano, growing crystals, or even cooking can teach kids about chemistry and physics. Nature walks and trips to the local zoo or science museum can spark curiosity and provide real-world learning experiences.  Family Activity TimesSummer is a great time for family outings and activities that combine fun with learning. Visit museums, historical sites, or botanical gardens. Many places offer interactive exhibits that are both educational and engaging. Even a family hike can become a biology lesson as you identify plants and animals along the trail.  The goal of doing these types of activities is to help kids maintain the academic skills they worked so hard on during the school year. They can avoid the summer slide and return to school in the fall ready to succeed. Remember, the goal is to make learning enjoyable and natural, seamlessly blending education with the joys of summer.  Here is a sports themed game board that might be fun to use for creating some different games or activities.  Related Posts
In order to manage the multiple challenges in today's classrooms we need to address ways of differentiating during lessons and how to handle multiple groups at the same time. For the purposes of this blog post, I will look at differentiation in math and literacy and I will try to address ways to deal with active classrooms.  Differentiating Lessons In MathThere are several different strategies available that can be used to make teaching math work more successfully in classrooms with a wide range of understanding and knowledge of math concepts and skills. A cookie cutter lesson will not work well if some students are struggling and others are bored because they already know the concepts being taught. Here are some suggestions to help make math time work for more students and help teachers maintain some sanity.  Guided Math GroupsGuided math groups can help with tailoring the lessons to the abilities of specific groups of students. The curriculum area can be addressed with material at different levels covering the same concept. Begin by dividing students into small groups based on their current understanding of a math concept. Then prepare appropriate materials and activities that will work with these groups. Some groups may be working on foundational skills while others may be working on more complex concepts within the same area. Here are some possible differentiations strategies for lessons. For groups that are struggling, start with visuals and manipulatives and work on concrete activities before moving to the abstract forms. Provide scaffolding and small group instruction with smaller, more manageable chunks of information or simpler questions and problems to ensure that the concept is understood before adding more complex material. Try using a stations approach so that the same basic concepts and skills are being used but with different levels of material or skills according to the needs of the students. Use technology to provide games and activities that can be tailored to the needs of the students.  Math Concepts Differentiation ExamplesWhen teaching addition and subtraction provide different levels of questions and activities such as basic facts, double digit subtraction without regrouping, addition and subtraction with regrouping, larger number addition and subtraction, basic word problems and more complex combinations of these skills for those needing enrichment. For a lesson on multiplication, create tiered worksheets with different levels of difficulty. For example, one worksheet could focus on basic multiplication facts up to 10, another could involve two-digit by one-digit multiplication, and a third could include word problems requiring multi-step multiplication. For long division, start with simple division problems and gradually increase the difficulty as students demonstrate proficiency. For fractions, students who struggle could work on foundational skills while others work on more advanced fraction operations or problem-solving tasks. Offer a choice board with various math activities related to the same topic. For instance, for a unit on geometry, students could choose to complete tasks such as creating geometric shapes with manipulatives, solving geometry puzzles, researching real-world applications of geometry, or designing their own geometric patterns.  Differentiating Reading LessonsTo handle the wide range of levels in reading, guided reading is a popular go-to because it allows for small group instruction that meets the needs of the various groups. During guided reading sessions, it's possible to provide tailored support to small groups of students as they read texts at their instructional level. Using prompts, questions, and scaffolding techniques helps to deepen comprehension and develop critical thinking skills. Close reading activities can also be differentiated based on students' readiness levels, with varying levels of text complexity and support. Work stations and rotations help with managing the reading groups that are not getting instruction from the teacher. This allows the teacher to do mini-lessons or instructional sessions with one group at a time while the other groups engage in independent or collaborative activities. It's important for the teacher to rotate between groups as needed, providing targeted instruction, feedback, and support based on each group's needs and progress. Prepare a variety of assignments and activities that cater to the diverse needs and abilities of each group. Offer options for students to choose tasks based on their interests, learning styles, or readiness levels. Provide scaffolding and support materials as needed to ensure that all students can successfully complete the tasks.  Differentiating Responding To Reading and WritingSet up word work stations with activities targeting different literacy skills, such as phonics, vocabulary, spelling, and grammar. Students can rotate through the stations and choose activities that align with their individual needs and interests. For example, one station might focus on decoding skills, while another might involve vocabulary games or word sorts. Offer a variety of options for responding to texts to accommodate different learning preferences and abilities. For example, students can choose to write a summary, create a visual representation (such as a poster or comic strip), participate in a book discussion, or record a video book review. Provide graphic organizers and visual aids to help students organize their thoughts and make connections between ideas. Visual supports can include story maps, Venn diagrams, concept webs, and graphic timelines. These tools can be especially helpful for students who struggle with reading comprehension or expressing their ideas in writing. Offer a range of writing prompts and assignments that allow students to demonstrate their understanding in different ways. For example, students can choose to write a narrative, persuasive essay, informational report, or creative poem based on the same topic or theme. Provide scaffolding and modeling as needed to support students in developing their writing skills. Incorporate a variety of multimedia resources and technologies to engage students and accommodate different learning preferences. This can include audio books, podcasts, digital interactive texts, educational videos, and online learning platforms. Providing options for how students access and interact with texts can increase motivation and accessibility.  By incorporating these differentiated instructional strategies, teachers can effectively address the diverse learning needs of their students and ensure that all students have the opportunity to succeed. Working With Active ClassroomsEvery year the makeup in a classroom is different. Sometimes it's a quiet, work-focused group, sometimes it is a bouncy, active group, and other times it is a mix of somewhere in between. Classroom strategies for management need to be flexible to address these different kinds of classes. It's important to maintain the basic rules, guidelines, and routines for a respectful, caring environment, but the day to day approach to lessons needs to change to meet the needs of each different class we have. When you have an active class, it's important to have lots of movement, body breaks, hands on activities and variety in your day. Kids will need to know when you require quiet work and understand that they will have time to talk and move at other times during the day. If you show them that these times are there, and allow them to be more active at these times you may be surprised to find that they can work quietly for periods of time. This may take some time to establish, so you should make the quiet work times short at the beginning and gradually increase the length throughout the year.  It's important to note that not all the children work well in active situations, so you need to find some balance for those kids too. Maybe you can find some quieter areas in the room for them or provide headphones. The rest of the class will need to understand that not all people work well in the same environment so it's necessary to work together to help each other find a way to work well and be respectful of the ways each one works best. If the class works out some ways together, they will be more willing to follow them.  When confronted with multiple challenges and complex teaching situations there's no quick fix, but with strategies and support from administration and others, hopefully some of these situations will be a bit more manageable.  Related Posts
There are many different issues that teachers deal with on a regular basis in the classroom that make teaching challenging. These can range from struggles with differentiation in various subject areas to managing different types of behavior in the classroom. Managing one or two of these issues in a classroom, can be doable, but with several issues happening simultaneously, it is easy for things to quickly get out of control. Here are a few of the challenges that were shared with me recently along with some suggestions to help manage them.  Some Challenges In Today's ClassroomMany teachers are dealing with large classes, multiple grade levels, a wide range of abilities academically, differentiating and teaching the required curriculum, handling active children, tattling and other classroom management issues. In order to provide some suggestions, it's important to first look at some of the common reasons for behavior challenges with kids.  Common Reasons For Behavior Challenges With KidsYoung children may exhibit behavior issues at school for a variety of reasons. Understanding these reasons can help teachers and parents address the underlying causes effectively. When I started looking at some common reasons for behavior issues in young children, I was overwhelmed by how many different reasons were possible. Several stood out. Young children are still developing the ability to manage and regulate their emotions. This can lead to outbursts, frustration, and difficulty coping with stress. They are still learning how to interact appropriately with peers and adults, which can result in misunderstandings, conflicts, and social frustration. Differences in cognitive development can affect a child's ability to understand rules, follow instructions, or stay focused on tasks. Struggling with academic tasks or having undiagnosed learning disabilities can lead to frustration and acting out. Conditions such as ADHD, autism spectrum disorder, or sensory processing issues can also influence a child's behavior. Children may exhibit behavioral issues when they are feeling anxious or stressed. This can be due to academic pressure, social challenges, or other stressors. Being bullied or bullying others can result in behavior problems. Children may act out in response to being victimized or to exert control over others. The desire to fit in or gain acceptance from peers can also lead some children to engage in inappropriate behaviors. Overcrowded classrooms, lack of structure, or inconsistency in rules and expectations can contribute to behavioral problems. Inconsistent application of rules and consequences can confuse children and lead to testing boundaries and acting out. Some children act out to gain attention from teachers or peers, especially if they feel neglected or overlooked. Children who are not sufficiently challenged or who find the material unengaging may become disruptive out of boredom.  Stressful home situations can impact a child's behavior at school. These situations can vary, but here are a few examples: family conflict, divorce, or financial instability, changes such as moving to a new home, the arrival of a new sibling, or starting a new school. Lack of sufficient sleep can significantly impact a child's mood, attention span, and overall behavior. Poor nutrition or hunger can also affect a child's energy levels and ability to concentrate, leading to behavior issues. Ideas For Managing Multiple Groups At One TimeWith large classes and a range of abilities in each class, using a station approach is almost the only way to effectively get to all the kids. Managing multiple groups at once can be challenging but is essential for providing individualized support and instruction to students. Here are some ideas for effectively managing multiple groups simultaneously. If guided reading and math groups have been used, these ideas will be familiar. 1. Set up different learning stations around the classroom, each focusing on a specific activity or skill. Assign students to small groups and have them rotate through the stations at timed intervals. As one group works on independent practice or collaborative activities at a station, the teacher can provide direct instruction or guided practice to another group. 2. Arrange your classroom to accommodate multiple groups working simultaneously. Use tables, desks, or floor space to create separate areas where each group can work independently without disturbing others. Consider using portable whiteboards or privacy partitions to delineate group workspaces. 3. If available, enlist the help of support staff or classroom aides to assist with managing and supporting multiple groups. They can provide additional supervision, facilitate group activities, and offer individualized assistance to students as needed. 4. Conduct brief mini-lessons or instructional sessions with one group at a time while the other groups engage in independent or collaborative activities. Rotate between groups as needed, providing targeted instruction, feedback, and support based on each group's needs and progress. 5. Prepare a variety of assignments and activities that cater to the diverse needs and abilities of each group. Offer options for students to choose tasks based on their interests, learning styles, or readiness levels. Provide scaffolding and support materials as needed to ensure that all students can successfully complete the tasks.  6. Incorporate technology tools and resources for independent learning and group collaboration. Educational apps, online learning platforms, and interactive whiteboards can provide engaging activities, immediate feedback, and opportunities for virtual group work, allowing students to work at their own pace while the teacher works with other groups. 7. Circulate throughout the classroom to monitor student progress, provide assistance, and address any issues that arise. Schedule regular check-ins with each group to review their work, clarify instructions, and offer guidance. Use informal assessments and observations to gauge student understanding and adjust instruction as needed. By implementing these strategies, teachers can effectively manage multiple groups at once, providing personalized support and instruction to meet the diverse needs of all students in the classroom. Working With Multiple Grade LevelsIt would be unrealistic to expect to be able to cover the entire curriculum for each of the grade levels in depth, but there are some ways to make teaching to multiple grades work. After all, in the one room schools of the past, teachers had to figure out how to cover multiple subjects and grades every day. Granted, teaching is more complex now and the curriculum has also changed, but it's possible to make it work with some strategies. 1. Take a look at the curriculum for each grade and find the common themes or skills. Work with these themes and differentiate the material to accommodate the multiple grades and levels of the students. 2. Consider team teaching with someone and each taking one grade to teach a specific subject or theme when it doesn't work well in a single classroom. This can especially work in math where the concepts and skills can be significantly different for the various grade levels. 3. Collaborate with colleagues within and across grade levels to share resources, lesson plans, and teaching strategies.  Managing behavior issues is more difficult because of the many possible reasons for the behaviors. Classroom management strategies can be used and often help if they are fair, consistent, and appropriate for the ages and needs of the kids. Different strategies will be needed based on the academic, physical, and emotional needs of the children and the amount of support that is provided to meet these needs.  In Part 2, I will provide more ideas for dealing with different classroom behaviors as well as differentiation in math and literacy lessons. Related Posts
Summer break has arrived for some and for others the end of the year is close at hand, finally! Teacher burnout is becoming more common and teachers need this time to take care of themselves. This has been a tough year for many teachers and they are ready for a well-deserved break to refresh, recharge, and focus on their own mental well-being.  Teacher burnout is a significant issue that affects teachers' well-being, job performance, and retention rates. To help teachers avoid burnout, we need to address both professional and individual needs. The workload for today's teachers is heavier and more complex than in the past. It's important to help teachers manage this workload and give them the support necessary to do so. Adequate planning time and resources are needed as well as professional development and support, administrative support, and recognition and appreciation to help them want to keep going. In a perfect world, all of these things would be available to teachers, but we all know that it's far from a perfect scenario for teachers nowadays. Given the current reality where many of these ideal supports might not be available, here are practical steps and strategies that can be implemented in schools to help teachers avoid burnout even in less-than-ideal situations.  Teachers can: Focus on time management and prioritizing tasks. Determine what is most impactful for student learning and distinguish between urgent and important tasks to make sure time is being used wisely. Share time management techniques with each other to help with allocating specific times for planning, grading, and personal breaks. Try to develop streamlined systems for grading, lesson planning, and classroom management to save time and reduce stress. Utilize digital tools and apps that can automate repetitive tasks, such as grading software or lesson planning templates.  Administration can: Encourage peer collaboration where teachers can share resources, lesson plans, and strategies to reduce individual workload. Establish regular informal meet-ups or virtual meetings for teachers to discuss challenges and brainstorm solutions together. Make small but meaningful gestures to show appreciation, such as handwritten thank-you notes, shout-outs during staff meetings, or small rewards for achievements. Regularly acknowledging the hard work and successes of teachers can boost morale significantly. Offer flexible and relevant professional development opportunities that teachers can engage with at their own pace, such as online courses or workshops that can be accessed on their own. Focus on PD that addresses immediate classroom challenges and provides practical solutions.  Here are a few ideas that administration can do to help with teacher well being. Encourage teachers to prioritize self-care activities, such as exercise, hobbies, and relaxation techniques. Promote mindfulness and stress management practices, such as meditation and yoga, that can help teachers maintain their mental health. Offer workshops on mental health awareness and coping strategies. Provide information about local mental health resources and services that teachers can access independently. Arrange for occasional on-site wellness activities, such as yoga sessions or stress management workshops, if possible. Help teachers set boundaries to maintain a healthy work-life balance, such as limiting work-related communication during personal time. Encourage them to say no to additional responsibilities that may overwhelm them. Support the creation of peer support groups where teachers can share experiences, challenges, and strategies. Encourage collaboration and team teaching to reduce isolation and build a sense of community. Give teachers greater autonomy over their teaching methods and curriculum design to develop creativity and job satisfaction. Encourage them to pursue projects or initiatives they are passionate about within the school.  Teachers also need to take care of their individual needs to maintain their own physical well being and mental health. They need to find strategies for self care and stress management, develop professional boundaries, have access to mental health resources, find peer support networks, and be given some autonomy with their teaching. It's important that we help teachers find the joy in teaching again and encourage them to focus on the aspects of teaching they enjoy, whether it's a particular subject, a successful lesson, or positive interactions with students. Encourage them to integrate passion projects or creative activities into their teaching to reignite their enthusiasm.  By implementing these strategies, schools can create a supportive environment that enables teachers to effectively balance their instructional responsibilities with the additional roles they play in supporting students' emotional and mental well-being.  There are many different issues that teachers deal with on a regular basis in the classroom that make teaching challenging. Next time we will look at how to make some of these challenges more manageable. For now, I hope that some of the strategies suggested above will be implemented and that teacher burnout can be avoided, or at least reduced. Related Posts
Burnout and overload is becoming a common occurrence. Teaching has become much more complex and teachers wear many hats as they enter the classroom each day. Not only do they have lessons to teach, they have to help support those who are struggling with emotions, hunger, mental health issues, bullying, and low self esteem. No wonder they are feeling overwhelmed and exhausted. Some places have huge teacher shortages so teachers are finding it harder than ever to deal with the needs of their students and they are often required to cover other classes as well. We need to find a way to fix this or the crisis will be too great to handle. 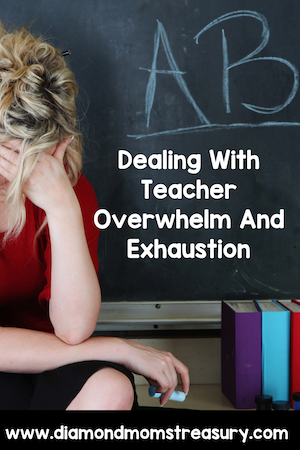 Recently, I asked teachers the following question: "What has been the most difficult part of teaching this year?" Some common responses showed up. Here are some of the main ones: - Large class sizes - Student behavior/classroom management - Meeting the needs of so many different levels - Managing multiple grades - Motivating students Do these sound familiar? Teaching is getting more difficult all the time. We need to find some ways to make teaching a bit easier or we will have massive teacher burnout. Obviously, there are no easy answers, but if we help support each other, maybe we can help.  Teachers are struggling to get to the end of the year. They are counting the days or weeks until summer break. They are exhausted and many are experiencing teacher burnout. The joy of teaching is gone and the mental health and physical well being of many teachers is at risk. Here are a few ideas that may help for next year, but they are bandaid solutions and won't deal with the underlying issues. Managing Learning In Large ClassesThis seems to be a monumental task, and without some management strategies it can be a source of chaos and disrupted learning. Teaching effectively becomes much more difficult when there are a lot of students to manage. It can be harder to give each student personalized attention, and classroom management becomes more complex. Strategies like implementing clear expectations, utilizing classroom aides or volunteers, and employing technology for individualized learning can help. Consider trying the following: - Break the class into smaller groups for certain activities or discussions to facilitate more personalized attention. - Use seating arrangements strategically to manage behavior and focus attention. - Make use of classroom management techniques like clear expectations, consistent routines, and positive reinforcement. - Consider team teaching or co-teaching with another educator to provide additional support and manage the workload. 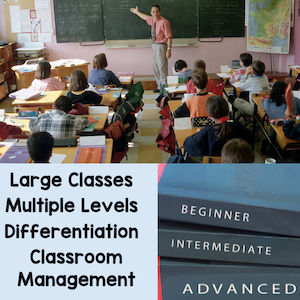 Student Behavior And Classroom ManagementDisruptive behavior can derail even the best-planned lessons. Consistent discipline guidelines, positive reinforcement, building strong relationships with students, and involving parents can all contribute to better classroom management. Once the guidelines are set, they need to be reviewed periodically and they need to be consistently followed. Consider trying the following: - Establish clear and consistent expectations for behavior from the beginning of the school year. - Use positive reinforcement techniques such as praise, rewards, and privileges to encourage good behavior. - Implement a system of consequences for inappropriate behavior, ensuring they are fair, consistent, and age-appropriate. - Build positive relationships with students by showing genuine interest, empathy, and respect. 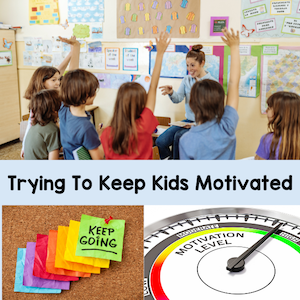 Differentiation For Multiple Levels In A ClassroomWith students coming in with varying abilities and backgrounds, it can be a real juggling act to ensure that each student is being adequately challenged and supported. Teachers might need to employ differentiated instruction techniques, group work, or individualized learning plans to address this. Consider trying the following: - Conduct regular assessments to understand each student's level of understanding and skill. - Implement differentiated instruction techniques, such as tiered assignments, flexible grouping, and personalized learning paths. - Offer enrichment activities for advanced learners and provide extra support for struggling students through small group instruction or tutoring. - Utilize technology tools and educational apps that adapt to individual student needs. 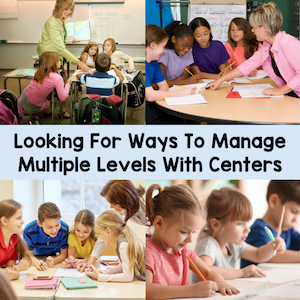 Managing Multiple GradesJuggling the needs and expectations of students across different grade levels requires careful planning and organization. Teachers might need to streamline their curriculum, leverage technology for individualized learning paths, and collaborate with colleagues to share resources and strategies. Consider trying the following: - Streamline curriculum planning by identifying common themes or skills that can be taught across grade levels. - Utilize technology tools for managing assignments, grading, and communication with students and parents. - Collaborate with colleagues within and across grade levels to share resources, lesson plans, and teaching strategies. - Consider team teaching or departmentalization, where teachers specialize in specific subjects or grade levels, to ease the burden of managing multiple grades. Motivating StudentsKeeping students engaged and motivated can be a constant battle, especially when facing diverse interests and learning styles. Teachers might need to get creative with their teaching methods, incorporating interactive activities, real-world examples, and student choice whenever possible. Consider trying the following: - Incorporate hands-on activities, projects, and real-world examples into lessons to make learning more engaging and relevant. - Offer choices and autonomy whenever possible, allowing students to select topics, projects, or activities that align with their interests. - Provide regular feedback and celebrate students' successes, no matter how small. - Encourage a positive and supportive classroom environment where students feel comfortable taking risks and exploring new ideas.  In many ways, I feel I am preaching to the choir because most teachers are trying to implement these strategies already. But, that isn't enough. Administrative support, district funding and resources to allow for more manageable class sizes are needed. Professional development and extra support in the classroom are needed to handle the increasing needs of the kids and the wide ranges of levels needing attention. These are just a few of my observations and thoughts about the stresses of teaching today. Next time I will share more specific ideas for how to help with teacher burnout and some of the concerns teachers are dealing with in today's classrooms. In the meantime, I want to give you a feelings tracker to help with maybe finding some good in each day. 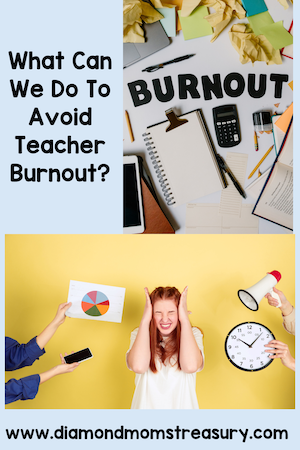 Teachers, hang in there. The end of the year is in sight. Related Posts |
About Me Charlene Sequeira
I am a wife, mother of 4, grandmother of 9, and a retired primary and music teacher. I love working with kids and continue to volunteer at school and teach ukulele. 
Categories
All
|


 RSS Feed