Welcome To My Blog |
|
Welcome To My Blog |
|
|
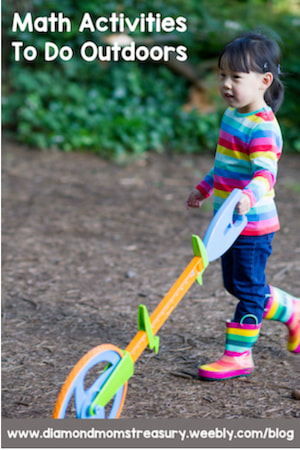
Track and field season is here and kids are training and competing for their schools. Younger children may not be competing yet, but they still may be attending track meets or doing some activities that are similar. This is a great time to take measurement outdoors. 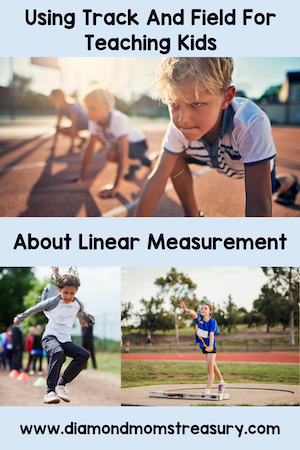 Measurement Activities For Track And FieldMost of the events in track and field have to do with distance, length or height specifically. This is a good time to talk about bigger distances than that of a ruler or small tape measure. Of course, those lengths are also important to learn and practice. On the track, there are shorter races and longer races. There are 100 m, 200 m, 400 m, 800 m etc. races. Some of those distances are pretty long for younger children so they may only try the shorter ones. For older students, they are able to go even beyond those distances. 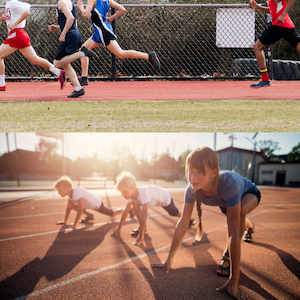 For younger children, shorter distances can be used. These could be measured out with a trundle wheel in the school yard. Different races can then be held. it might be fun to add in some fun races like 3 legged races and potato sack races. 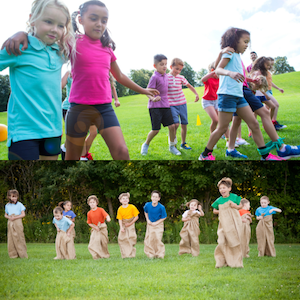 For long jump and high jump, the distances jumped are measured. These distances are shorter, so they are measured with measuring tapes or on the high jump standards. If shot put is included, this would be measured by how far the shot put is thrown, so a measuring tape would be used for this as well. Field events are measured in meters and centimeters. 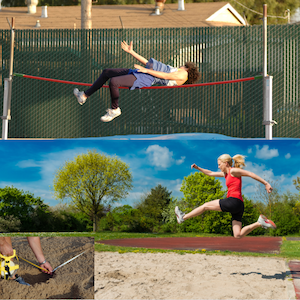 Time Measurement OutdoorsWhen doing track events or other races, not only is it fun to see who wins the race, but how fast they are. This is an opportunity to practice measuring time using stopwatches. Doing multiple races encourages kids to better their times and focus on their personal bests instead of just being first across the line. 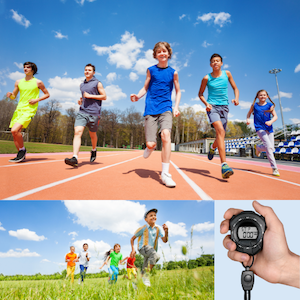 Team events can also be fun to do. Check out these outdoor measurement team activities that use standard measure. They can be fun to do and require just a few pieces of equipment. 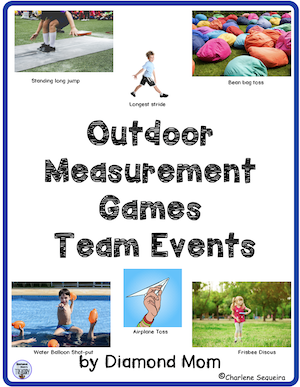 Outdoor Measurement Activities For Area And PerimeterPerimeter and area can be done with standard and non-standard measurement units. After doing some practice in the classroom with grids and units, it could be fun to get outdoors and try to use measuring tapes or trundle wheels to measure bigger areas or perimeters. If there's a fence surrounding the school yard, this could be measured in sections to figure out the perimeter. The area of the playground or the school field could be measured as well. Measuring the perimeter of the school could also be done. It may require doing it in chunks and recording it on graph paper to figure out the actual perimeter as many schools are not rectangular. 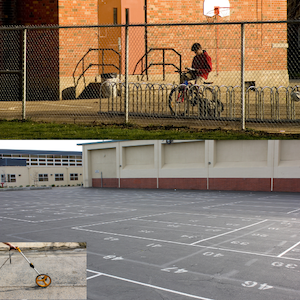 Some Other Measurement IdeasMeasuring Tape Exploration: Provide the kids with measuring tapes and let them explore different objects in the outdoor environment. Encourage them to measure the length of benches, fences, tree branches, or any other objects they find interesting. Footstep Measurement: Have the kids measure distances using their footsteps as a unit of measurement. For example, challenge them to measure the length of a path by counting how many footsteps it takes to walk from one end to the other.  These are only a few different ideas for using measurement outdoors. Depending on your surroundings, there are many opportunities to use both standard and non-standard measurement outside to connect skills and concepts with the real world. Have some fun with your students while exploring some of these ideas.  Related Posts
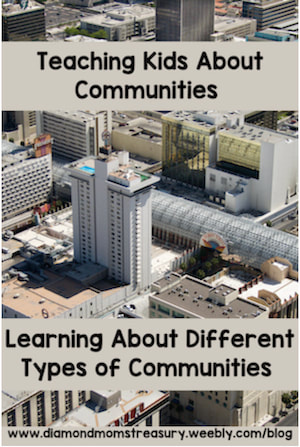
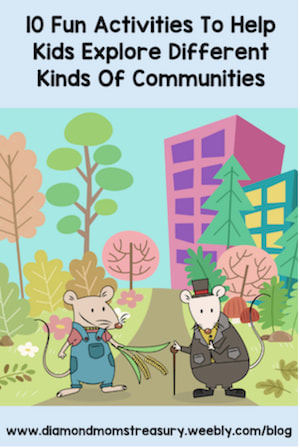
Kids love to get creative and build structures. I can remember many times watching them build houses with yards and garden plots or playground structures. As they became aware of their surroundings, more of the features appeared in their designs. Building a community requires the same type of awareness. In order to build a community, it is important to take note of what needs to be included. Let's take a look at how communities differ or are the same and what key elements are found in each type of community. 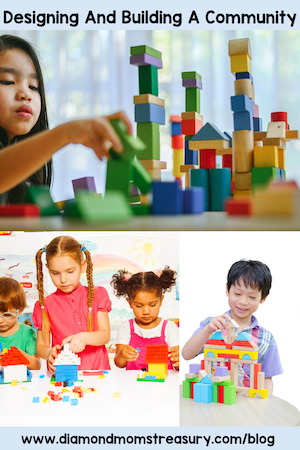 There are 3 main types of communities that kids should be introduced to: urban, suburban, and rural communities. Most children live in one of these types of communities, or perhaps they've moved from one type of community to another type of community. Each of these types of communities has characteristics that cause them to be identified as a specific kind of community. They have many of the same types of essential services, but they have different points of interests, kinds of buildings, locations, and other features. 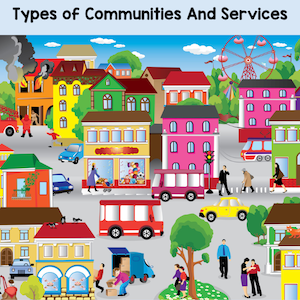 When looking at the various types of communities, get kids to look for the following kinds of services and points of interest: Schools, daycares, homes, parks and playgrounds, libraries, hospitals or clinics, fire stations, police stations, post offices, grocery stores, specialty shops, restaurants, cafes, banks, places of worship, types of public transportation, community centers, and unique landmarks. The more densely populated the area is, the more of these essential services there will be in the area. For less densely populated areas, the services will be fewer and they will be more spread out. 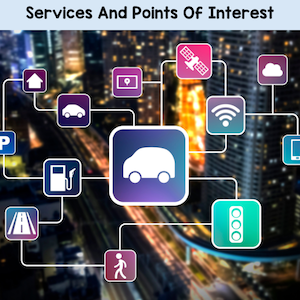 Take your students on some neighborhood walks and check out what different services, and features are found in the nearby area. Use this information to help determine what type of community they live in. To find out more about the different types of communities, check out these resources. What Is A Community? Types of Communities 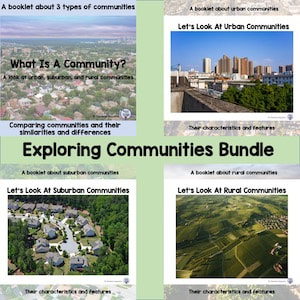 Designing A 3D CommunityDesigning a 3D community can be an exciting and engaging project for kids. Here are some tips to help them get started and create a vibrant and imaginative community model. Begin by deciding what type of community to build. Think about things like: What buildings or landmarks should be included? What features make our community special? Look at pictures, maps, and books to gather ideas and information. Have them imagine that they are developers or city planners. When deciding on what services will be there and where they would be located, what would a developer or city planner have to consider? Ask questions like: Would it be a good idea to put the airport in the middle of town? What should go near a school or a hospital? Why? What kind of transportation will there be and how will it be set up? There are many other questions and discussions about what is needed and where it should be located. Make note of the different ideas and when it comes to making decisions choose the ones that the students feel fit with the community they want to create. Note: They may need guidance with making these decisions. 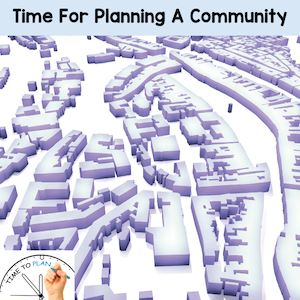 Time To Build The CommunityOnce decisions have been made, it is time to begin the process of creating the community. Note: It is important to consider the space needed for your 3D community. This will determine the scale and amount of structures, etc. that can be included. Create a sketch together before starting to build. (I usually did this on the whiteboard.) This helps them visualize the layout and design of their community. if it's a class project, assigning different jobs to small groups or individuals as you proceed will help with making the project manageable. Assign roles to different children based on their interests and strengths. Some children may enjoy building structures, while others may prefer decorating or landscaping. Once the plan is drawn and the buildings, services, landmarks and other features are decided on, it is time to build. Scale and proportion are very important and should be discussed to help them understand how to create buildings and features that are proportional to each other. For example, a small milk carton could be the size of a house. This would be the scale guide for all other buildings and objects. Don't forget to include natural elements such as parks, trees, and rivers in the 3D model. These features add depth and realism to the community. Features like street signs, traffic lights, benches, and street lamps can also make the model more realistic. 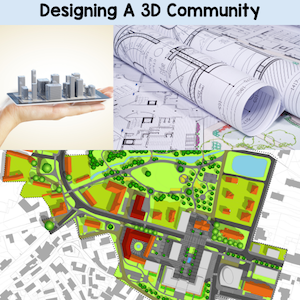 Share And CelebrateOnce the 3D community is complete, display it prominently in the classroom or school for others to see. Consider organizing a presentation where children can share their creation and explain the thought process behind their design choices. I did this type of project several times with my classes and I was always very impressed with what they learned and how excited they were to share this will others. If you want to find out more, check the posts below. This is the resource that I used to create our 3D communities. Creating A Community 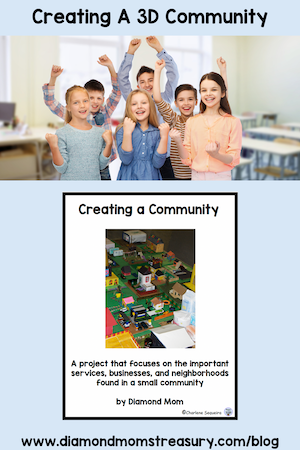 Good luck with your students as you embark on creating a community together. Related Posts
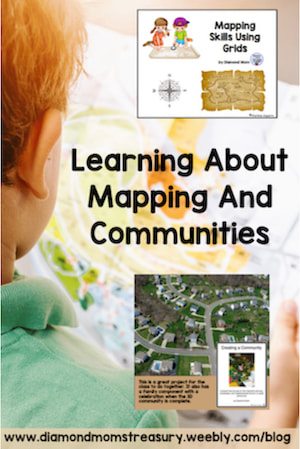
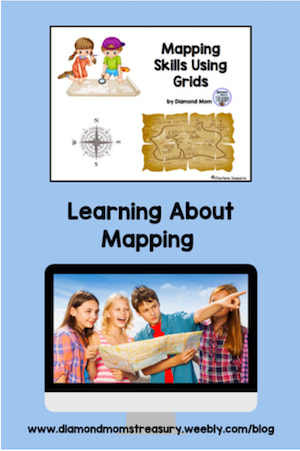
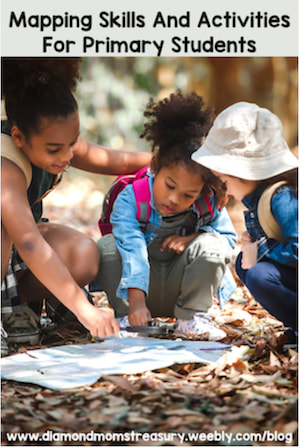
If you mention to your students that you are going on a treasure hunt, you can be sure there will be cheering and excitement along with lots of questions. Learning to read maps and use them are valuable skills for kids, and one way of capturing their attention is to link them to stories of treasures and adventure. 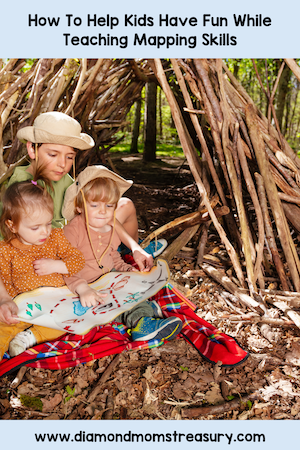 Ways To Use MapsMapping skills can be exciting for kids if they are introduced in an interesting, hands on way. These skills help develop spatial awareness and teach kids how to navigate in their world. Here are some different ways to get started. 1. Look at a variety of different types of maps and try to find some similarities on them. Look for symbols, shapes, words, or other elements that may be important. Treasure maps, school maps, neighborhood maps, and even country or world maps are great examples. 2. Try following a neighborhood or school map and identifying the various areas or symbols that are on the map. 3. Walk around the neighborhood and make note of different things that are there. Draw a map that shows the different key elements and create a legend that can be followed by others. 4. Create a treasure map and a story to go along with it. Maybe even try to find a hidden treasure in the nearby area following a map. 5. Check out mapping programs like Google Earth and see the bigger world by exploring the neighborhood and beyond. 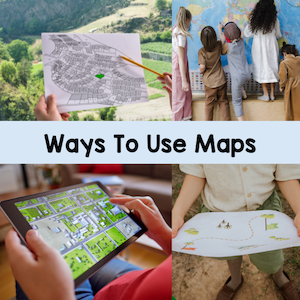 Important Mapping Skills And TermsLooking at a variety of different maps and exploring the world around them is great, but in order to really understand how to read and use maps requires teaching about the different concepts and details. Young children need to be taught some of the vocabulary and also how to use the different symbols and components of maps effectively if they are going to be able to transfer these skills to various different types of maps. 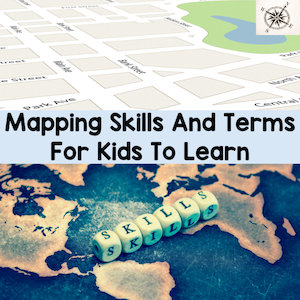 Here are some of the terms and aspects of maps that children need to understand and practice using to fully understand how to read maps. Map - A paper drawing or an electronic image that show where different places are located. There are many different kinds of maps. World maps, neighborhood maps, road maps, and treasure maps are just a few types. Legend/Key - This is a guide for the symbols used and tell us what they represent. Symbols - These are pictures or shapes that are used to represent real objects or places. Compass Rose - This is a symbol that is used to show the directions north, south, east, and west, as well as areas in between. It helps to make sure that we are going in the correction direction when following instructions for how to get somewhere. Grid - This is used to help locate areas on the map. The spaces where the letters and numbers interesect show where the object or place is located. Coordinates - These are the numbers and letters on the map that are used for locating the correct spaces on the grid. Scale - This shows the distance between places or objects. It can also be used for 3D maps to make sure that objects are appropriate sizes. Here are some booklets that help to explain and practice using these terms. Map Skills Mapping Skills Using Grids 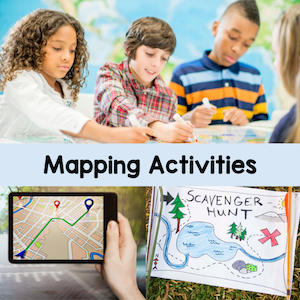 Once they understand what the various components are, they can begin to create their own maps. Here is a free booklet I created that can help them get started on creating a neighborhood map. 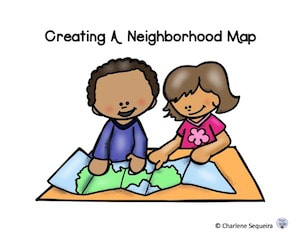 More Mapping ActivitiesLooking for some more ideas and hands on activities? Check these out. 1. Create a treasure hunt: Provide children with blank paper and crayons/markers. Encourage them to draw their own treasure maps, including landmarks like trees, houses, and lakes. They can then hide "treasure" (e.g., small toys or stickers) and exchange maps with classmates for a fun treasure hunt. 2. Collaborative Classroom Map: Create a map of the classroom. Use a large piece of paper or a whiteboard and let students contribute by drawing key features such as desks, chairs, door, windows, and other important items. Discuss the purpose of each item and its location within the classroom. 3. Following Directions Game: Play a game where children practice following directional instructions in the school yard. Give verbal instructions like "walk two steps north" or "turn to the left and walk three steps west." This helps reinforce cardinal directions in a fun way. 4. Outdoor Scaventer Hunt: Take children on an outdoor scavenger hunt around the schoolyard or nearby park. Provide each child with a simple map indicating areas they need to explore and items they need to find (e.g., a tree, a bench, a flower). Encourage them to mark off each item as they find it and label the map where the item was found. 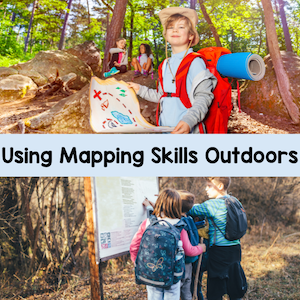 As you can see, there are many components to learning how to use maps and understand them. Once kids get the hang of it. they can navigate to different places and create adventures that are fun and educational as well. Enjoy sharing these spatial adventures with your students and helping provide them with tools for future adventures. 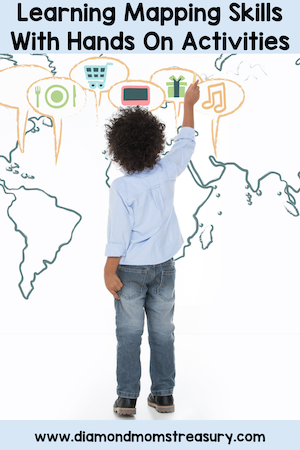 Next time I will share more ideas about mapping and how to create a 3D community. Related Posts
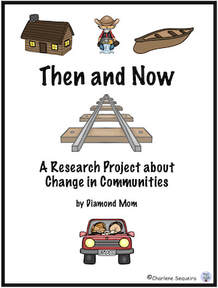
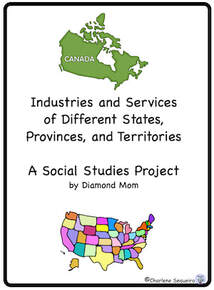
There are many different ways to approach teaching a child about their world, but developmentally, it makes sense to start with their little circle and move out from there. When kids are young, they are looking at the world through the lens of ME - what I like, what I want, what I have, etc. This is the time to focus on helping them to know what is going on around them with family, friends, neighbors, and themselves. Here are some fun activities that help them with learning about these things. 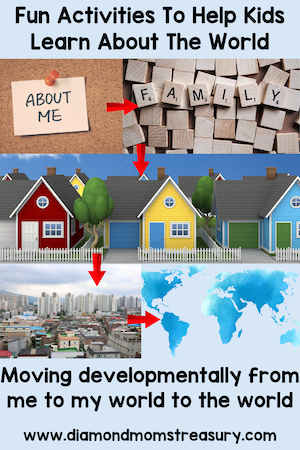 All About Me ActivitiesThese activities help kids to focus on their unique identity, interests, and experiences. They encourage them to explore and share information about themselves, including their name, family, hobbies, and favorite things. 1. Name Identity And Recognition - Create personalized name tags using their names and decorative materials like stickers, markers, or colorful paper. - Play name games that involve saying and spelling names 2, Family And Home - Create a family tree collage using photos or drawings of family members. Discuss family roles and relationships. - Draw pictures of their homes, including details like the color, number of windows, and any special features. 3. Hobbies - Create personalized "All About Me" books where they can write or draw about their favorite things, hobbies, and interests. 4. Favorite Things Or Preferences- Create a class chart or graph where they can share their favorite foods, colors, animals, etc. Discuss similarities and differences among classmates. 5. Celebrating Similarities And Differences - Provide magazines, newspapers, and art supplies for them to create collages showcasing diversity in appearance, interests, and abilities. 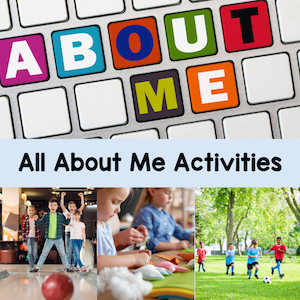 Some Family Resources To Go FurtherLearning more about family backgrounds and cultures is an area that can be pursued when the children have an understanding of what makes them special or unique. Here are two resources that can help to develop these ideas more. Heritage Project Discovering Our Roots and Flat Family Project. 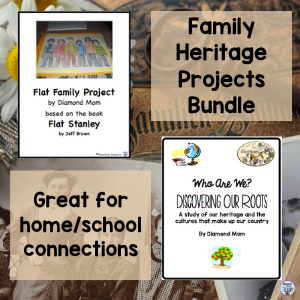 Neighborhoods And CommunitiesDepending on where children live, their neighborhood and surrounding communities can be very different from other neighborhoods and communities. It's important to be able to recognize different types of communities and also identify which community is most like theirs. The three main types of communities most people are familiar with are urban, suburban, and rural. Here is a booklet that helps to explain some of the features that distinguish the different kinds of communities. Once children are familiar with the different types of communities, they will be able to look around the area where they live and start to identify different characteristics that will determine which kind of community they live in. 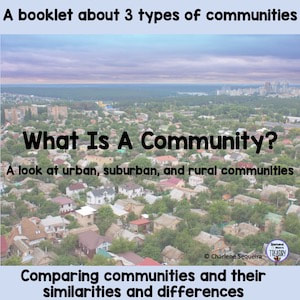 Neighborhood And Community Activities1. Start with neighborhood walks. Ask questions that can help to determine noticeable characteristics. What kind of businesses and industries are there? What kind of housing is most common? Are there any landmarks? How much traffic is there? and so on. 2. Take note of some of the community helpers in the area. Who do they see regularly in their neighborhood? What type of community service do they provide? Learn more about their neighbors and community helpers. Perhaps bring in some community members to share what they do. 3. Learn more about the different businesses, services and landmarks or points of interest in their community. How many schools are there? Is there a library? How close is the hospital? What different services are there? Consider taking field trips to the various places such as the fire hall, police station, library, or grocery store to learn first hand how the different members of these places help the community. 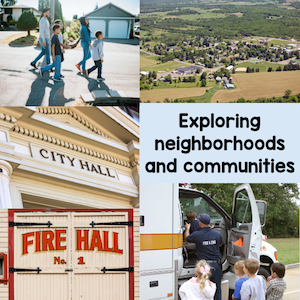 Provinces, States, And TerritoriesProvinces, states, and territories are larger areas of land that make up countries. Although they are considered as individual sections, they have a variety of different communities and characteristics, not just across the country, but also within each province, state, or territory. There are many different kinds of activities that can be done based on the areas being studied. Here are a few ideas. 1. Check out how the various areas are similar or different when it comes to climate zones and weather. Keep track of weather patterns by following the weather reports for the region and the country. How are they the same or different? Note: The wide range of climate changes across the larger regions and country may be surprising since children often expect the weather to be the same all around them. 2. Do activities that explore the geography of the country. What are the major cities, landmarks, types of landforms, etc. How do these things impact living in these areas? 3. Choose a couple of areas that are different from each other and research them. Here are some types of questions to ask: How do they vary in services and industries provided? What is the climate like there? What kinds of activities and landmarks are they know for? How is living the same or different? 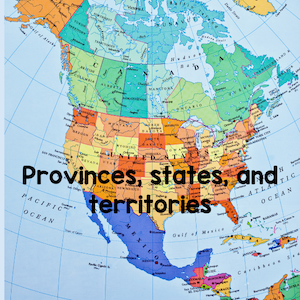 Some Projects To TryOver the years areas change. It's important for children to understand that life now is very different from what it was like many years ago. Here is a research project that can help them to understand how their community has changed in the past 100 or so years. When studying about different provinces, states, or territories, doing research is a great way for children to get a better understanding of where they live. Here is a research project the focuses on learning about the industries and services of a province, state, or territory. It has different ways to share what has been learned so that children can choose the format that best helps them to share their knowledge.
The WorldContinue to help kids expand their knowledge of how big our world is. The world encompasses countries, oceans, and continents. Do activities that help them to see the vastness of where we live. Here are some ideas. 1. Look at globes and maps and see where the different countries are located. 2. Build puzzles and talk about the different continents and the countries that make them up. 3. Do activities that involve labeling the oceans and continents. 4. Choose some countries and do research activities on them with small groups. Have the groups share their findings with the rest of the class. This way several different countries can be explored and it will enrich the knowledge and understanding of cultures and diversity in the world. 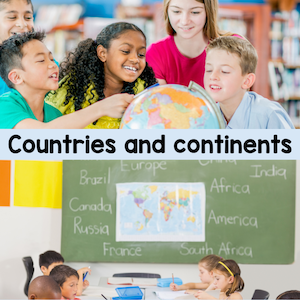 Enjoy sharing these activities with your students. Next time I will share ideas about teaching mapping and creating communities.  Related Posts
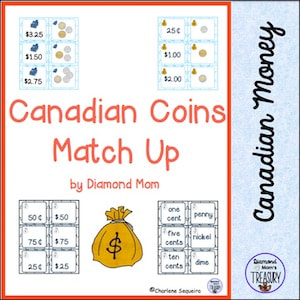
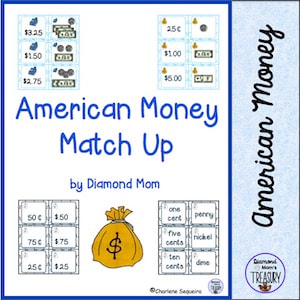
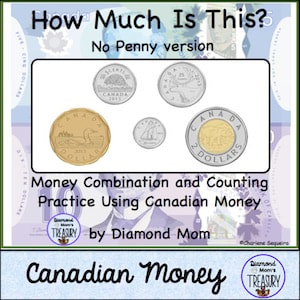
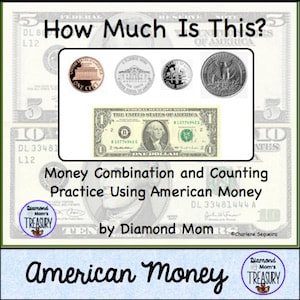
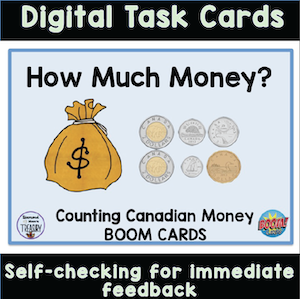
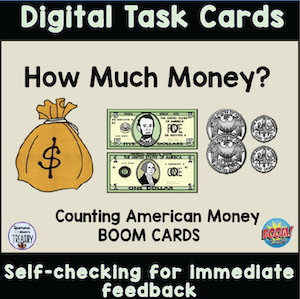
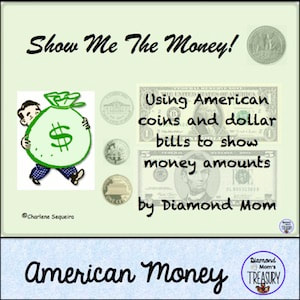
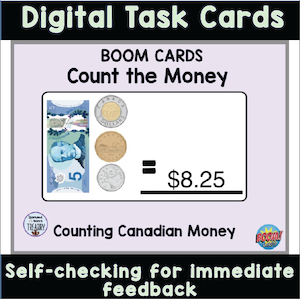
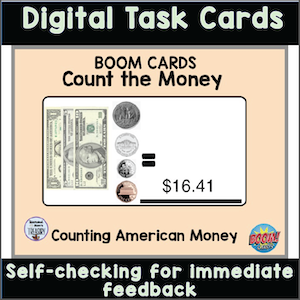
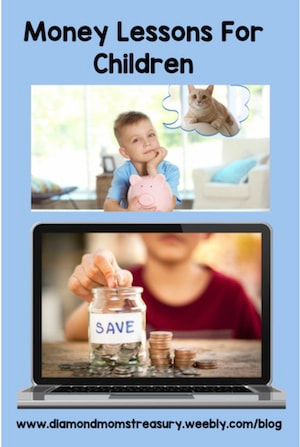
Learning about the world we live in is a fascinating thing for young children. There are so many different facets of the communities, countries, and areas of the world to discover. Kids are intrigued with maps, field trips, and stories about the world around them.  One way to capture their enthusiasm and engage them in learning more about the world around them is to start at an individual level and expand globally from there. There are several reasons for this approach, but from a developmental perspective it just makes sense. Kids focus on themselves and what is going on around them when they are young. Therefore, learning more about their immediate circle and the area around them first is a good choice. Beginning with the individual allows them to connect their learning to their own lives and experiences. Begin with family, friends and neighborhoods and expand out from there. Here are some ideas for expanding from the individual to the global concepts.  All About MeStart with the individual, focusing on each student's unique identity, interests, and experiences. Encourage children to explore and share information about themselves, including their name, family, hobbies, and favorite things. Consider activities such as All About Me posters, family trees, Interest profiles, and writing activities about a special hobby , activity, or interest. 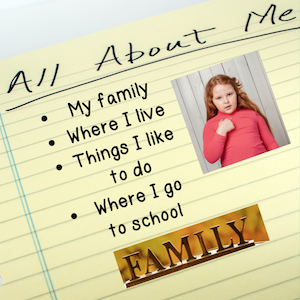 My NeighborhoodExpand your students' understanding to their immediate surroundings by exploring their neighborhood. Engage them in activities such as neighborhood walks, where they can observe and map local landmarks, houses, parks, and businesses. Encourage them to learn about their neighbors and community helpers like firefighters and mail carriers. My CommunityBroaden the scope from the immediate neighborhood to encompass the larger community beyond there Guide your students in learning about the various institutions, services, and points of interest within their town or city. This may include schools, libraries, hospitals, government buildings, and cultural landmarks. Encourage them to explore the roles of different community members and how they contribute to the community's well-being. 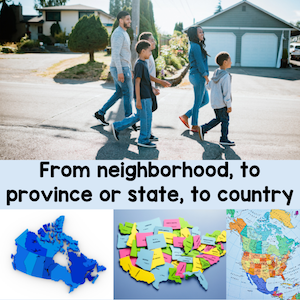 My Province Or StateDive deeper into regional geography by exploring the province, state, or territory where the students live. Help them learn about the geography, history, and cultural diversity of their region. They can research notable landmarks, industries, natural features, and historical events that shape the identity of their province or state. Encourage them to compare and contrast their region with others. My CountryContinue to expand your students' geographical knowledge to the national level by studying their country. Explore its geographical features, climate zones, major cities, landmarks, and cultural diversity. Discuss national symbols, traditions, government structure, and historical events that have shaped the country's identity. Encourage them to develop a sense of national pride and appreciation for their country's heritage. 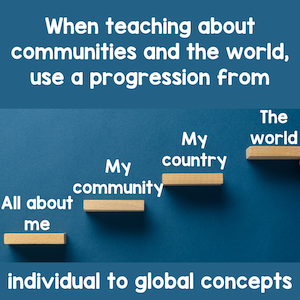 The WorldFinally, broaden their perspectives to the global level by learning about different countries and continents around the world. Help them explore world maps, atlases, and globes to understand Earth's continents, oceans, and major geographical features. Encourage discussions about global issues, cultures, languages, and traditions. Help them to develop an appreciation for cultural diversity and interconnectedness among nations. 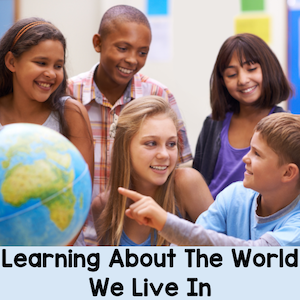 By following this progression from the individual to the global level, students gradually develop a deeper understanding of themselves, their immediate surroundings, and the wider world. Through hands-on activities, research, discussions, and exploration, they gain valuable knowledge and skills in geography, social studies, and cultural awareness. 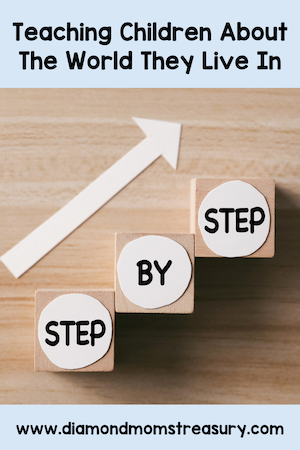 Next time I will share some more ideas for learning about our families, our communities, our provinces or states, and the world around us. Money is a necessary commodity in our lives, but it's a difficult concept for many children to understand. Because we are living in a plastic world, children don't always get to see and handle real money anymore. This makes it even more difficult for them to understand how to handle it and use it correctly. It is up to us as teachers to help them understand the importance of money and how to count it, earn it, pay for things with it, and make change when needed. This can be a daunting task unless we use concrete examples and situations. 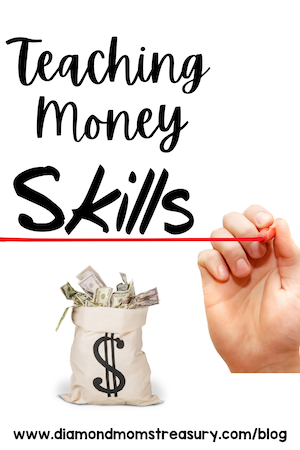 Recognizing Coins And Their ValuesRecognizing coins and understanding their values is one of the first things that needs to be taught. There are many different resources available for doing this, but it's important to make sure that kids get to actually see and handle the coins or play money that looks like the coins as they practice identifying them and stating their values. In Canada, we use the terms penny, nickel, dime, and quarter for the smaller values. It's amazing how many kids don't know which are which. I get questions like, "Is that the beaver, or the sailboat?" They examine the coins looking for clues as to how much each is worth. I suspect it is the same with kids in The United States. They may have different symbols on the coins, but the confusion still happens. 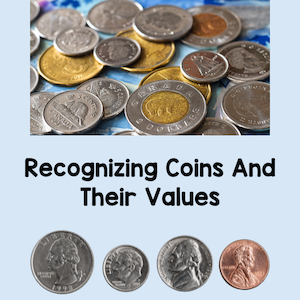 Resources for identifying and counting moneyHere are some resources I created to help kids identify different coins and bills, recognize their values, and count money. There are Canadian and American versions as well as Boom cards versions for those wanting digital resources.
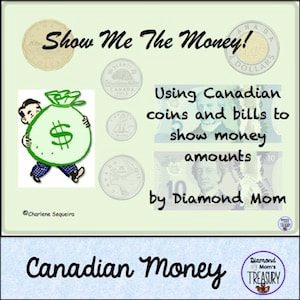
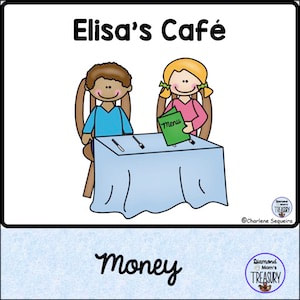
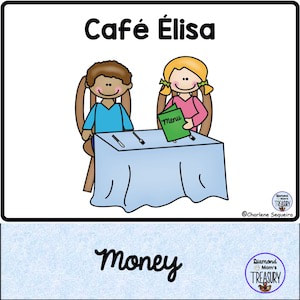
It's important to make sure that these resources are used with many different hands on opportunities to manipulate the money and look at it closely so that the connection can be made to the abstract examples of images and questions. 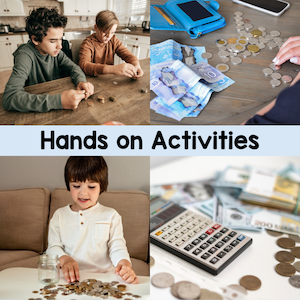 Resources for applying the skillsApplying the skills of counting, earning, and spending money is a necessary part of learning to handle money. I have created some resources to practice doing this. Note: Café Élisa is in French.
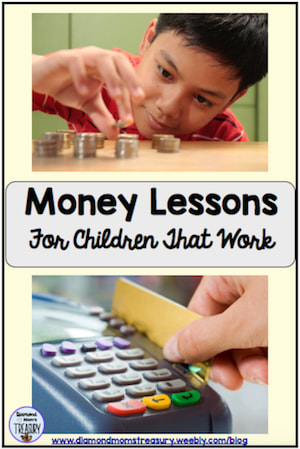
Learning about debit cards and moneyBecause we live in a world of plastic currency, it's important to make sure children understand that money is still exchanging hands and there must be money available in order to use the debit card. I created this unit to help kids better understand this and to provide opportunities for them to earn money and keep track of what was going in and out of their bank accounts. 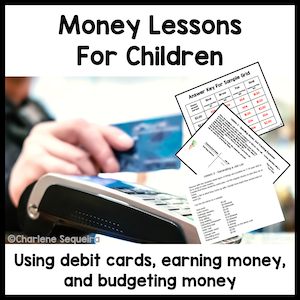 Other money mattersCredit cards are another type of spending that adults use, but I didn't address this specifically with my students. It's a much bigger deal to explain debt and should be dealt with, but I feel it's best done in detail as kids get older. Taxes are another part of money skills that needs to be addressed. This will require separate instruction to better understand how to calculate it and allow for an extra cost when calculating what money is needed to purchase things. There's nothing worse than getting to the checkout and discovering you are short of money because of the added taxes. Kids need to be exposed to this in teaching about money so that they aren't disappointed when they go to buy something and don't have enough money. I have not specifically addressed this in any of my resources, but it's a necessary element to at least mention to younger children when teaching about spending money. 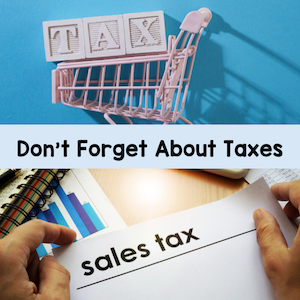 Even in a mostly electronic economy, it's important to be able to handle actual money for situations where cash is needed. Hopefully some of these resources will help with preparing your students for the monetary world out there. Check out some of my money bundles for more resources and extra savings. 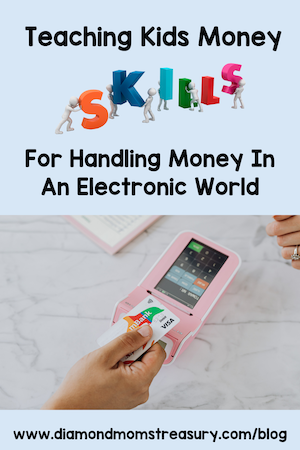 Related Posts
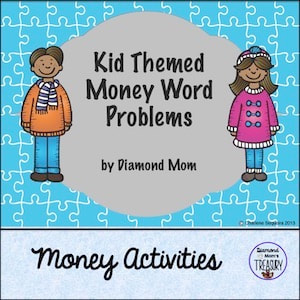
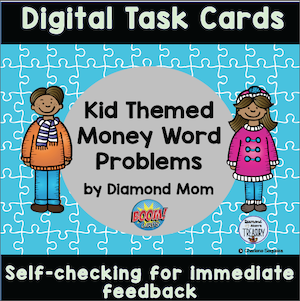
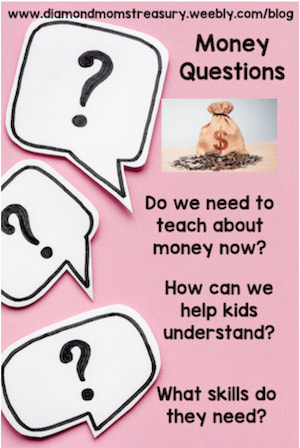
Do your students know much about money and how to count it, earn it, or use it for spending? Can they make change? Do they realize that they have to have money in the bank in order to use a bank card? All of these actions are necessary if they are to be able to handle money responsibly in life. 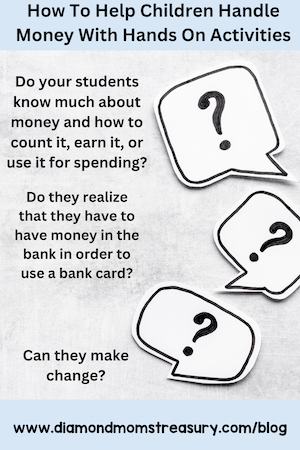 I recently worked with some students in grades 4 and 5 who had great difficulty with identifying coins, counting money, and making change. It was important to start at the beginning and work through different skills one at a time to help them understand how money worked. 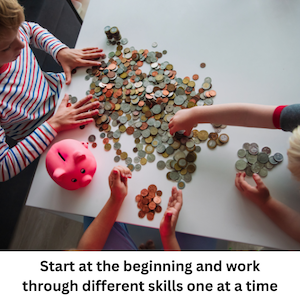 A few years ago, there was a Young Entrepreneurs event at our school. The grade 6 classes created items for sale and they learned all about creating a budget, purchasing materials, determining prices to earn a profit, and how to work with money. When I saw this in action, I decided to try a modified event with my grade 3 class. We created items for sale and we did a Spring Fundraiser for a special field trip. This took a lot of preparation, but it was a huge success. Check out more here. 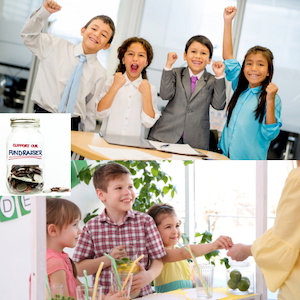 In order to make sure my students understood how money worked and how to handle it, we worked together and created this unit. I created the main outline and framework, and then added touches and refined it as we worked through the different lessons. I was amazed at how much they learned and how well they were able to work with money as a result. Part of the process included understanding how to handle money in a variety of situations. I created a bunch of scenarios for counting money, making change, earning money, spending money, and saving money. This led to the creation of Kid Themed Money Word Problems.  I have used these task cards a few times since and every time they have helped kids to make connections that help them understand how money works. 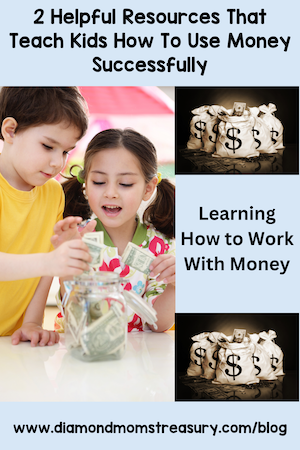 If you are looking for ways to help your students better understand how money works and how to use it effectively, check out these two resources. They work! Next time I will share some other ideas and resources for working with money. Related Posts
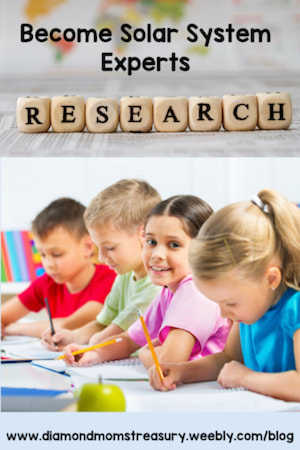
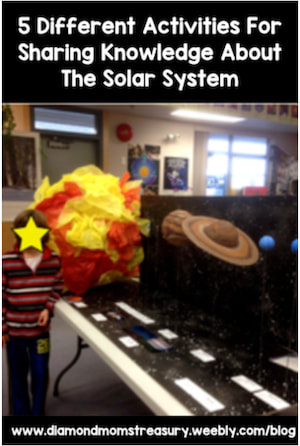
Are you thinking about teaching a solar system unit to your students? Capture the attention and wonder of these young children with a hands on approach that allows them to actually see how different aspects work and why they are so phenomenal. Here are some activities and experiments that will help your students better understand the workings of our amazing solar system. 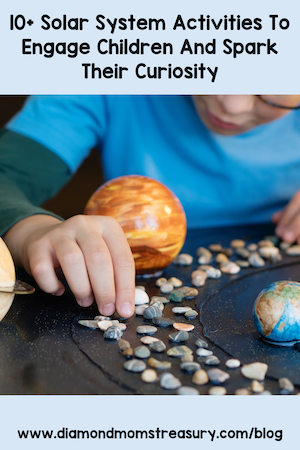 Solar System Activities And ProjectsCreating models, doing research on the planets, making mobiles, making puzzles or games or other activities will all make the solar system more understandable for your students and they will have fun learning as well. Here are a few specific activities that can be done. Solar System ModelsEncourage students to create a three-dimensional model of the solar system using everyday materials such as clay, papier-mâché, or recycled materials. As they design and construct their models, they'll gain a deeper understanding of the relative sizes, distances, and orbits of the planets. They can paint each planet according to its distinctive colors and sizes and then arrange them in order around a central "sun" display. Get students to create space-themed mobiles featuring the planets and other celestial bodies. They can use colored paper, string, and craft materials to construct their mobiles, incorporating facts about each planet into their designs. 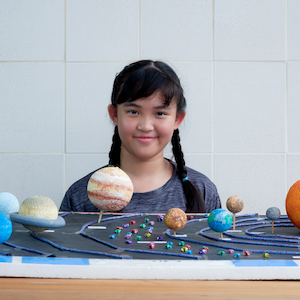 Planets Facts ActivitiesAssign each student or group of students a planet to research and create a fact sheet. They can include information such as the planet's size, distance from the Sun, number of moons, and any interesting facts they discover. Encourage them to use both text and illustrations to present their findings. Have students research individual planets and create informative posters or digital presentations highlighting key facts, such as size, composition, atmosphere, and unique features. They can use their creativity to design eye-catching visuals and share interesting tidbits about their assigned planets. Create puzzles or matching games featuring images of the planets and their names. This activity reinforces students' recognition of the planets and helps them learn their order from the Sun. 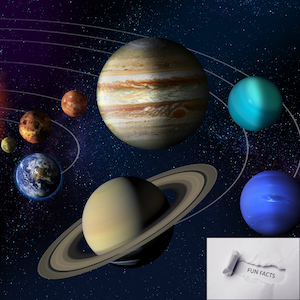 Planet OrbitsSet up a large-scale model of the solar system on the floor or outdoors using hoops, tape, or markers to represent the orbits of the planets. Have students take on the roles of different planets and walk or run along their orbits to understand the concept of planetary motion. Phases Of The MoonUse Oreo cookies to demonstrate the phases of the Moon. Have students carefully scrape away the cream filling to represent each phase, from new moon to full moon, and then arrange the cookies in the correct order. 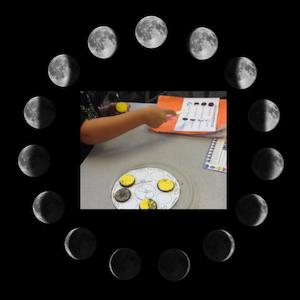 Another Moon ActivityInvite students to explore the surface of the Moon by designing and building their own lunar landscapes. Using a variety of materials such as sand, rocks, and modeling clay, they can recreate the craters, mountains, and valleys found on Earth's natural satellite. Space Themed Story Writing And IllustratingEncourage students to let their imaginations take flight by writing and illustrating their own space-themed stories or comics. They can invent characters, plot exciting adventures, and explore the wonders of the solar system in a creative and imaginative way.  Solar System ExperimentsThese experiments are fairly easy to do as a class and they provide hands-on opportunities for students to explore fundamental concepts related to the solar system while fostering curiosity, critical thinking, and scientific inquiry. Relative Sizes And Distance Of The Planets From The SunThe sizes of the planets will range from a peppercorn to a large balloon and the distances will be so great that you may need to take the experiment outside to relatively see just how far away some planets are from the sun. Note: These suggestions are not totally to scale, but are just to see the differences comparatively in size and distance. This experiment will help students visualize the scale and arrangement of the solar system. Here are some size tips to help. (Note: Pluto was included just for interest as it used to be considered a planet). Sun - large beach ball Mercury - pea Venus - ping pong ball Earth - tennis ball Mars - golf ball Jupiter - soccer ball Saturn - large balloon Uranus - medium size balloon Neptune - medium size balloon (Pluto) - peppercorn Here are some approximate measurements for distance based on 50 yards between the sun and Neptune. (Note: using 50 meters will not significantly change the distances as a meter and a yard are only a few inches different in length). Mercury - 0.65 yards Venus - 1.3 yards Earth - 1.66 yards Mars - 2.52 yards Jupiter - 8.66 yards Saturn - 15.92 yards Uranus - 31.87 yards Neptune - 50 yards (Pluto) - 65.57 yards Orbital Motion ExperimentUse a spinning chair, like a computer chair, to demonstrate orbital motion. Have students sit on the chair while holding a ball (representing a planet) and spin slowly. As they rotate, explain how the combination of forward motion and gravity keeps planets in orbit around the Sun. Gravity ExperimentExplore the concept of gravity by dropping objects of different sizes and weights from the same height. Discuss how gravity affects the motion of objects in space and why planets orbit the Sun in elliptical paths rather than flying off into space. Here is an experiment that shows how gravity works. 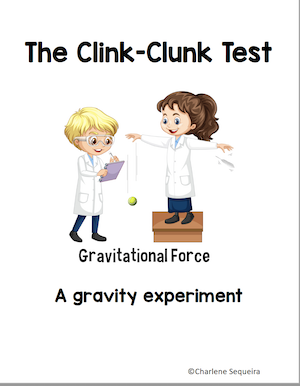 Moon Related ExperimentsUse a flashlight and a ball (representing the Moon) to demonstrate the different phases of the Moon. Have students observe how the position of the light source (Sun) relative to the ball creates shadows, mimicking the waxing and waning phases of the Moon. Create impact craters similar to those found on the Moon's surface. Fill a shallow tray with flour or sand, then drop small objects (marbles, rocks, or balls of varying sizes) onto the surface from different heights. Observe and discuss the shapes and sizes of the craters formed. Use a flashlight and objects of different shapes to explore how shadows are formed. Move the objects closer to or farther from the light source and observe how the size and shape of the shadows change. Discuss how sunlight creates shadows on planets and moons. Exploring Planet Atmospheres ExperimentCreate mini "planets" using balloons filled with different gases (helium, carbon dioxide, air). Observe how the balloons behave in various conditions (e.g., heated or cooled) to understand the role of atmospheres in planetary dynamics. Student ProjectsStudent projects are a great way to involve the family as well as classmates when learning about the solar system. Check out this blog post for some ways that my students have created projects in the past.  By combining teaching about the solar system with a variety of student-led projects, we'll not only deepen our students' understanding of the universe but also encourage creativity, critical thinking, and collaboration. Embarking on this cosmic journey with your students can inspire the next generation of astronomers, engineers, and explorers! Related Posts
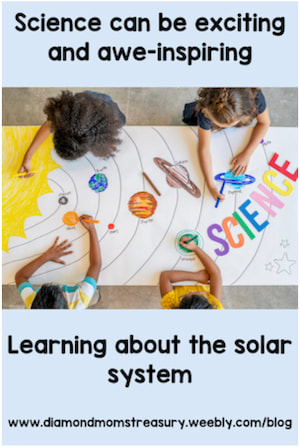
Picture the excitement on your students' faces when they learn that they are going to study the solar system. Watch the awe in their eyes as they learn about the colossal power of the Sun, the magnitude of the galaxy, the rocky planets and the gas giants, and all the other cosmic bodies in the solar system. Teaching about the solar system provides students with the opportunity to satisfy some of their curiosity and learn more about the awesome galaxy they are a part of. As they journey through the solar system, they'll use their imaginations, ask lots of questions, and maybe even build models. They'll learn about the planets' names, sizes, and distances from the Sun. They'll explore why some planets are hot and others are cold, and they'll discover what makes Earth so special and unique. 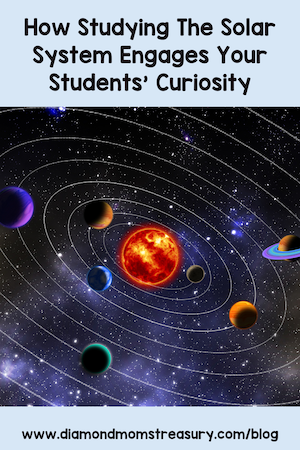 Depending on the age of the children, the study will be different in scope and depth. For young kids, it's important to introduce the solar system in a way that is engaging, understandable, and sparks their curiosity about space. Here are some suggestions for teaching primary children about the solar system. These are broad topics and can be approached in many different ways. Using hands on activities and visuals will help make things more understandable and engaging. What is the solar system?Basic information: The Solar System is a vast galaxy made up of the Sun, eight planets, numerous moons, asteroids, comets, and other celestial objects. Each of these entities possesses unique characteristics and features that offer valuable insights into the workings of the universe. Teaching tip: Introduce the solar system with engaging lessons that include interactive activities and multimedia resources to spark curiosity and lay the groundwork for deeper exploration. 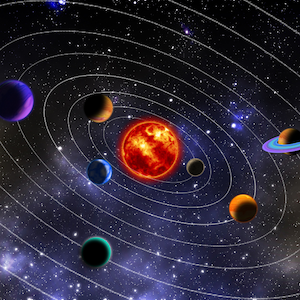 The sunBasic information: The sun is a giant ball of fire, keeping us warm and giving us light. It's a star too, but it's a lot closer to us than all the other stars we see twinkling in the night sky. Teaching tip: Teach children that the Sun is a star, and it's the center of our solar system. Explain that the Sun provides light and heat to all the planets. It provides energy, has solar flares and sunspots and helps sustain life on Earth. All the planets revolve around the sun. Use visuals that show the sunspots and flares, and how the orbits of the planets are ordered. 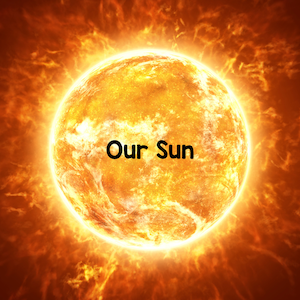 The planetsBasic information: There are eight planets in our solar system. Each one is unique and special. There are two different groups of planets: the rocky planets and the gas planets. The rocky planets are Mercury, Venus, Earth and Mars. These planets are like big balls of rock. They are the inner planets in the solar system and the closest to the sun. The gas planets are often referred to as gas giants because they are so big. They contain various gases in their atmospheres. They are Jupiter, Saturn, Uranus, and Neptune Some of them have colorful rings around them. They are also the outer planets and further away from the sun. Teaching tip: Introduce the eight planets orbiting the Sun, categorizing them into rocky (inner) and gas giants (outer) planets. Explore each planet's unique characteristics, including size, composition, atmosphere, and surface features. Teach students to recognize the planets by their names and order from the Sun. Help them understand the relative sizes of the planets and their distances from the Sun. Use simple comparisons, such as "Earth is bigger than Mars but smaller than Jupiter" and "Mercury is the closest planet to the Sun." 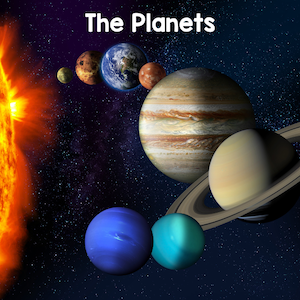 Orbits and moonsBasic information: Orbits are paths that the planets take when revolving around the sun. The gravitational pull of the sun keeps the planets orbiting the Sun in elliptical paths rather than flying off into space. Moons are natural satellites orbiting some planets. They have diverse sizes, shapes, and orbits, Teaching tip: Explain that planets orbit, or revolve around, the Sun in paths called orbits. Teach children that the time it takes for a planet to complete one orbit is called a year. Introduce the concept of moons as natural satellites that orbit planets. Point out that some planets have many moons, like Jupiter, while others have none, like Venus. Look at models of the solar system and the orbits that the various planets take.  How does day and night work?Basic information: It takes 24 hours for Earth to rotate completely. As it rotates, different areas are facing the sun. These areas have light and the other areas have darkness. We call the light "day" and the darkness "night". Teaching tip: Discuss the concept of day and night on Earth and how it's caused by the rotation, or spinning, of the Earth on its axis. Help children understand that it takes about 24 hours for the Earth to make one complete rotation. Using a flashlight and a globe can provide a good visual of how day and night happen. 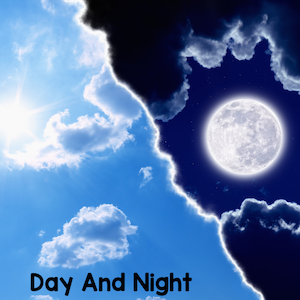 Why do we have seasons on Earth?Basic information: As Earth revolves around the sun, it has different seasons because of the tilt of its axis. When the tilt causes areas of Earth to be facing the sun for longer periods of time it is summer and when it causes the area to be facing away from the sun for longer periods of time, it is winter. Spring and fall happen as the different areas change position from facing to the sun to facing away from the sun and vice versa. Teaching tip: Teach children about the changing seasons on Earth and how they're caused by the tilt of Earth's axis as it orbits the Sun. Use simple visuals, such as diagrams, illustrations, or videos to demonstrate this concept. 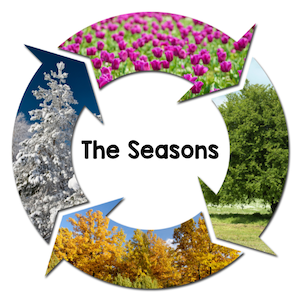 Next time I will give some specific activities to further develop the topics above. These will help engage the children with hands on activities to provide better understanding of the concepts. In the meantime, here is a resource that may help with some basic information about the planets and also provide some fun activities to try. 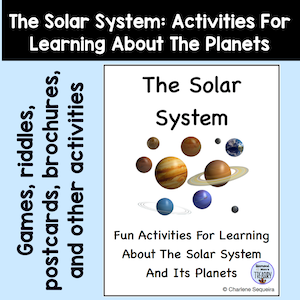 The benefits of studying the solar system extend far beyond the confines of our classrooms. As teachers, we can cultivate essential skills such as critical thinking, problem-solving, and scientific inquiry. We can also foster a deep appreciation for the natural world and inspire future generations of scientists, engineers, and space explorers. 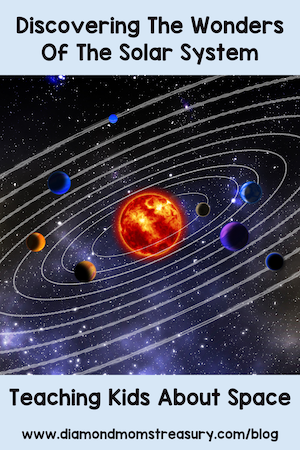 Related Posts
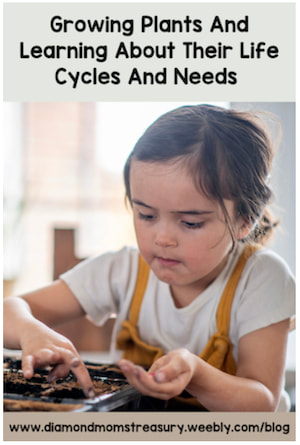
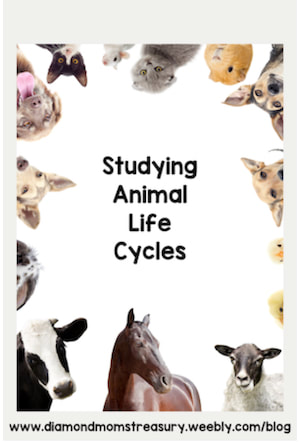
Spring is fast approaching and that means flowers poking up out of the earth, trees blossoming, grass getting green and lush again and kids wanting to get outside to play. This is the perfect time to start thinking about new science units that focus on life cycles, planting things, and watching baby animals as they start their lives and grow. 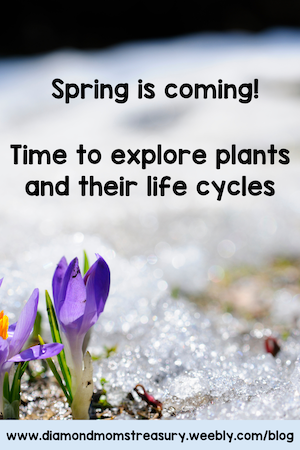 Planting seeds is a great way to help kids understand how we get a variety of fruits, vegetables, and flowers. This is the perfect season to start seedlings in the classroom as well. This has always been a great activity for my students. There are many different ways to plant the seeds and watch them grow. Check out this post to see some examples. 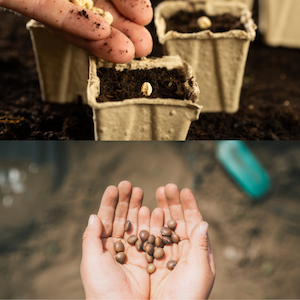 Taking the seedlings and planting them outside in the late spring is an event worth celebrating. If you have garden plots at the school, it is a fun way to keep monitoring and tending to them as they grow. Kids get so excited when the first fruits appear. I still have kids reminding me of the beans and tomatoes they grew when they were in my class. 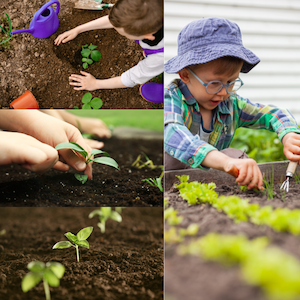 Beans, radishes, lettuce, and other plants tend to grow fairly quickly. Other plants take longer and will require more patience as kids wait to harvest them. This is a great time to talk about how not everything progresses at the same rate. If you are looking at planting other types of fruit or vegetables, check out my plant life cycles bundle. It includes apples, carrots, pumpkins, potatoes, and beans. 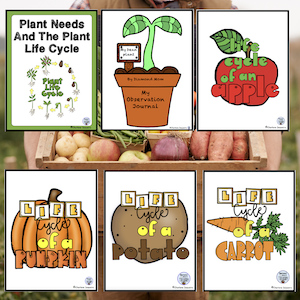 Watching baby chicks hatch, releasing salmon fry, observing the metamorphosis of butterflies from caterpillar to butterfly, or the transformation of a tadpole to a frog are awe inspiring sights for kids and they get so excited during these events. 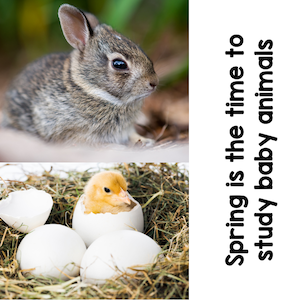 Choosing an animal to observe from it's start through to adulthood is a great hands on unit that helps kids understand how life cycles work. Check out my animal life cycles bundle for resources that may help if you are interested in studying about chickens, frogs, salmon, honey bees, or butterflies. 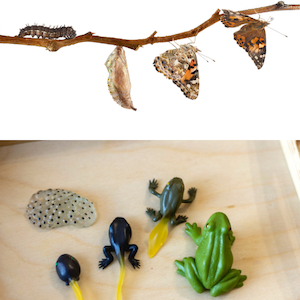 Check out this life cycle template freebie that helps with identifying the different stages of growth for plants or animals. 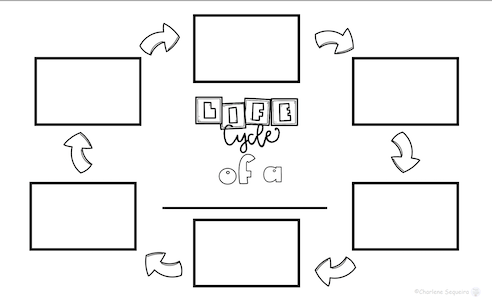 Deciding on what plant life cycles or animal life cycles you will study will depend on the interests of your students and the availability of resources and time. Whatever life cycles you choose to investigate, enjoy the moments and the excitement and wonder as your students learn. 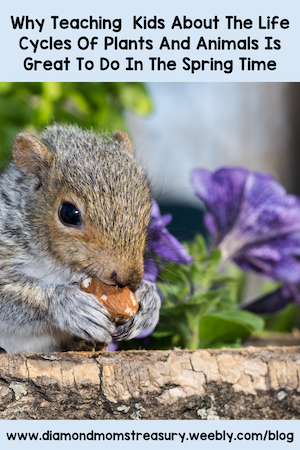 Related Posts
|
About Me Charlene Sequeira
I am a wife, mother of 4, grandmother of 9, and a retired primary and music teacher. I love working with kids and continue to volunteer at school and teach ukulele. 
Categories
All
|


 RSS Feed